Search the Community
Showing results for tags 'nssm'.
Found 4 results
-

[How-To] Emby Server on Windows Server with IIS as Reverse Proxy with Automatic Certificate Renewal
TheITJedi posted a topic in General/Windows
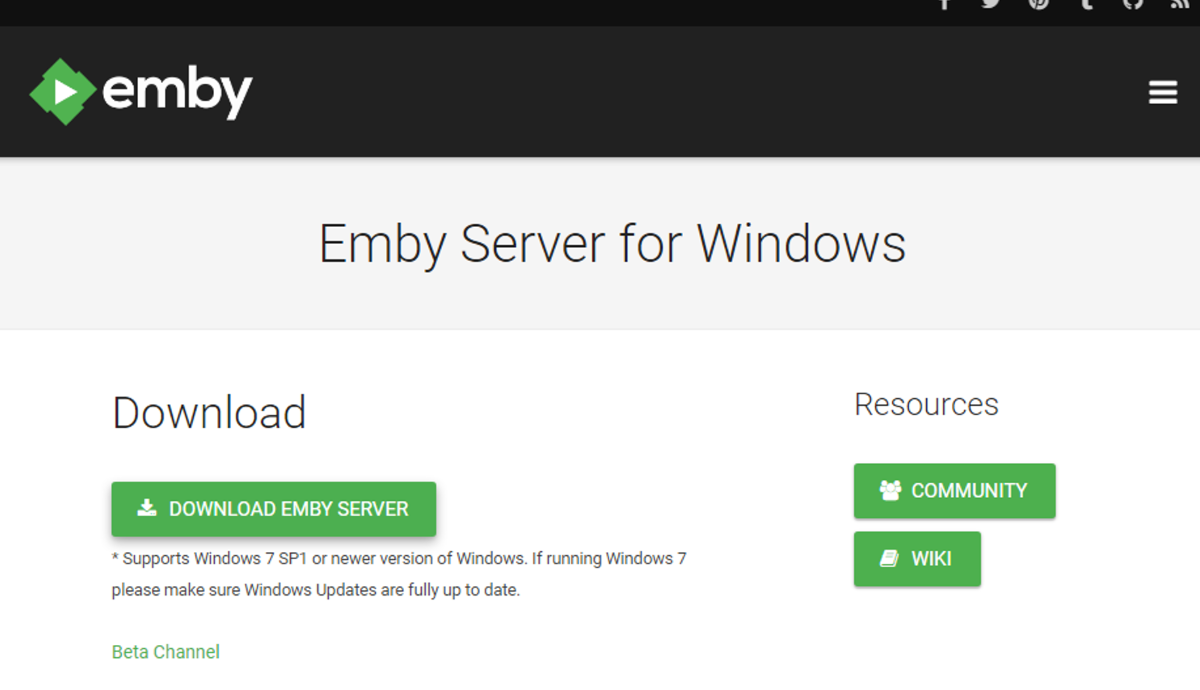
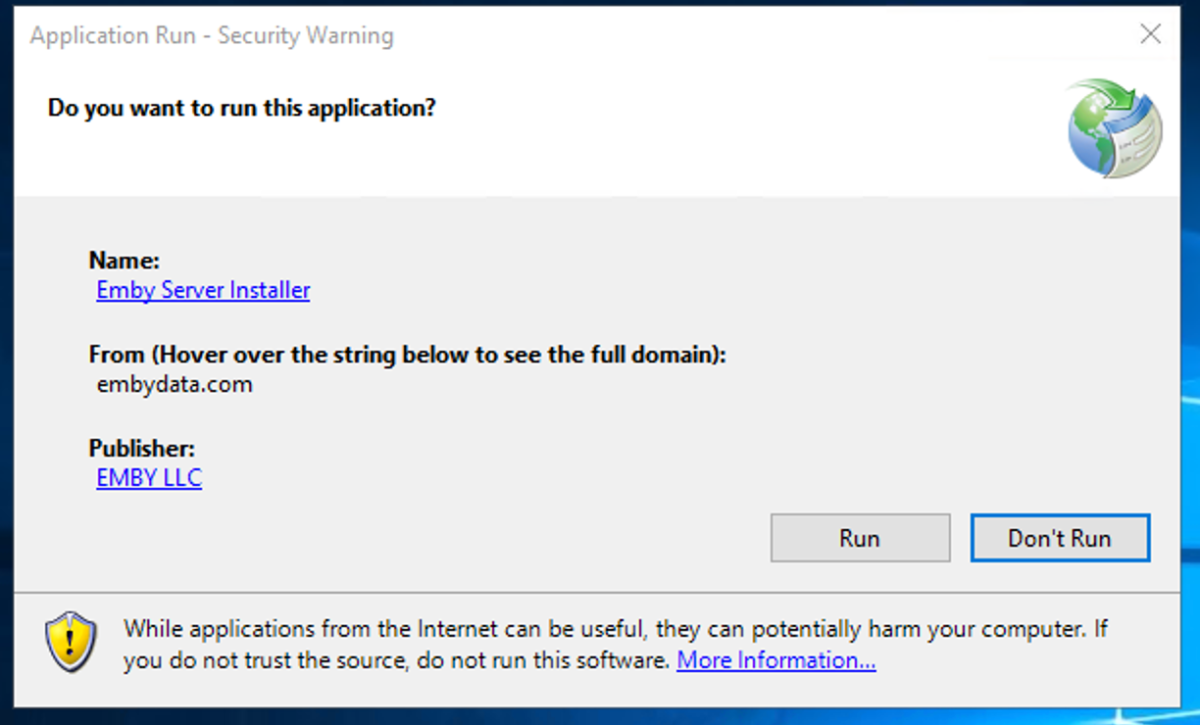
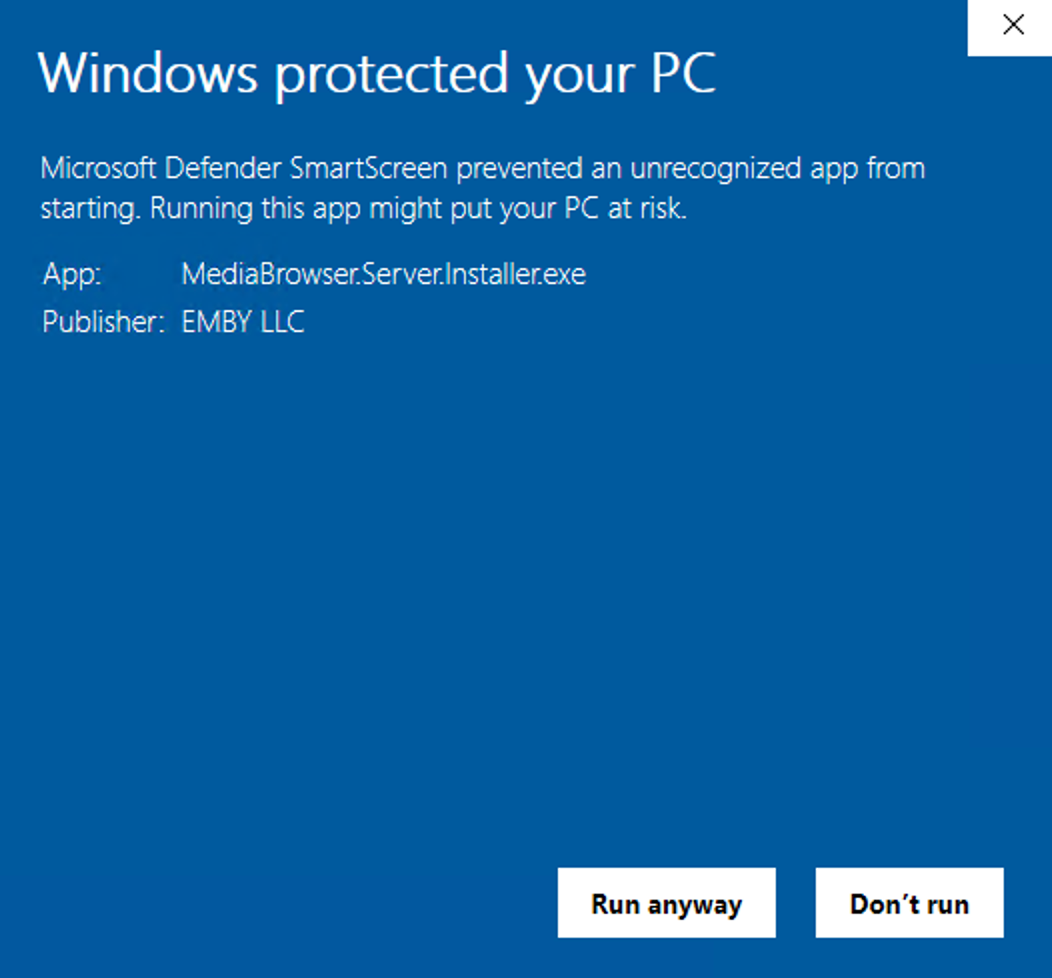
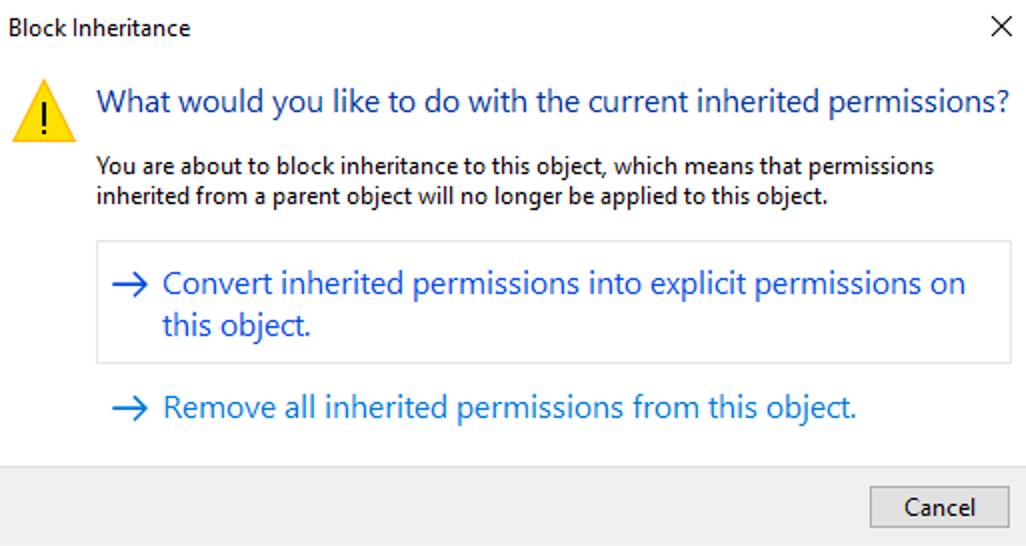
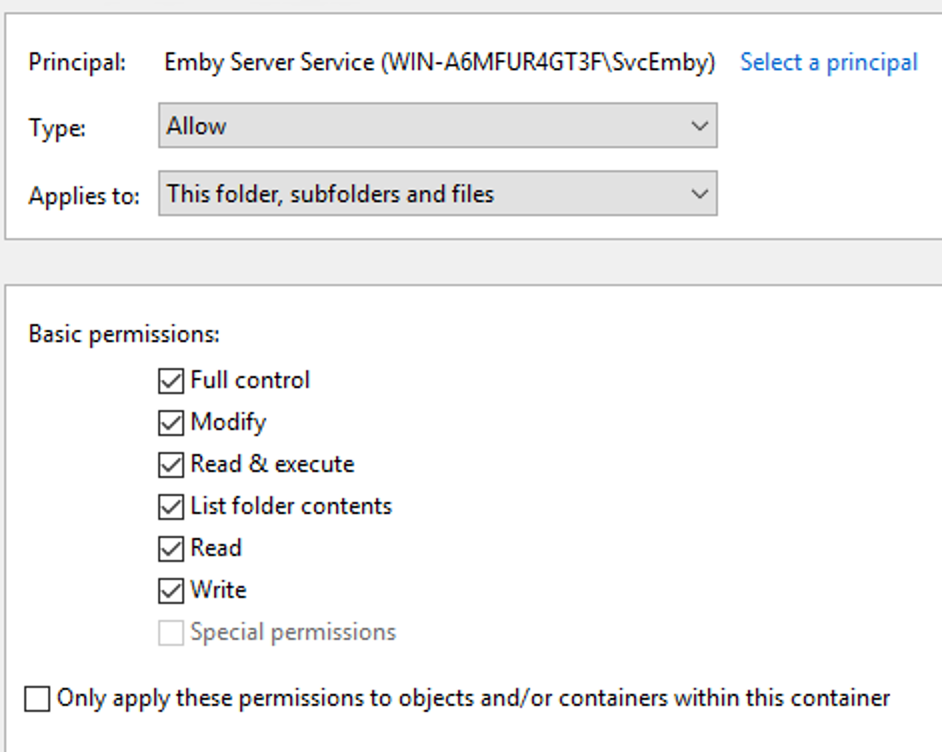
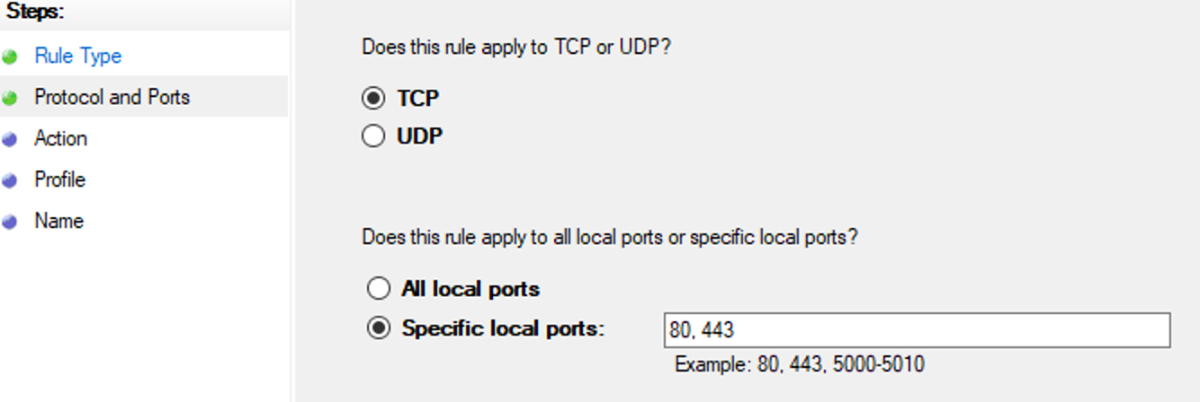
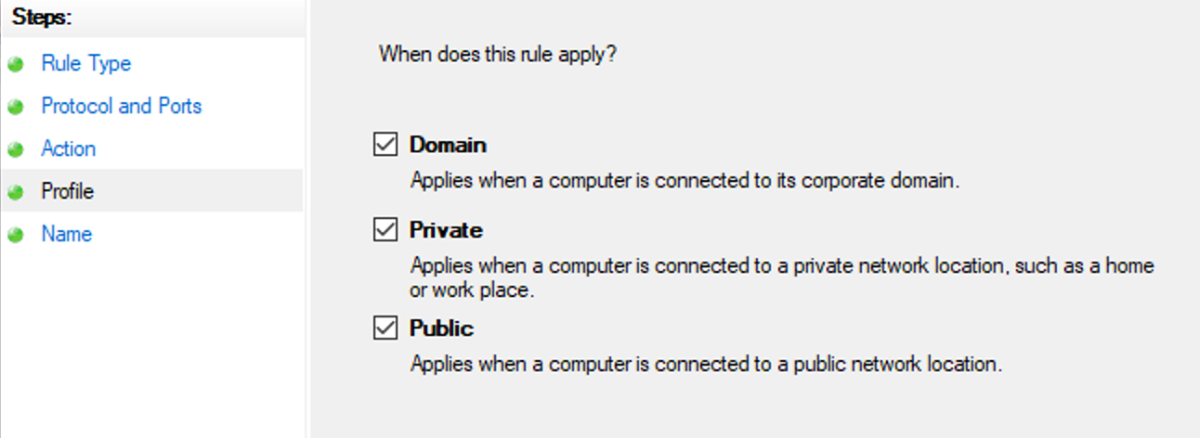
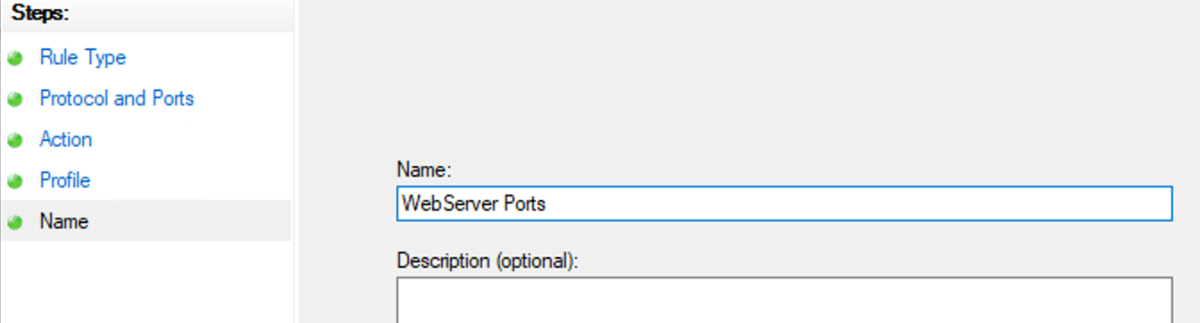
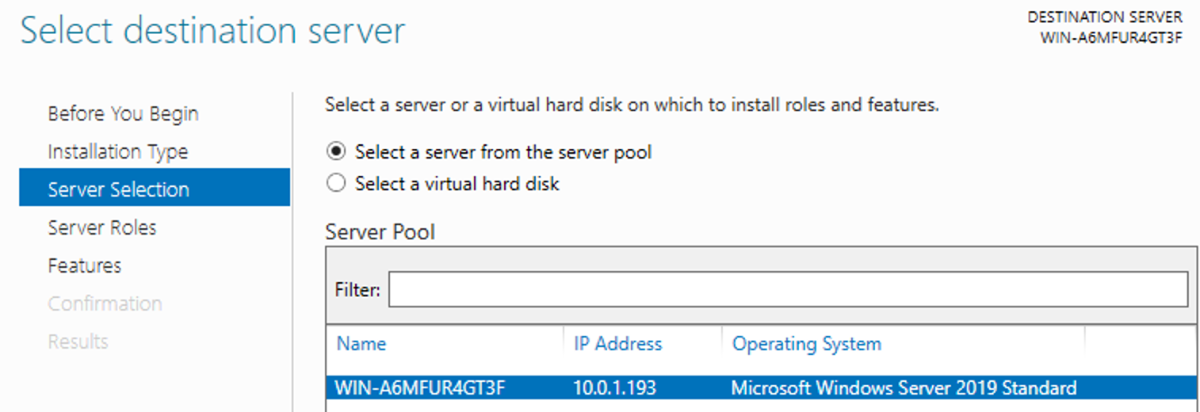
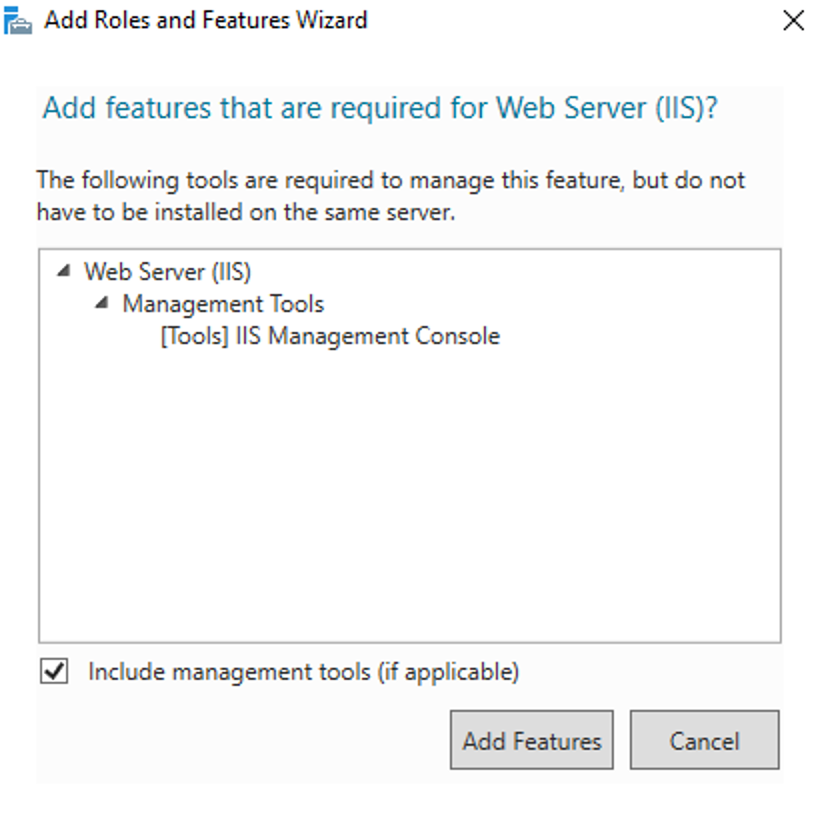
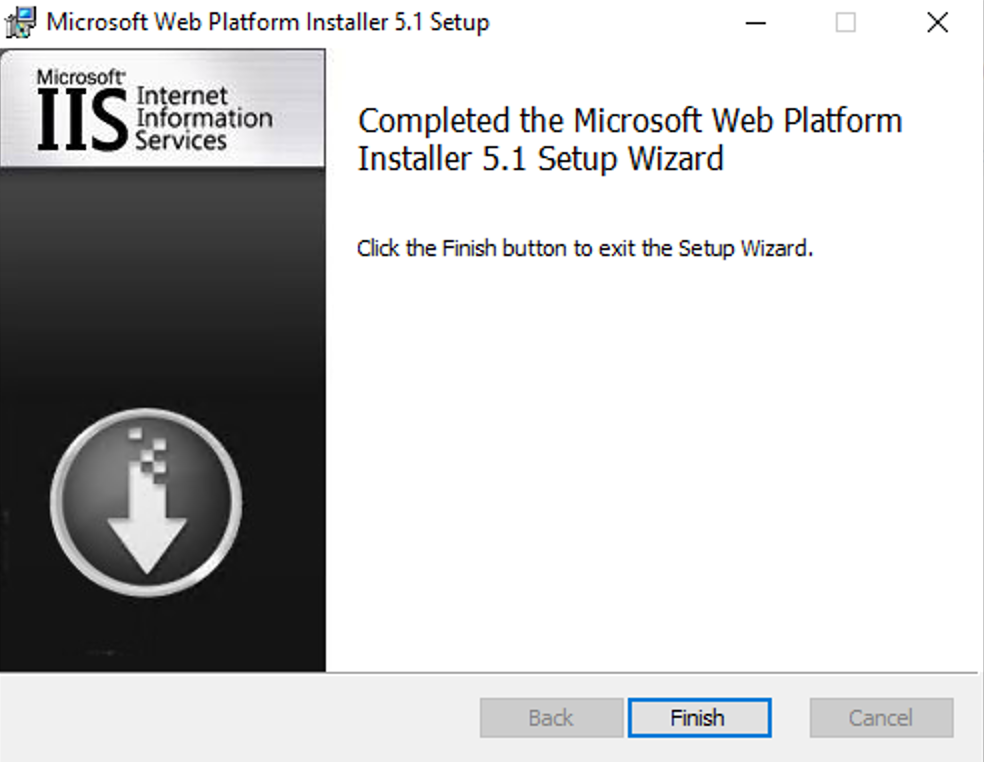
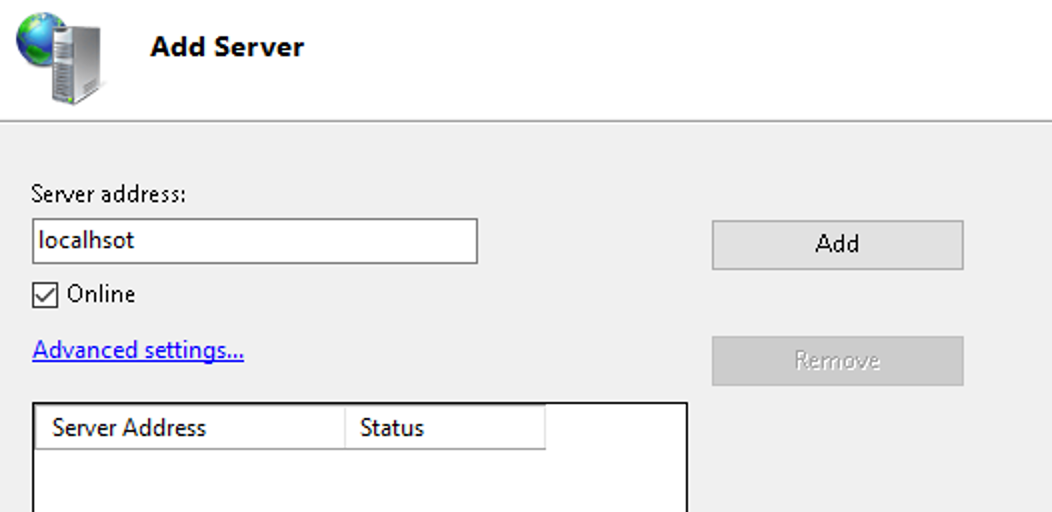
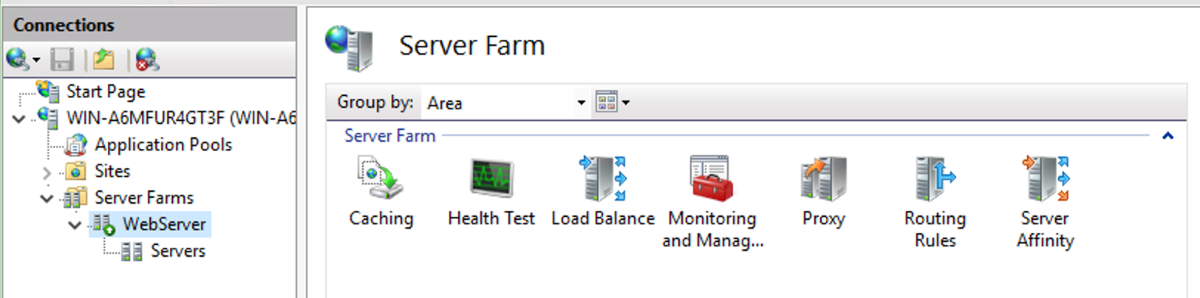
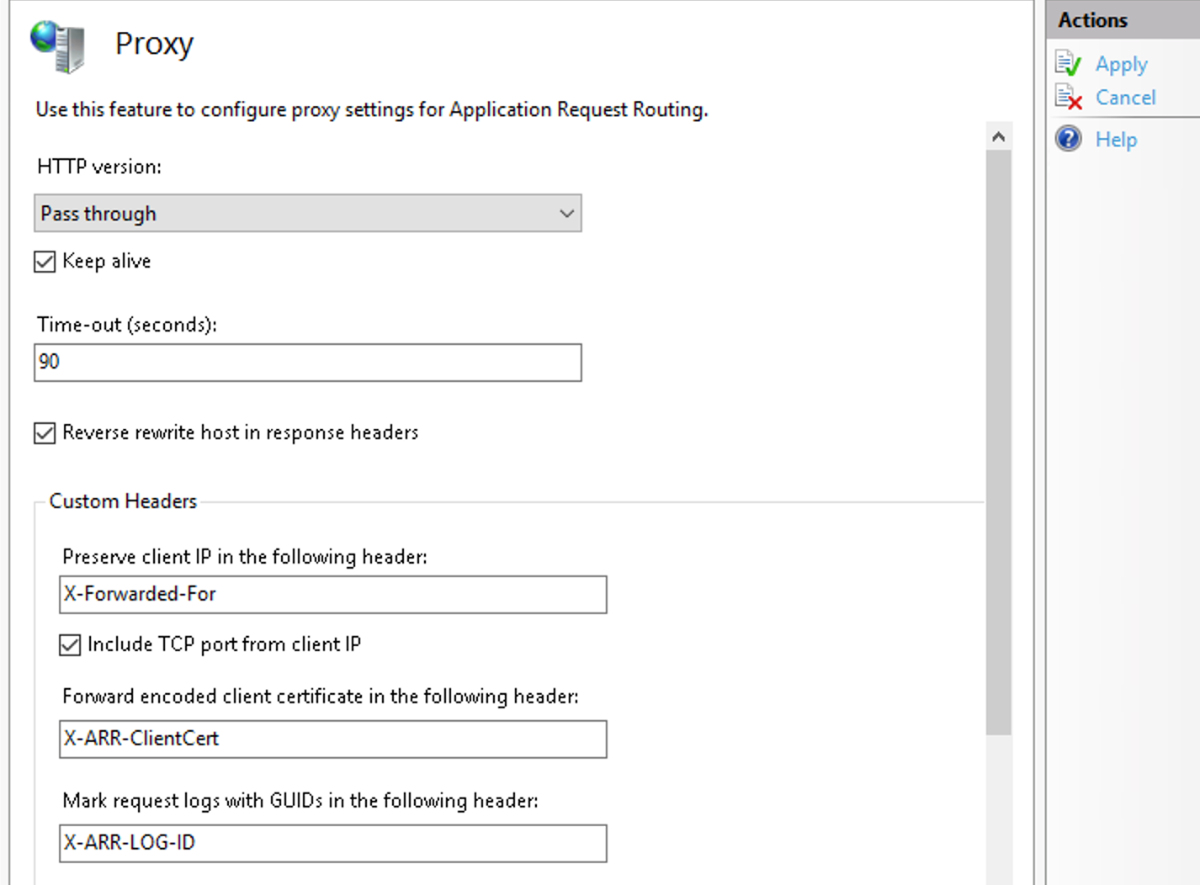
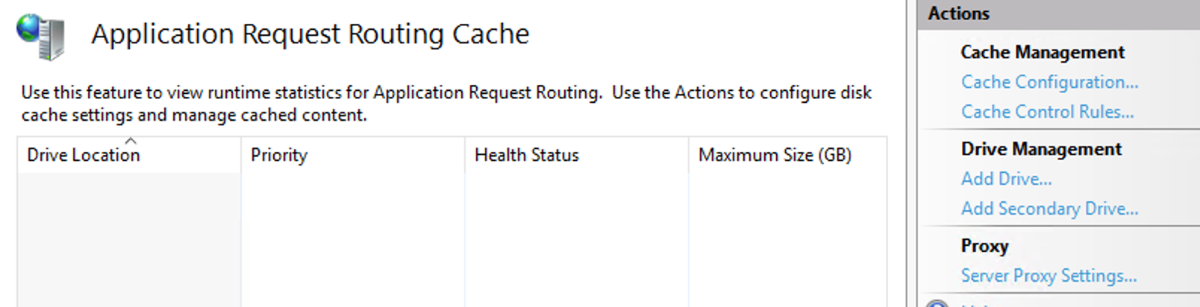
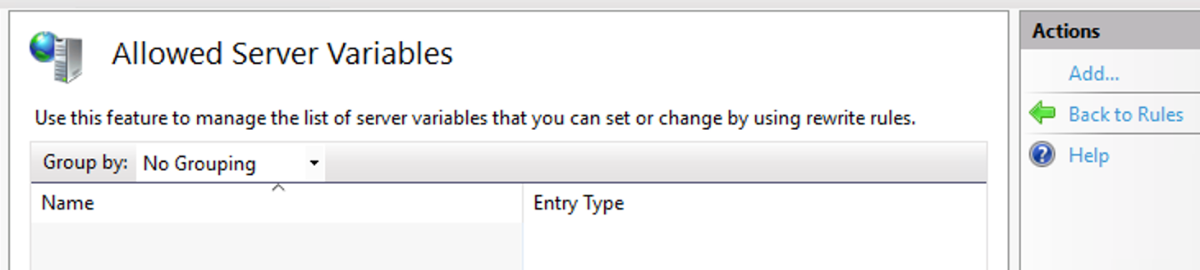
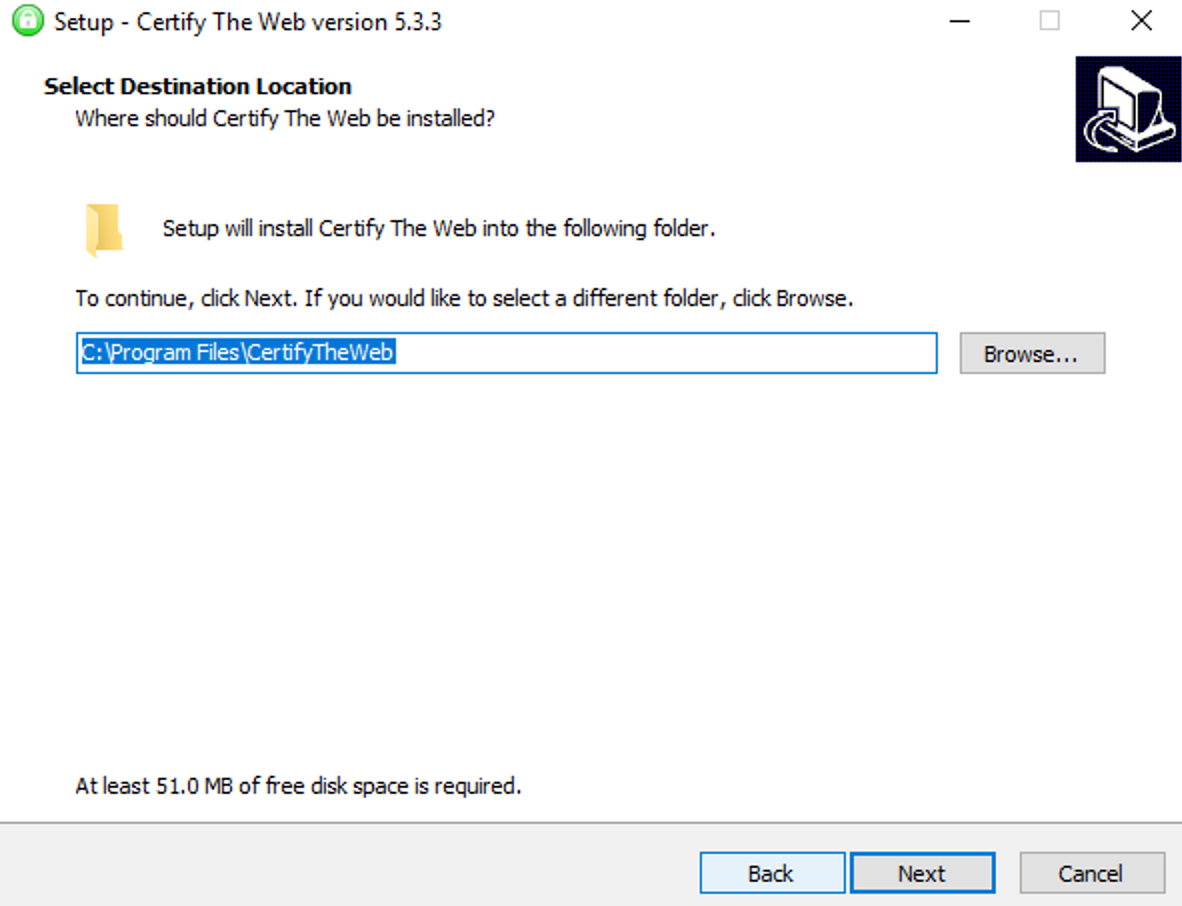
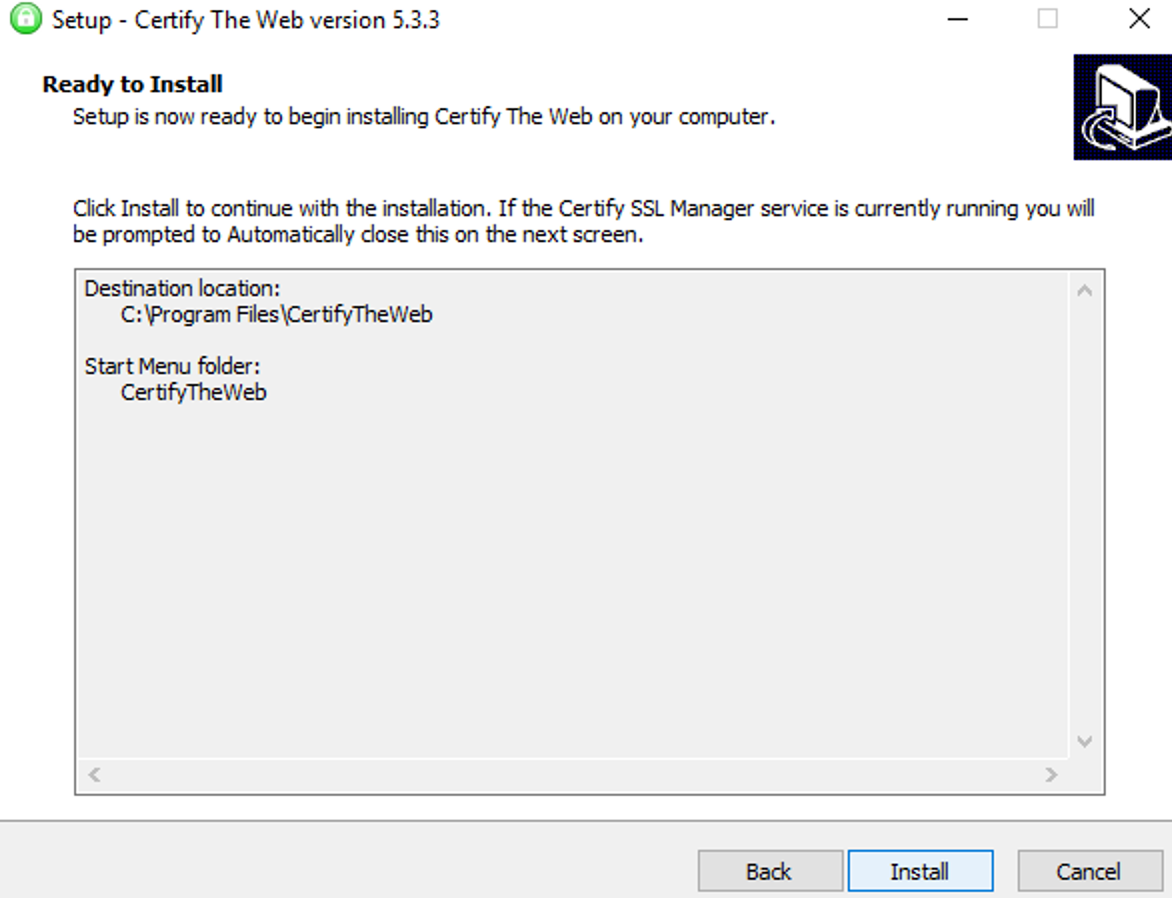
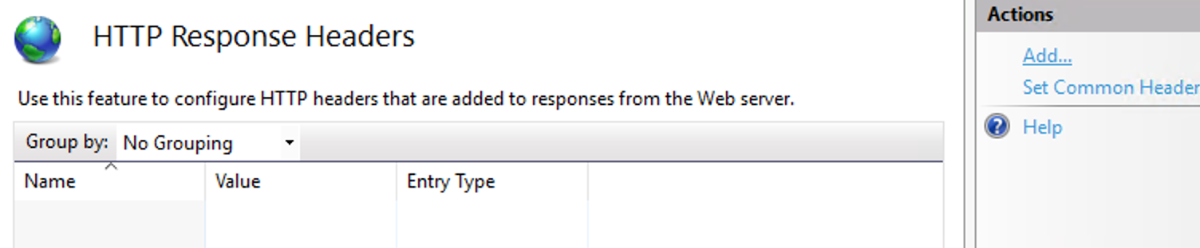
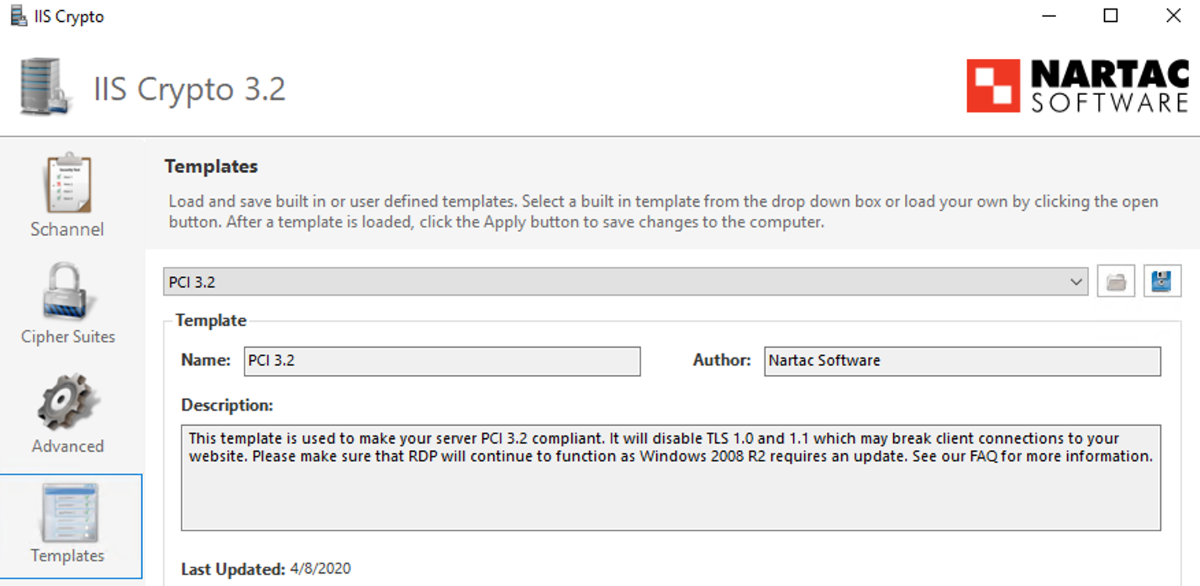
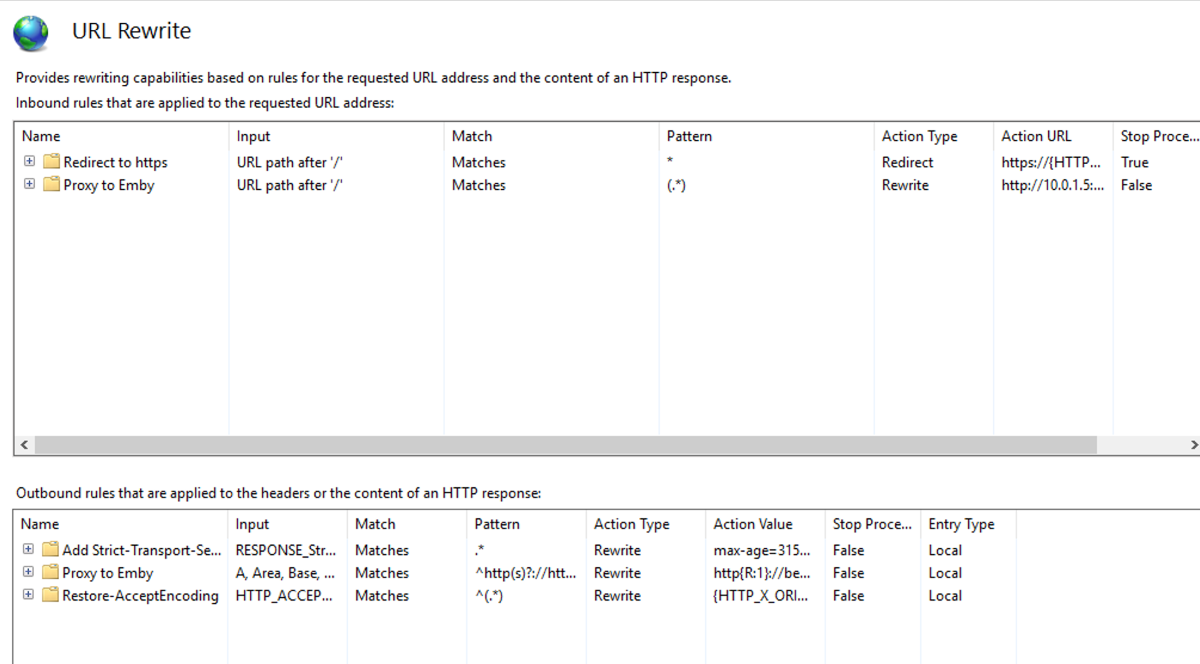
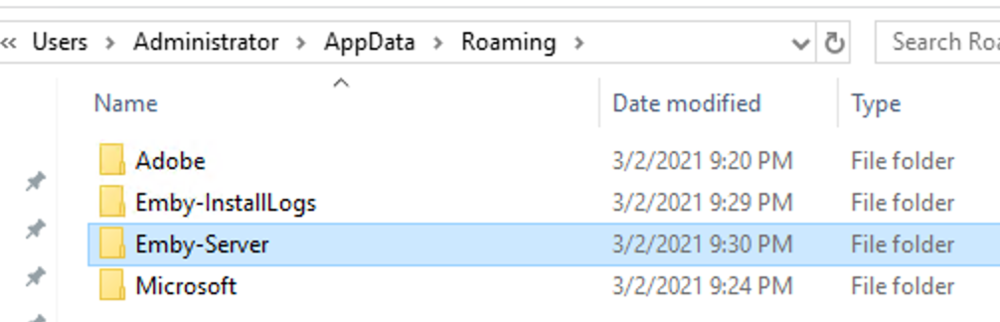
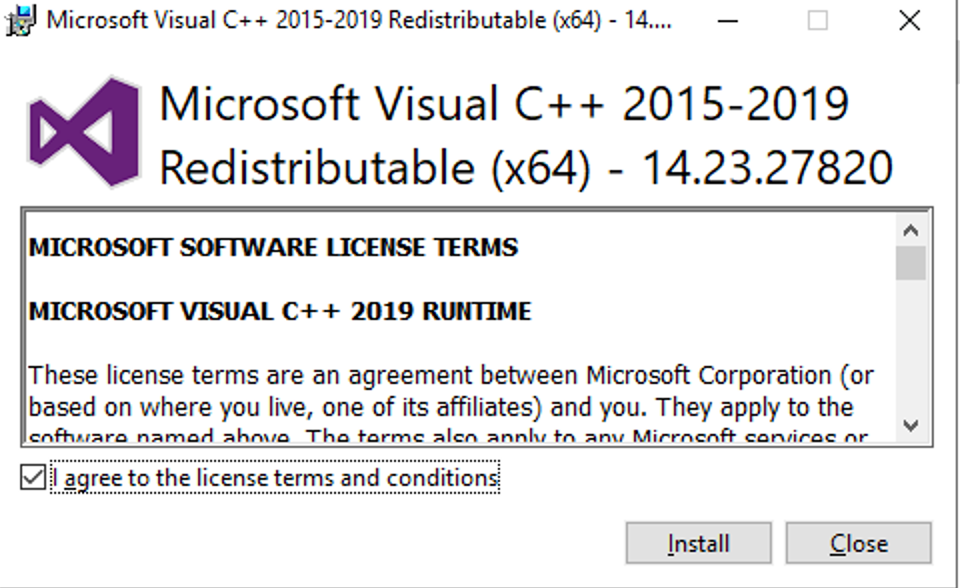
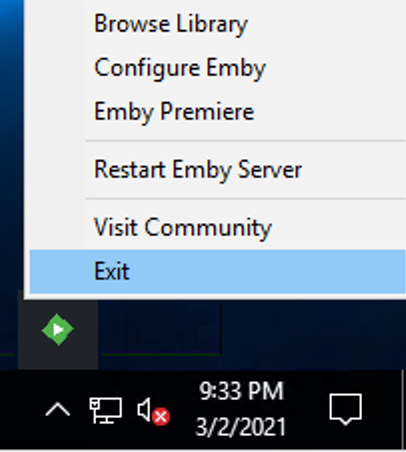
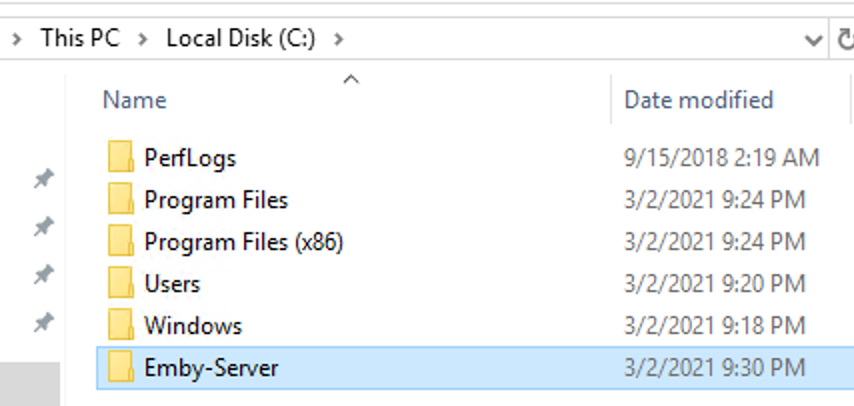
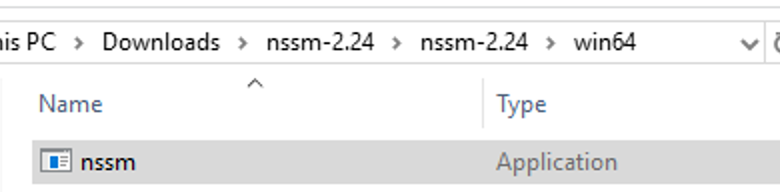
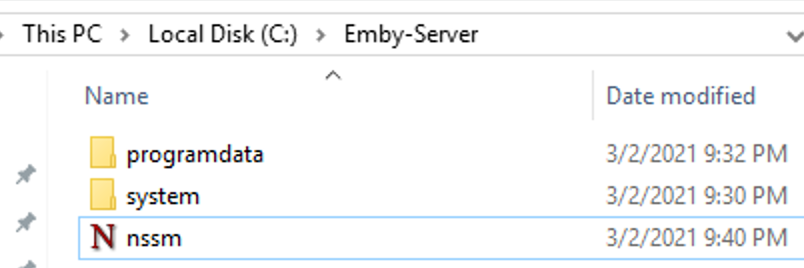
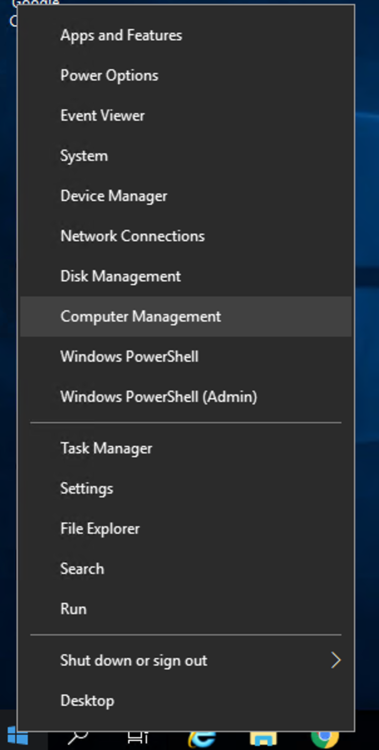
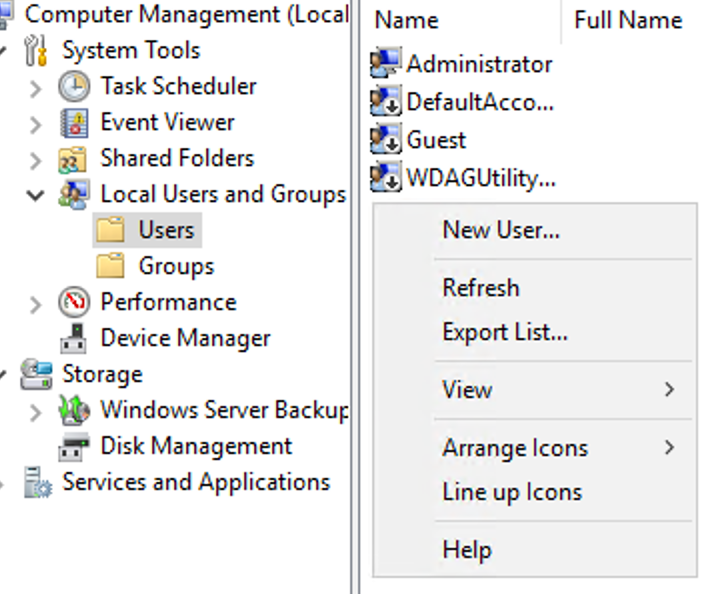
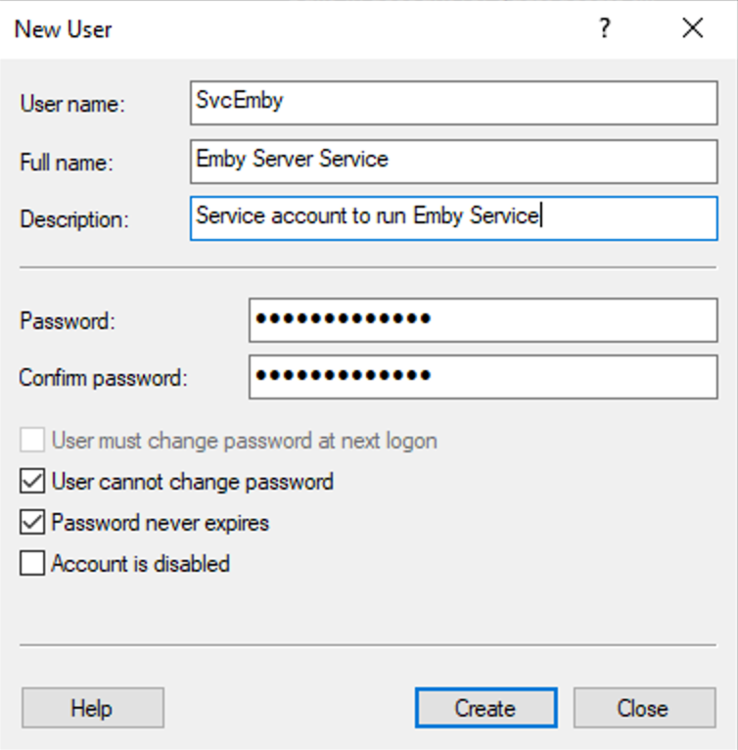
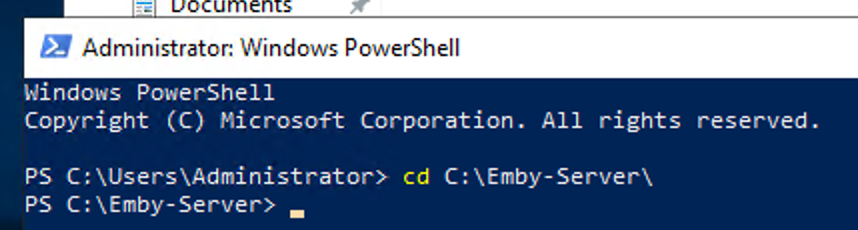
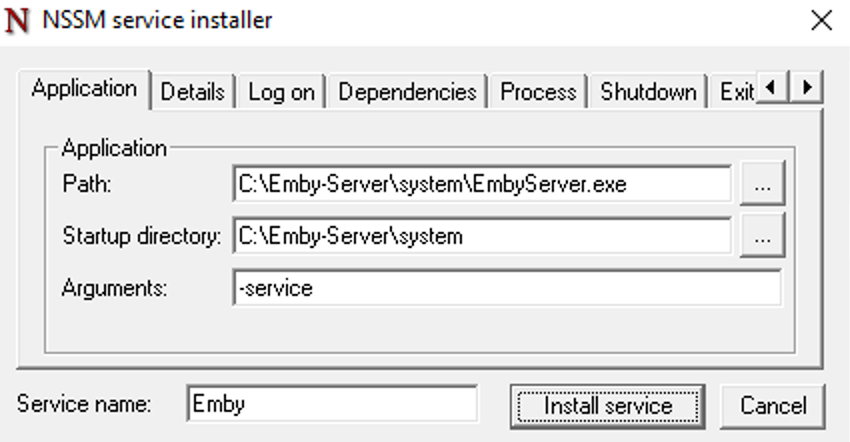
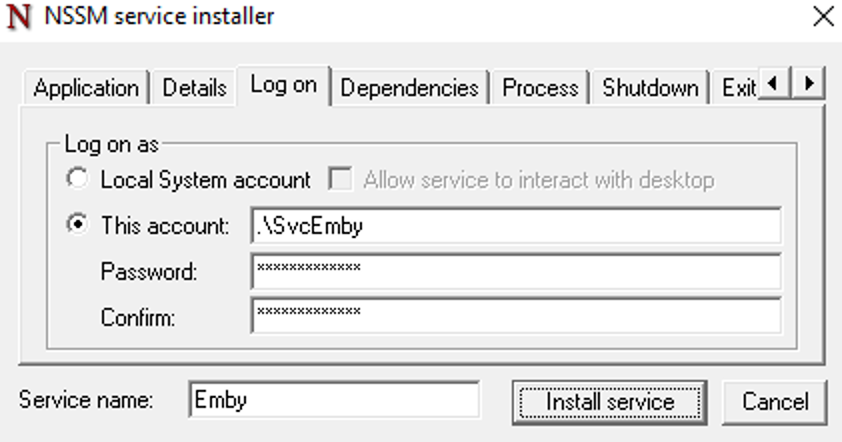
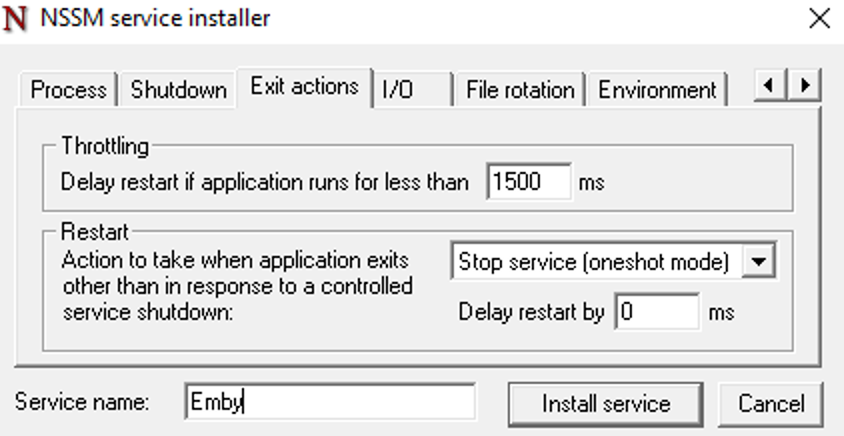
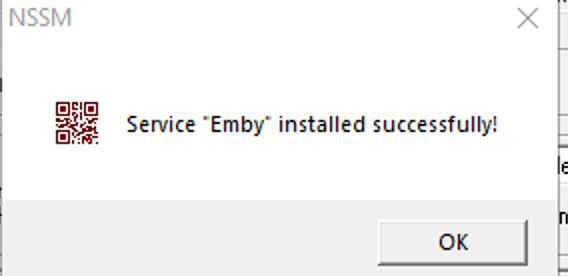
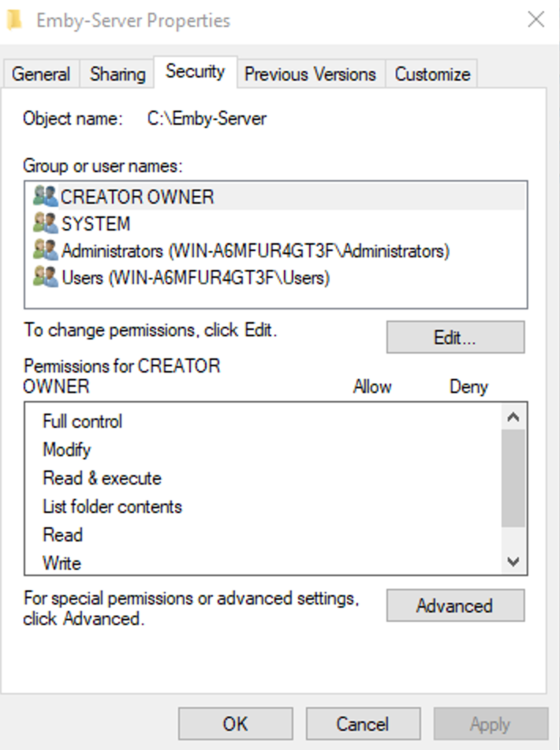
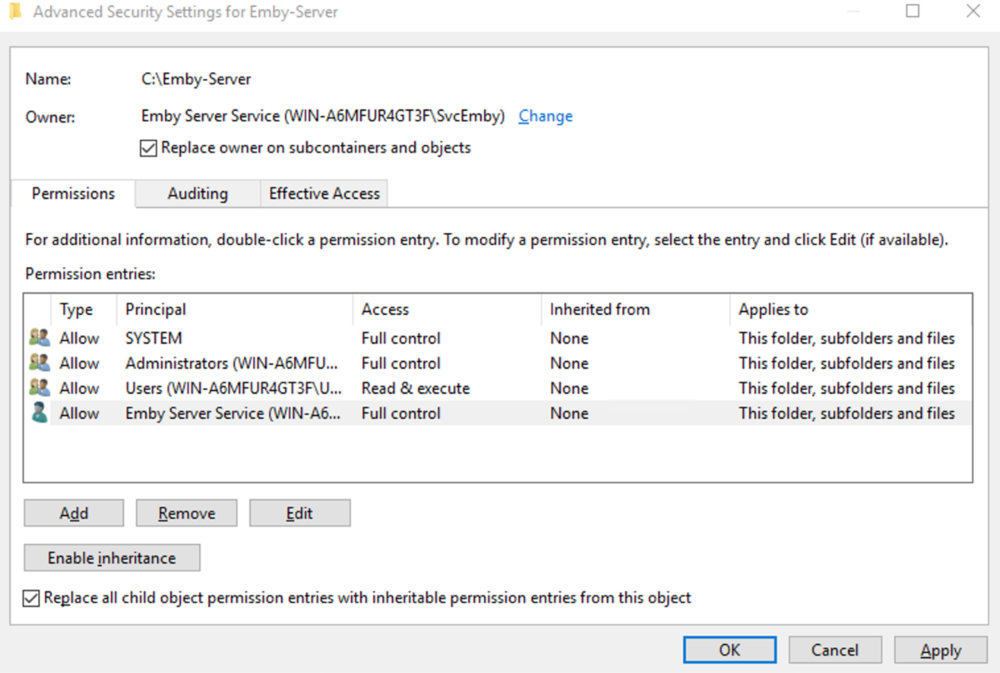
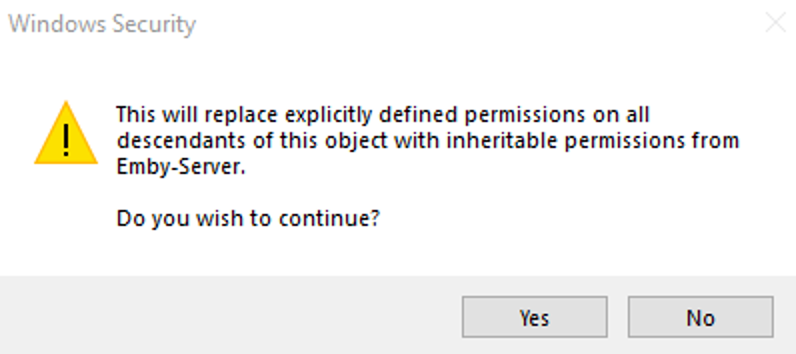
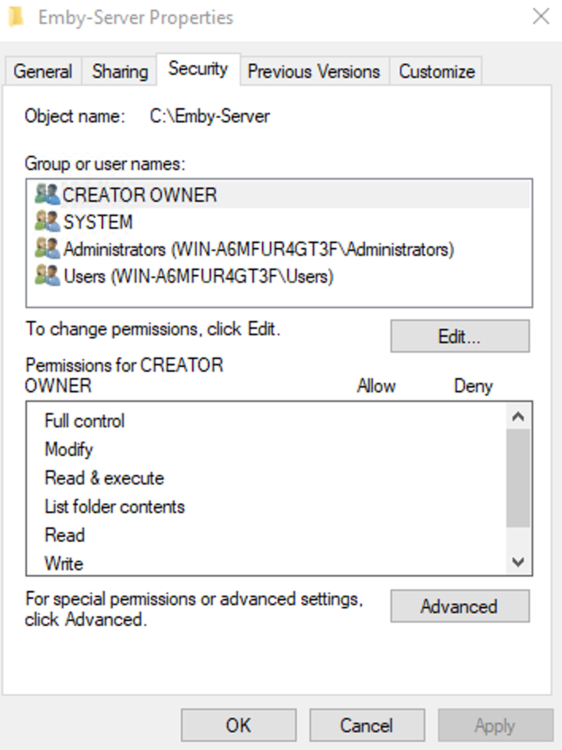
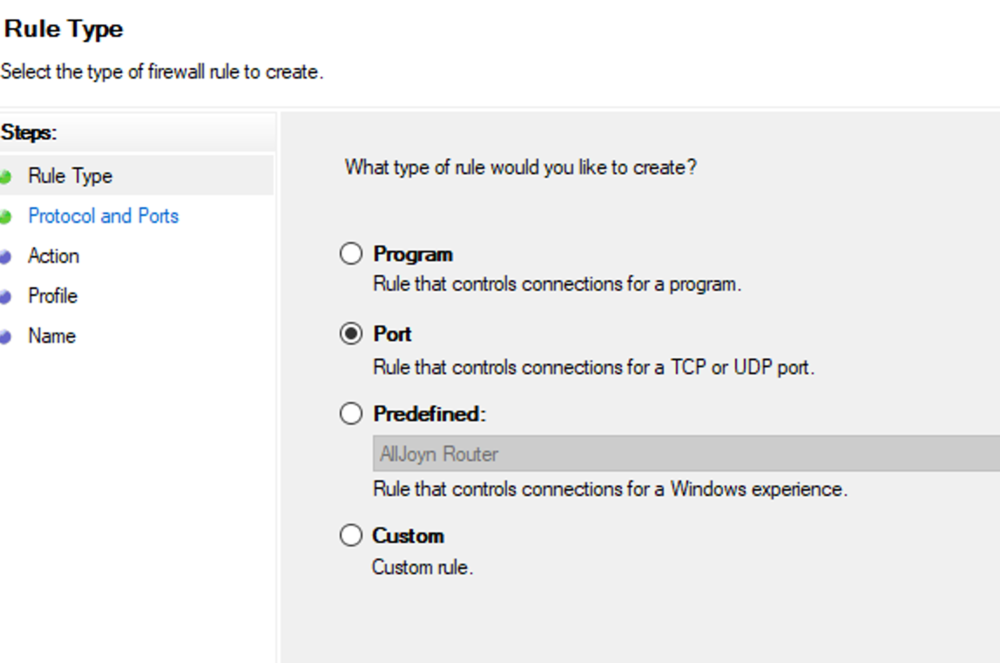
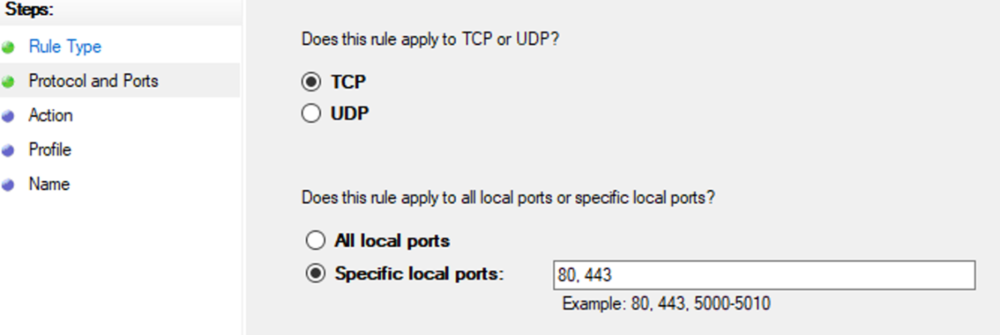
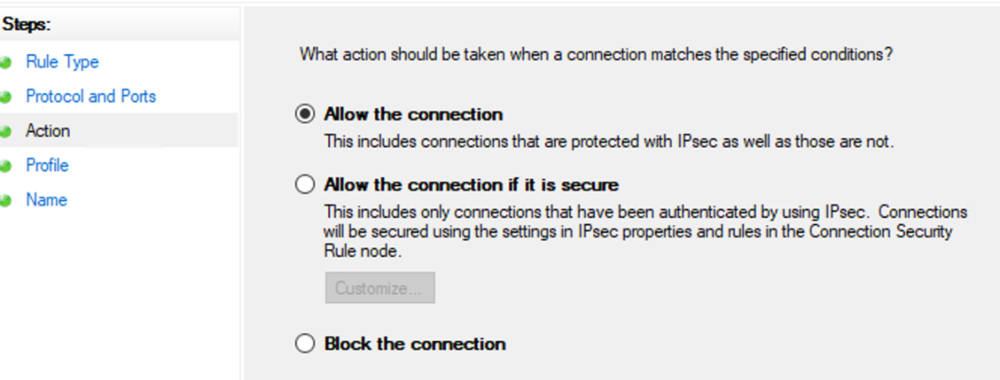
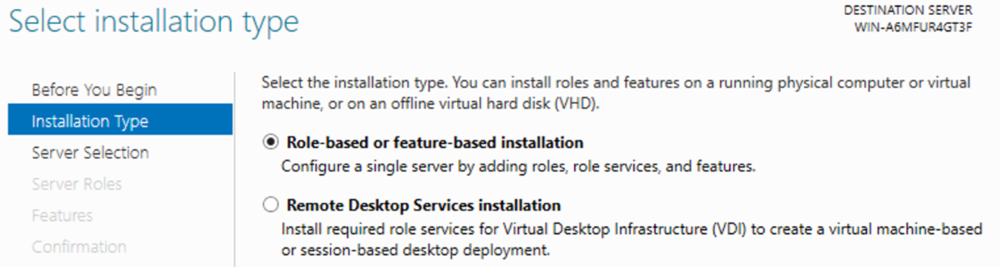
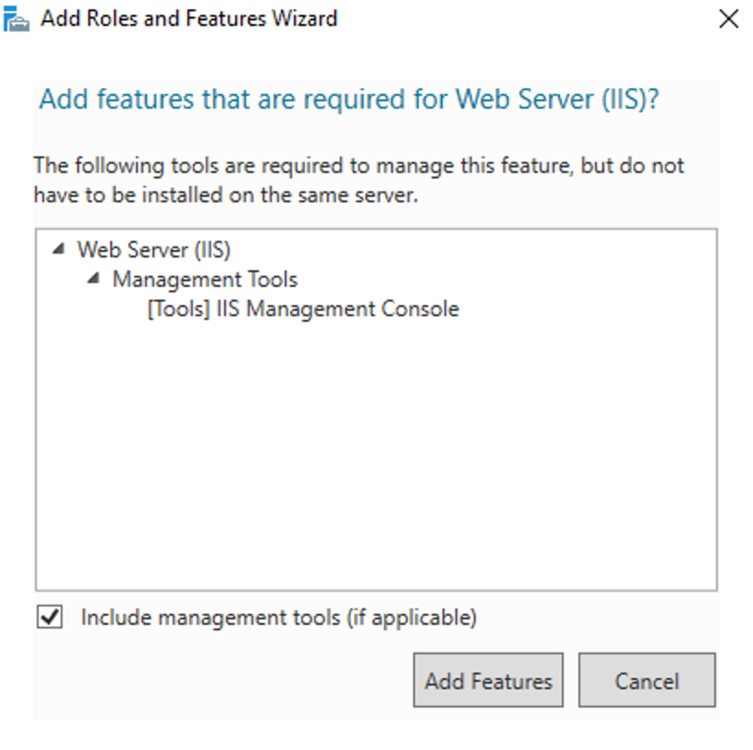
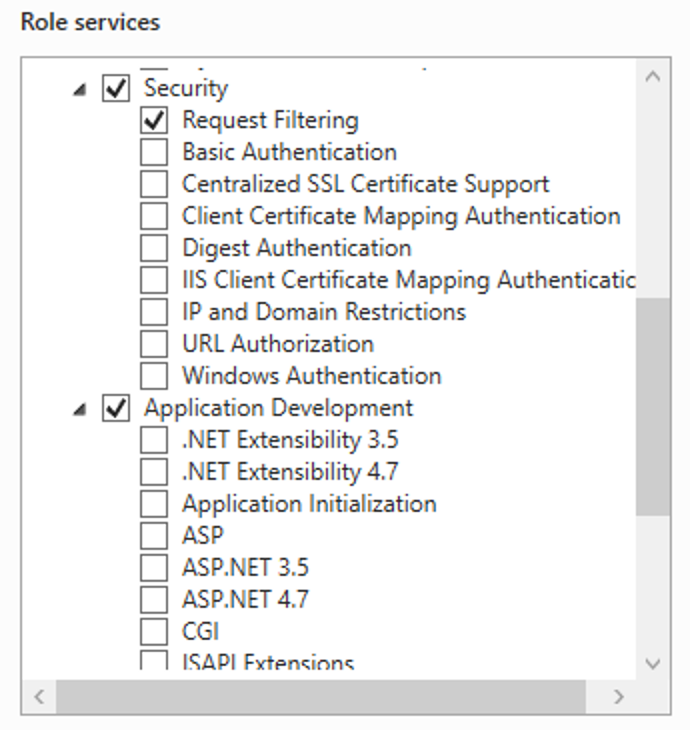
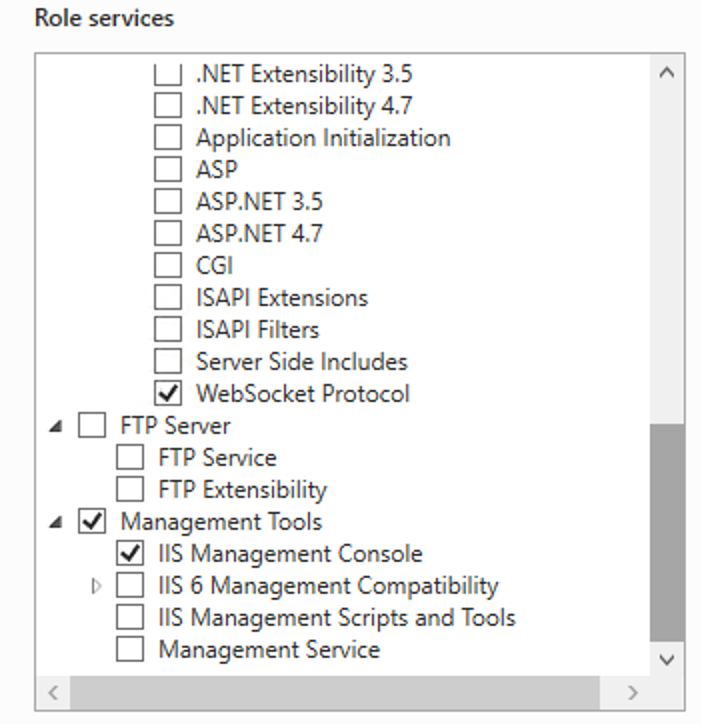
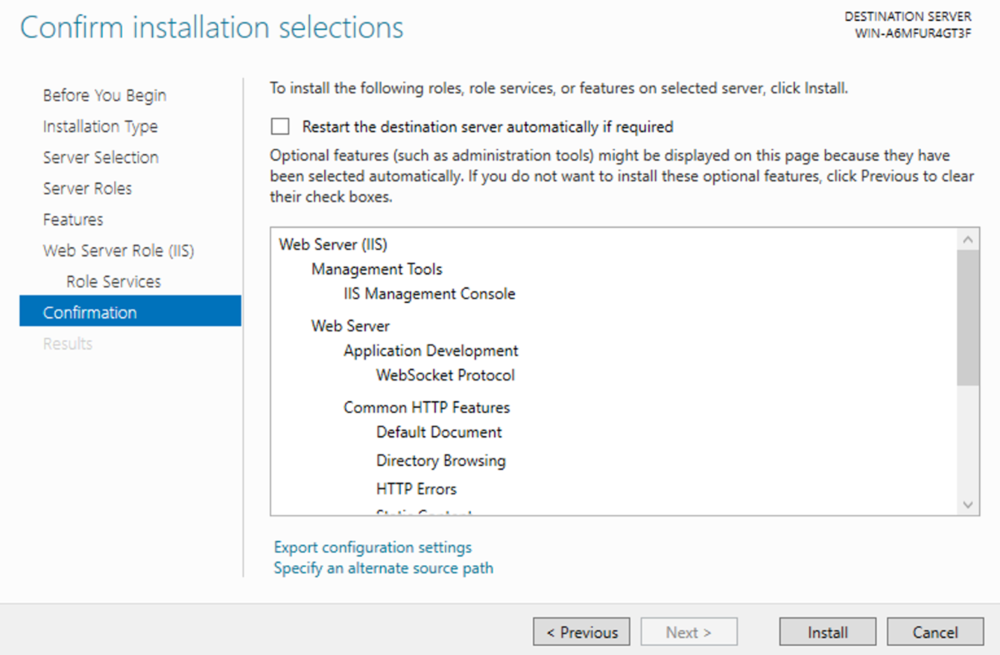
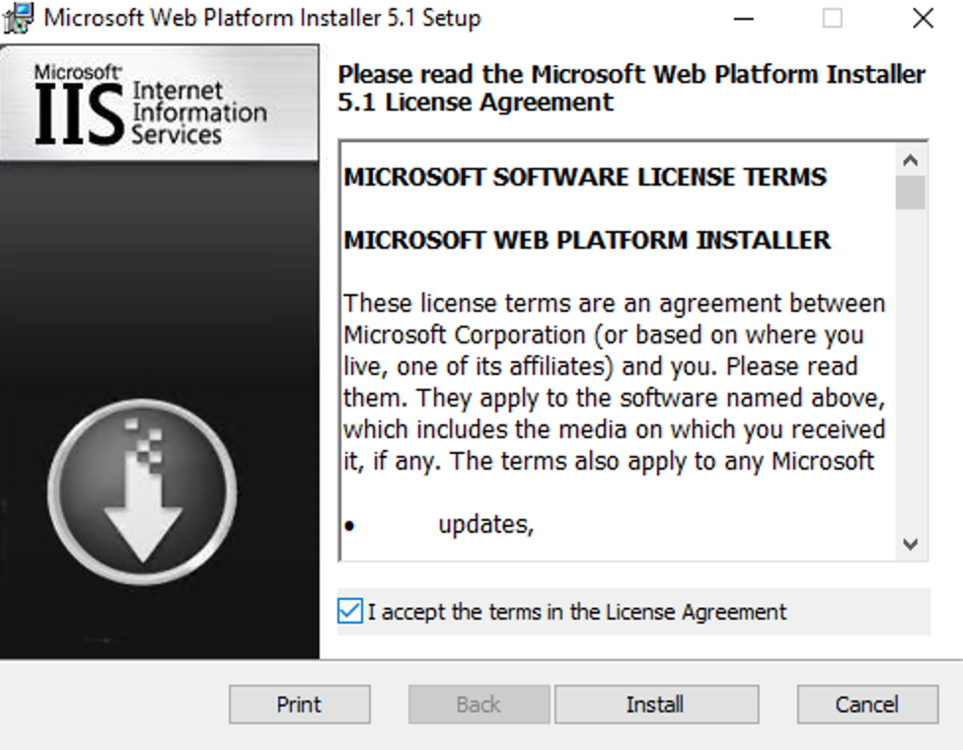
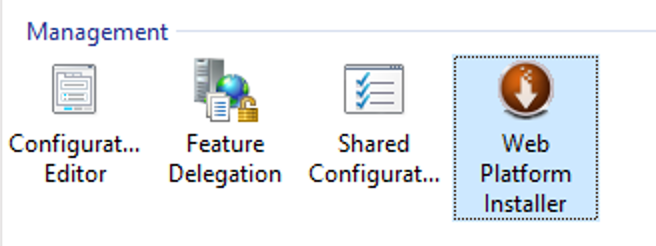
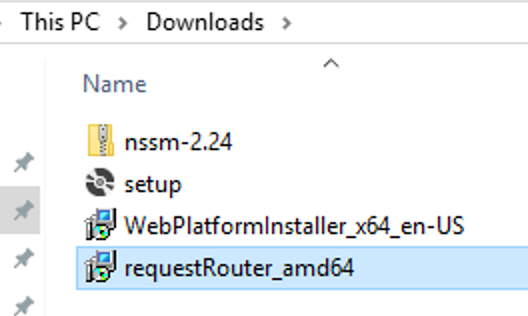
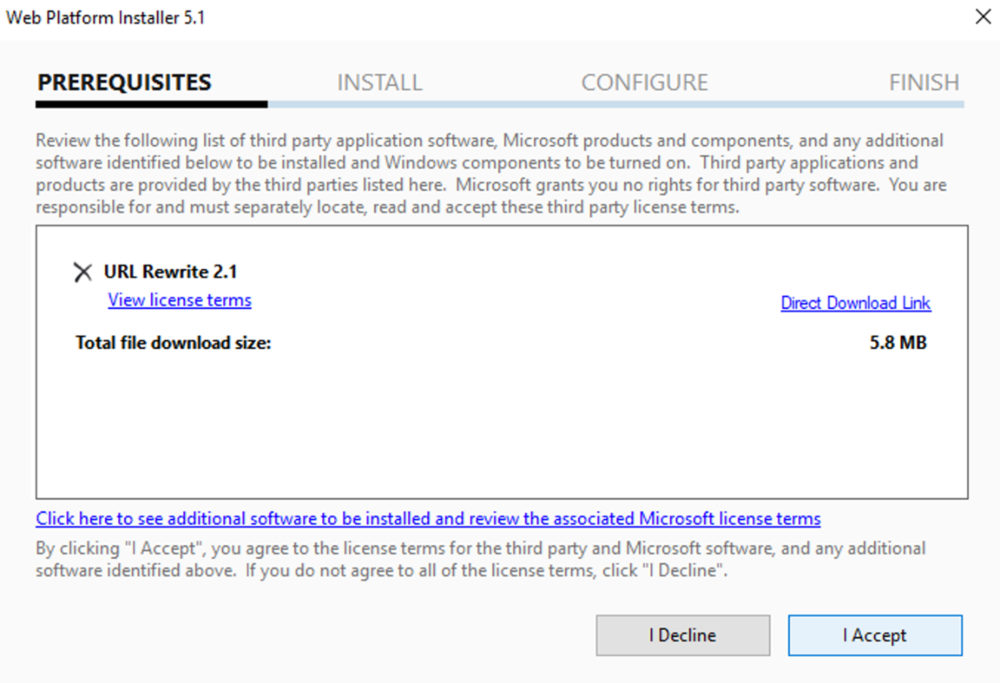
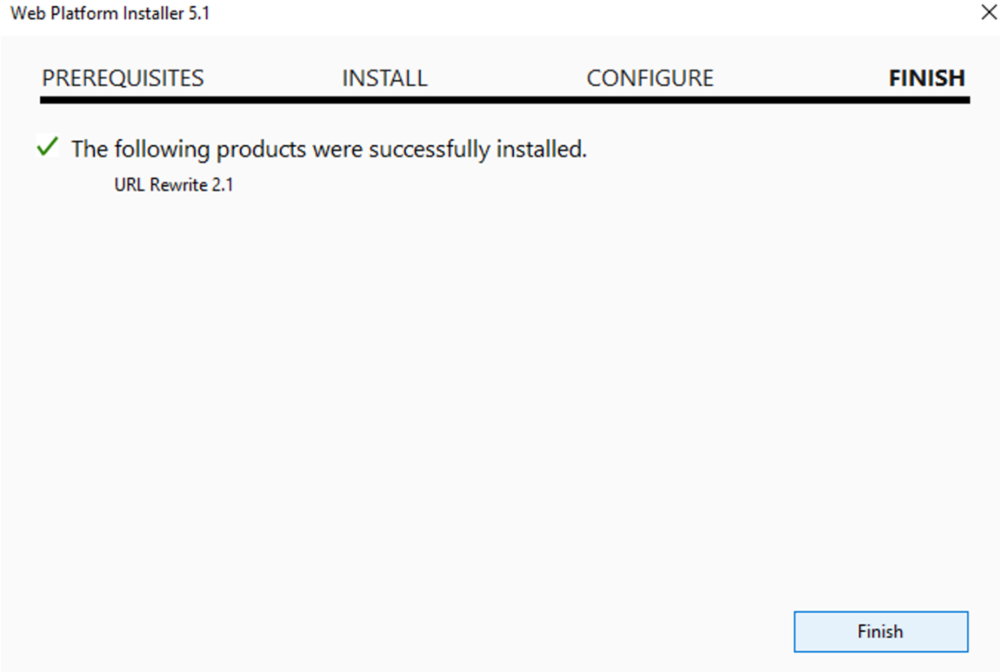
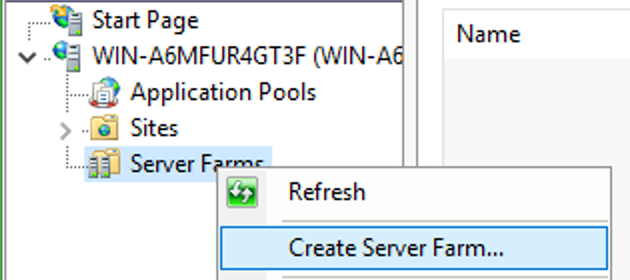
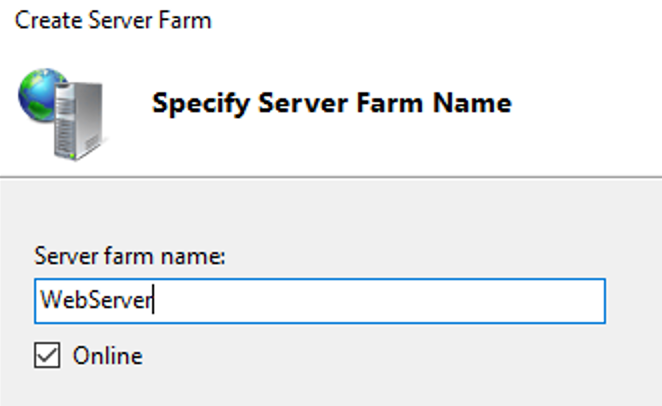
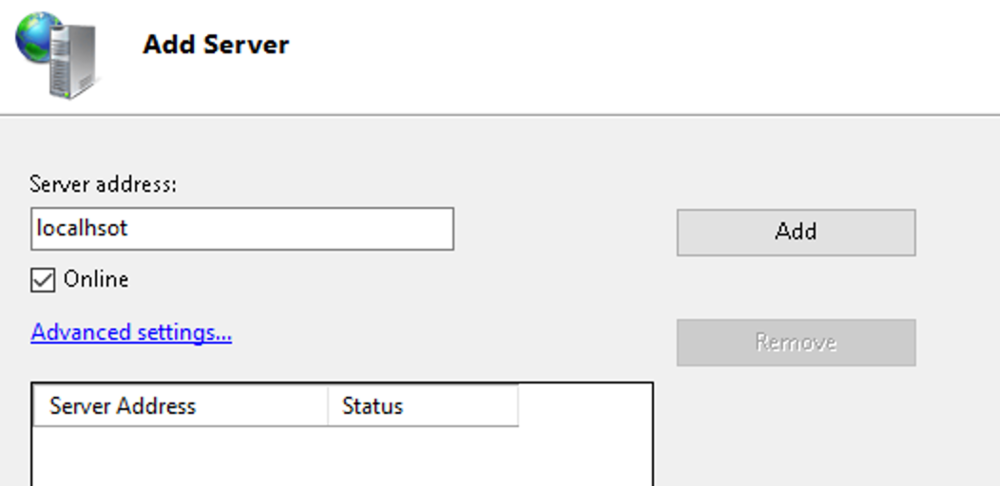
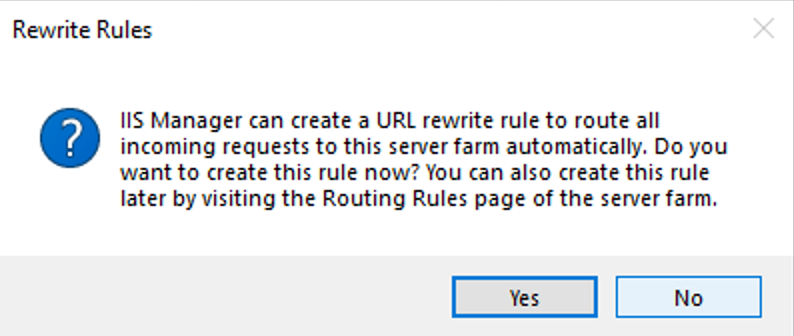
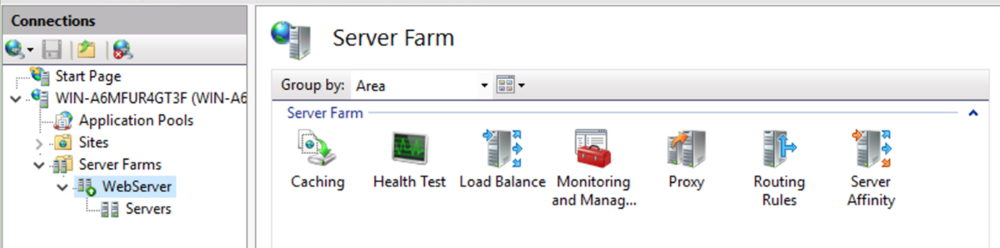
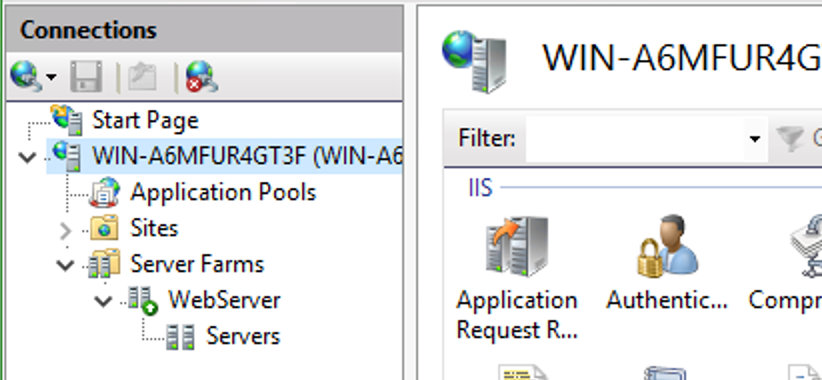
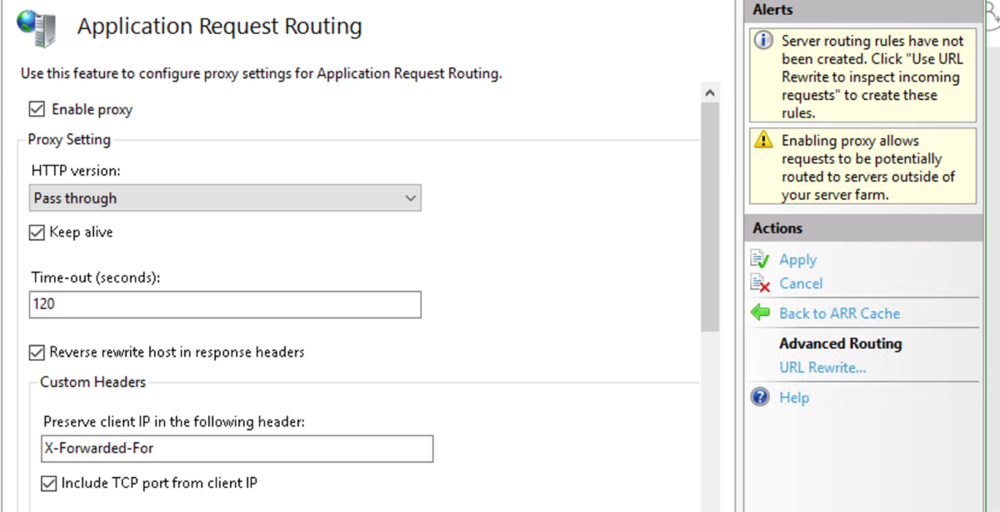
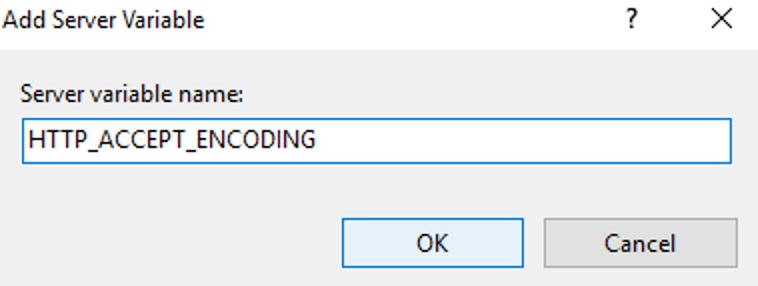
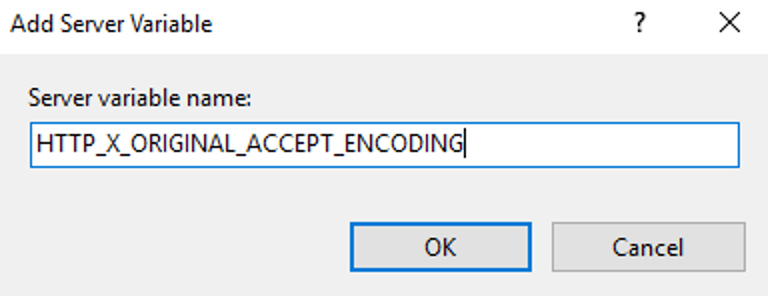
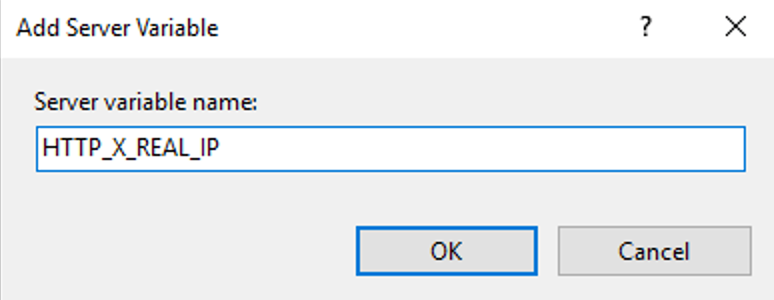
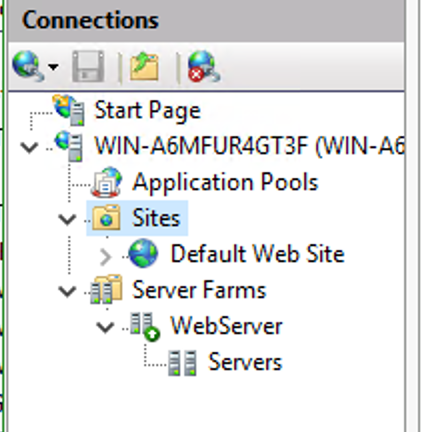
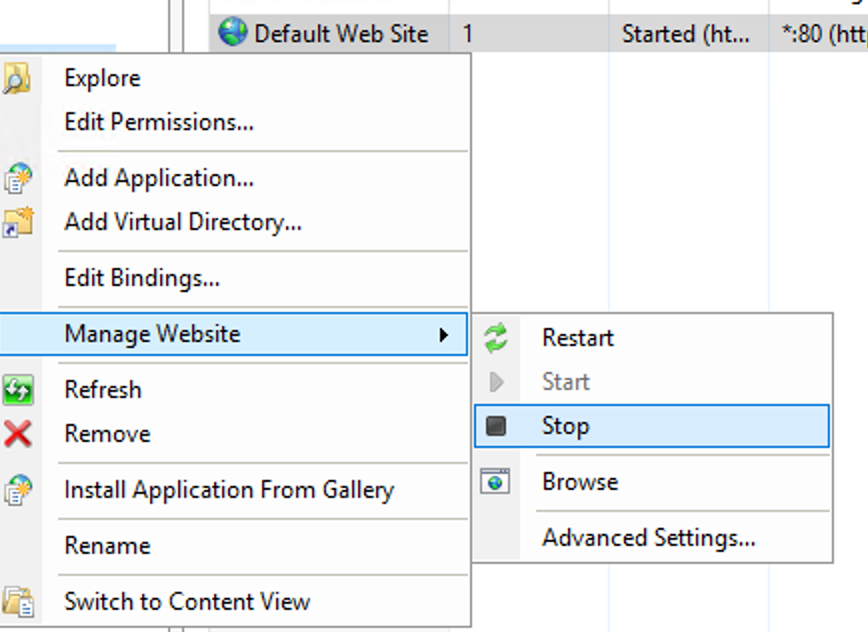
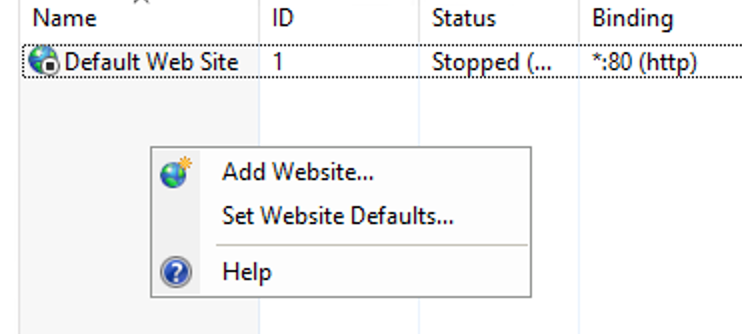
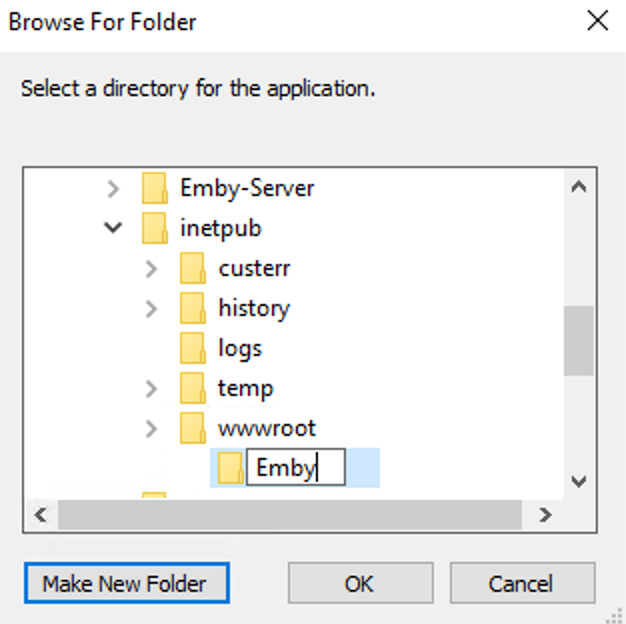
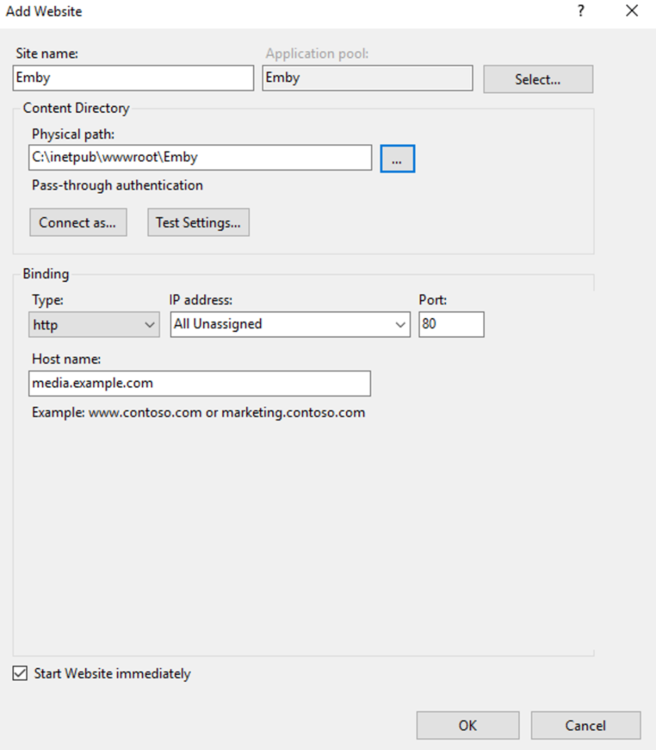
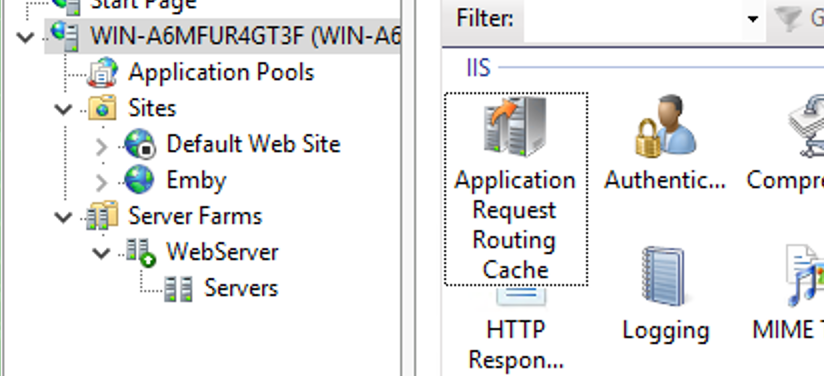
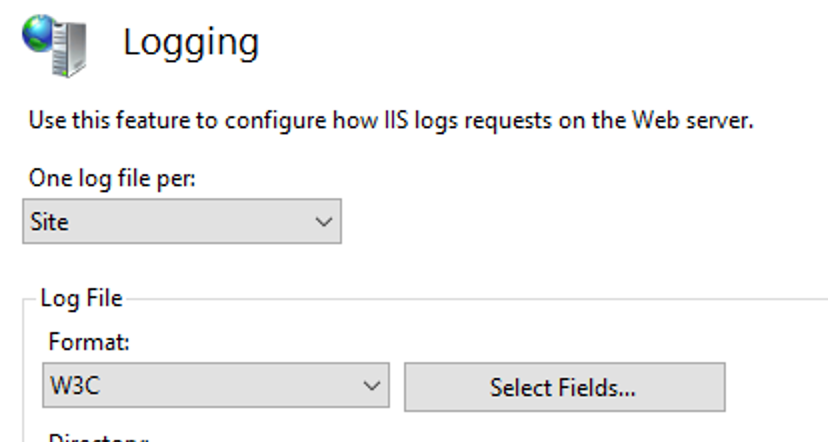
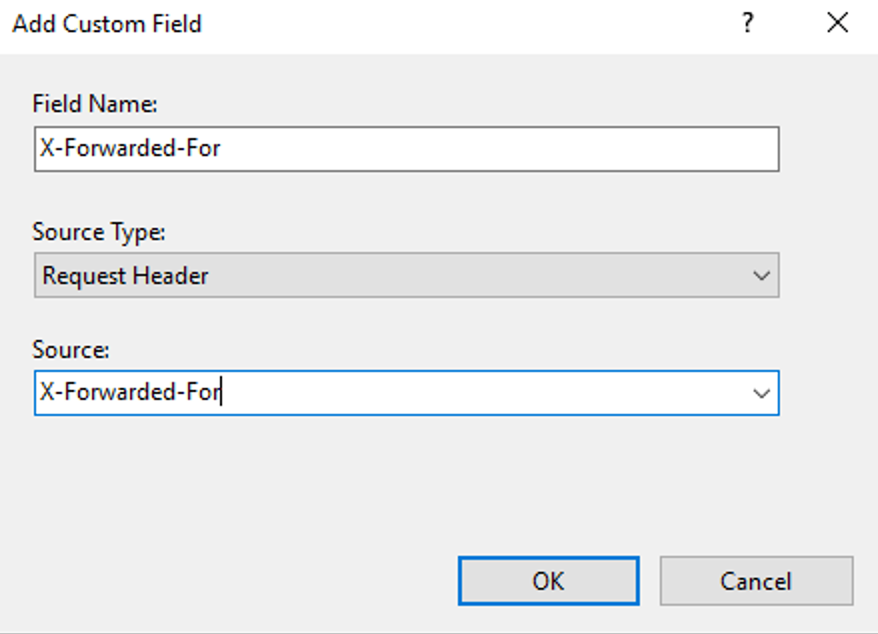
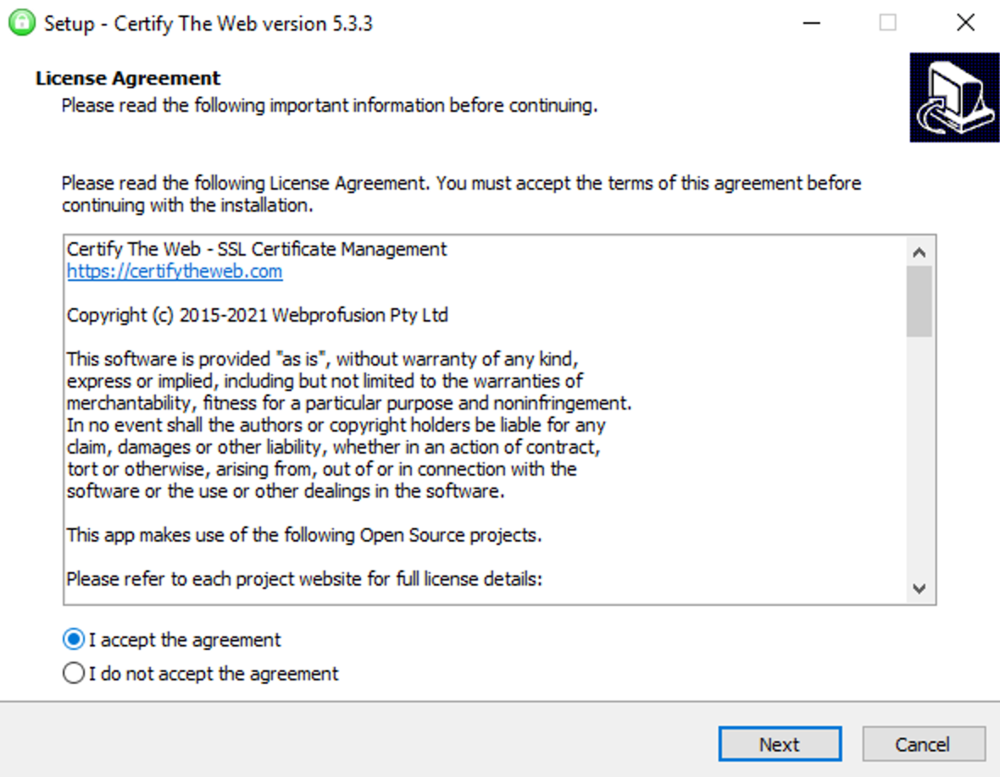
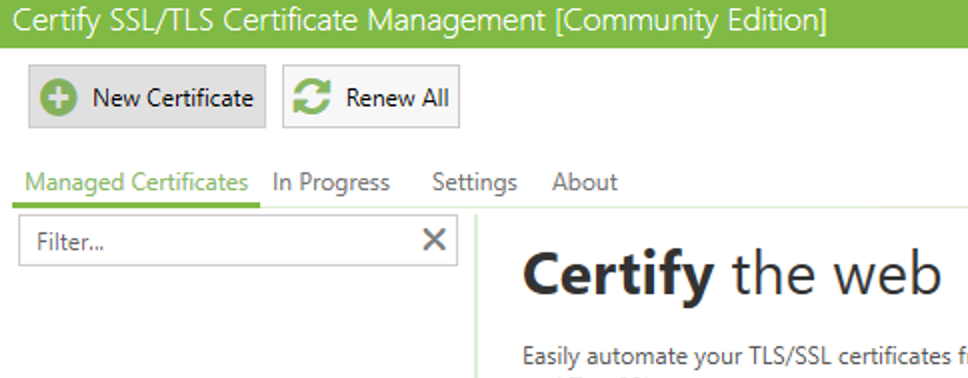
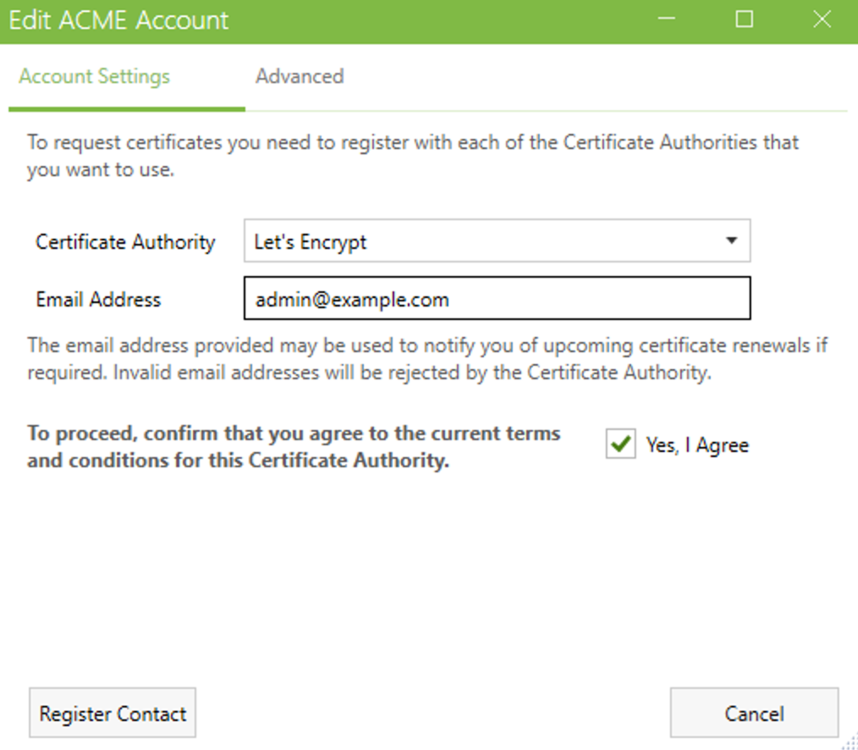
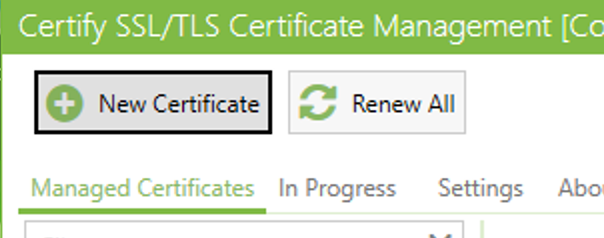
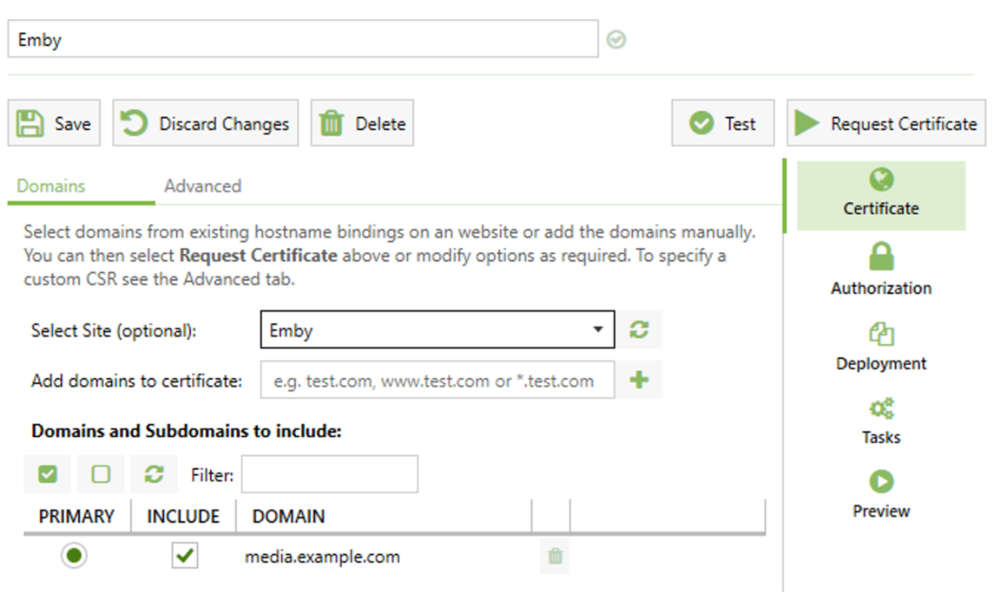
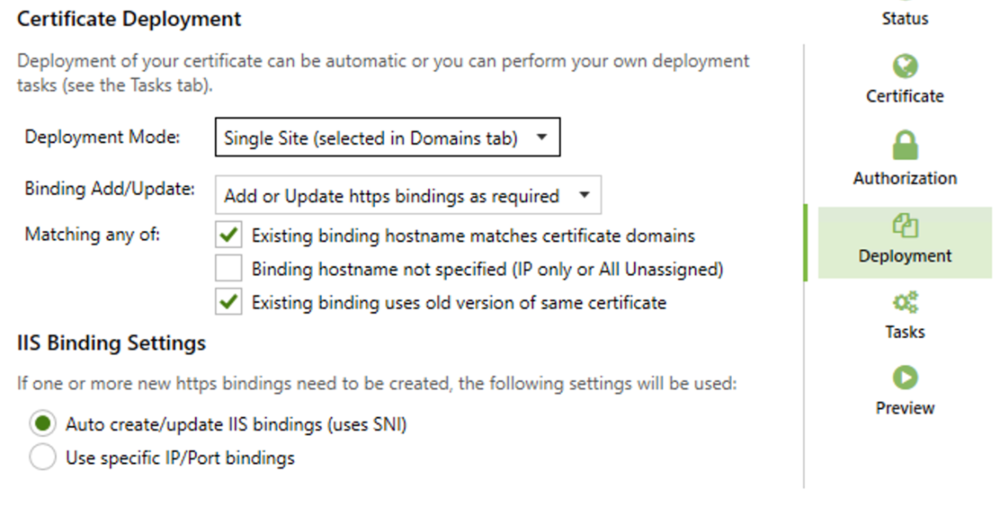
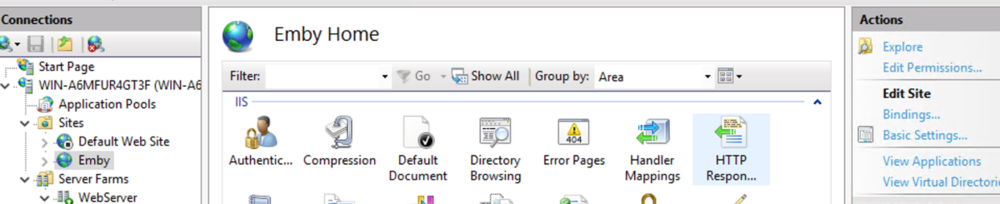
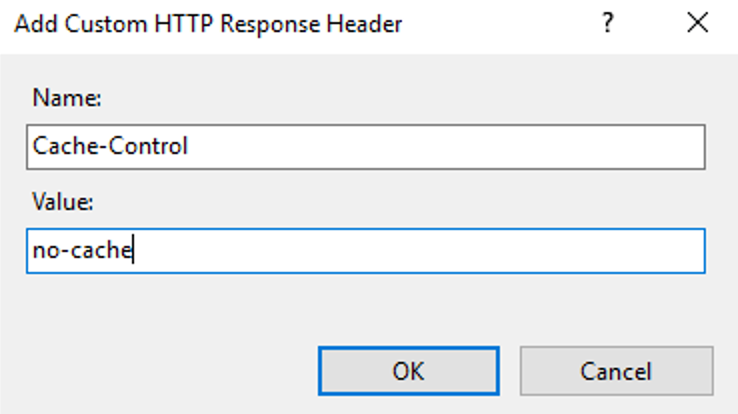
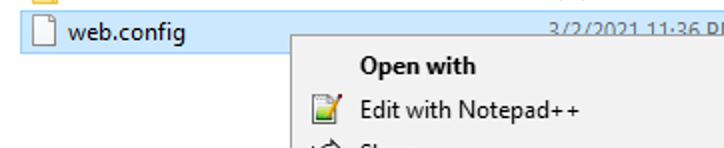
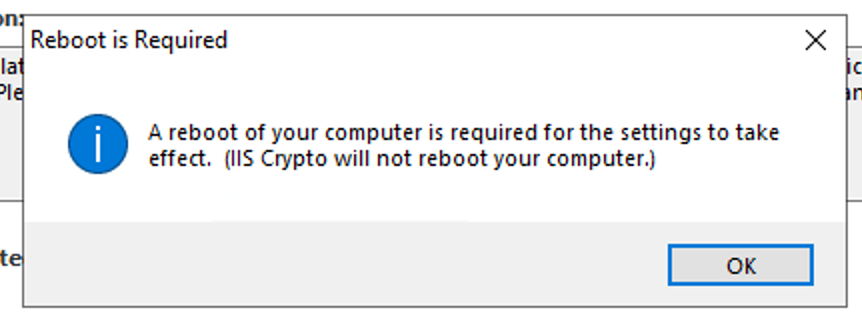
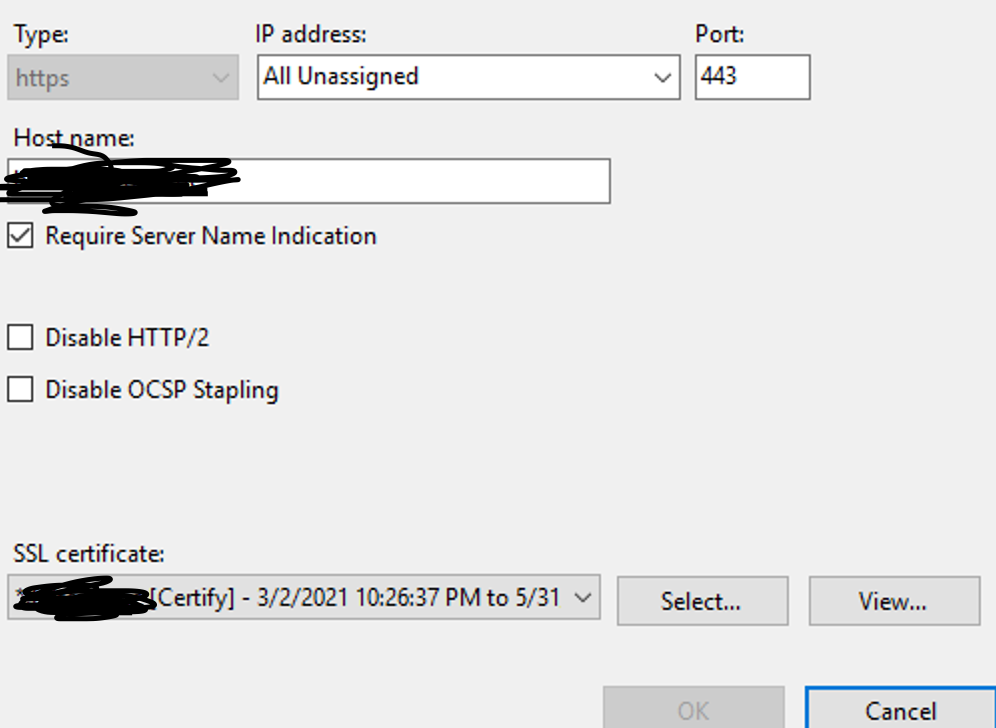
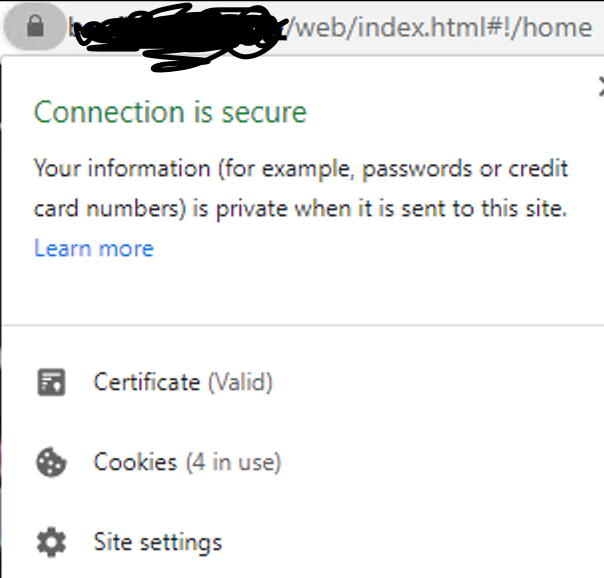
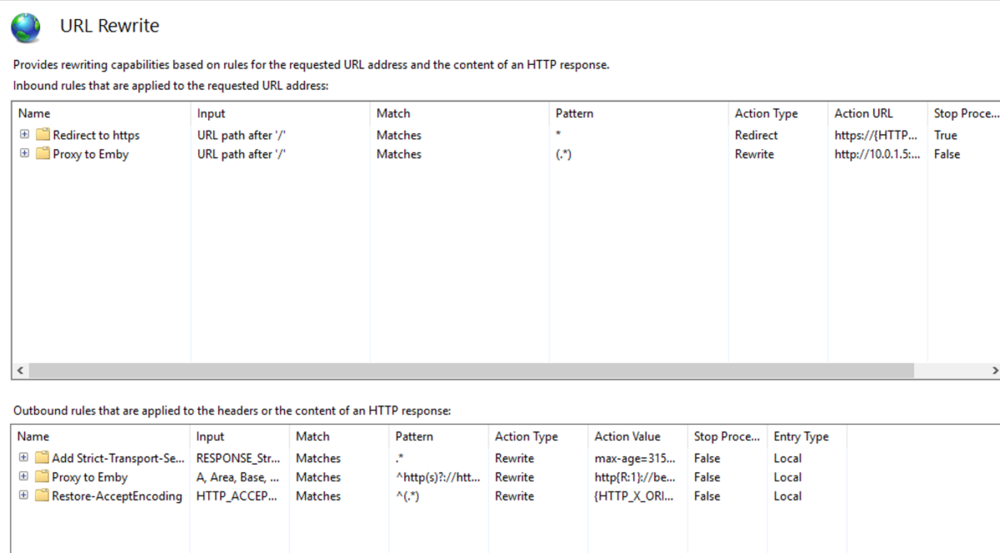
This guide will explain how to setup a Windows Server instance of Emby server with IIS as full transparent reverse proxy with SSL offload and auto-renewing certificates via Lets Encrypt. First, What is IIS? IIS or Internet Information Services is the web server service provided with Windows and Windows server installations. It is industry standard technology and is widely supported and regularly maintained by Microsoft. Second, What is a reverse proxy? A reverse proxy will take requests coming into your server (in this case HTTPS on port 443) and route them to a backend application (in this case Emby Server on port 8096 on the same box or another). Reverse proxies are very useful if you only have 1 public IP and multiple services you would like to run on a single port (443, for example is standard secure web traffic) or multiple servers that need to appear as one. Third, Why do I want a certificate for my site from Lets Encrypt? Well, most sites now days are secure (read they encrypt your traffic to prevent people from seeing your data), browsers these days flag sites that are not using properly signed certificate chains or run on insecure ports. If you use a self signed certificate in Emby, you may have difficulty getting things like the iOS app or Roku app to work properly outside your home. (Not sure about the rest of you, but Emby on the kid’s iPad is a life saver for long car rides). Let’s Encrypt provides free SSL certificates that are signed by certificate authorities that will be recognized on all devices and platforms. I will be using Windows Server 2019 with IIS 10 and AAR 3. All of this should work with Windows Server 2012R2 and Windows Server 2016 as well as Windows 10, however there may be some differences. You can use either stable or beta version of Emby Server, however in this guide we will use the stable version. At the time of writing, this guide will get you a full A+ rating from SSLlabs.com security test. (For comparison purposes, Facebook’s rating is a B.) In this guide we will: Install Emby Server Move Emby Server Installation to a non-user-locked location Setup a service user to run Emby Server as Configure Emby Server to run as a service Configure Windows Firewall Install IIS Install AAR Install IIS Rewrite module Configure AAR Configure IIS as a reverse proxy for Emby Configure SSL cypher suites for the server Install the Certify the Web client. Configure Certify the Web for auto-renewing SSL certificate for your domain Note: To be externally accessible, you will need to configure your route/modem to port forward 80 and 443 to your server. Pre-reqs/Assumptions: A physical server or VM running Windows Server An Internet Connection A DynDNS/No-IP URL (or similar routable dns name pointed at your router’s public IP) You have port forwarded ports 80 and 443 through your router to the machine you will use as a reverse proxy (in this guide we will use the same box for the reverse proxy and Emby server, but these can be run on different hosts). You have installed Notepad++ on the machine you will be setting up. Install Emby Server Download Emby Server Run the Installer Click Run when prompted If prompted by smart screen, click run anyway If prompted to install Visual C++ runtime, click install It will install to default location of %APPDATA%\Emby-Server. Move Emby Server to Non-User Locked Location Ensure that Emby Server is not running (right click icon in system tray if present and click Exit) Navigate to default location of %APPDATA% (%userprofille%\appdata\roaming) Right click the folder and click "cut" Navigate to C:\ (or root of the drive you wish to have Emby run from) Right click in the whitespace and paste. (if prompted to provide administrator permission, approve) Create a Service Account to run Emby as Note: Instructions show how to do this using local users and computers, you can also do this with Active Directory Users and Computers if your server is running that role. Right click on the start button (Windows flag) on the left side of the task bar Click Computer Management Expand Local Users and Groups on the left side Click Users Right click the whitespace and click new user Complete the new user dialog as shown (make sure you save whatever password you use as you will need it later, ProTip: don't re-use passwords) Click create Click close Close the computer management window Setup NSSM NSSM (Non-Sucking Service Manager) is needed to run Emby Server as a service as Emby Server does not include the nessicary components to run as a Windows service by default. Download here: https://nssm.cc/download Double click downloaded zip to open it in windows explorer Navigate to /win64 folder inside zip Copy/extract 64 bit version of the file to C:\Emby-Server Setup Folder Permissions Navigate to C:\ Right click the Emby-Server folder Click Properties Click Security tab Click Advanced Click Disable Inheritance Click Convert to Explicit Select CREATOR OWNER Click Remove Select Users (special) Click Remove Click Add Enter SvcEmby in the dialog Click OK Click Full Control Click OK Click Change next to owner at the top of the box Type SvcEmby in the dialog Click OK Check the Replace owner check box Check the Replace permissions checkbox Verify the dialog window looks similar to this (computer name will be different) Click OK When prompted if you want to replace permissions click Yes Verify security tab looks like this Click OK Setup Emby as a Service using NSSM Right click the start button on the left side of the task bar Click Windows Powershell (Admin) Type: "cd C:\Emby-Server" and press enter Type ".\nssm.exe install Emby" and press enter The install service dialog will launch, fill out as follows: Application Tab Details Tab Logon Tab (note, if you are using active directory it should be: YOURDOMAIN\SvcEmby) Exit Actions Tab Click Install Service Click OK Config ure Windows Firewall Click Start Click Control Panel Click Windows Defender Firewall Click Advanced Settings on the left hand side Click Inbound Rules Click New Rule on the right hand side Click Port Click Next Type 80, 443 in the ports box Click Next Click Next Click Next Name it Web Server Ports Click Finish Install IIS (Internet Information Services) Click Start Click Server Manager Click Add Roles and Features Click next on the Before you Begin page Click Role Based install Click Next Verify you are installing on your local server Click Next Check the box for "Web Server (IIS)" When prompted to install management tools Click Add Features Click Next Under Features, click Next Click Next again to get to role services Check the boxes for all of the following role services Make sure you check the box for web sockets under Application Development, this is needed for various features of Emby to work right. Click Next Click Install Once installation completes, click close Install Web Platform Installer add-on Download from: https://www.microsoft.com/web/downloads/platform.aspx Run the Web Platform Installer add-on installer Click Install Click Finish Install AAR (Advanced Application Routing) Download from: https://www.microsoft.com/en-us/download/details.aspx?id=47333 Run the Request Router installer Click Install Install IIS Re-Write Module Click Start Click Administrative Tools Open Internet Information Services (IIS) Manager Click the name of your server on the left Double Click on the Web Platform Installer In the search box type "url rewrite" Click Add Click Install Click I Agree Click Finish Configure AAR Click Start Click Administrative Tools Open Internet Information Services (IIS) Manager Click the name of your server on the left Right Click Server Farms Click Create Server Farm Name your Server Farm Click Next Enter the IP address of the server or "localhost" Click Add Click Finish Click No in the dialog that pops up Expand your newly created Server Farm Click Proxy Configure settings as shown Click Apply Click your Server Click Application Request Routing Click Server Proxy Settings Configure settings as shown Click Apply Click Your Server Configure IIS Server Variables Click Url Re-Write Click View Server Variables Click Add Type "HTTP_ACCEPT_ENCODING" Click OK Click Add Type "HTTP_X_ORIGINAL_ACCEPT_ENCODING" Click OK Click Add Type "HTTP_X_FORWARDED_FOR" Click OK Click Add Type "HTTP_X_REAL_IP" Click OK Click Your Server Create Emby Site Expand Sites on the left hand side Right Click "Default Web Site" Highlight "Manage Website" Click Stop Right Click the white space in the Sites list Click Add Website Click the "..." button to the right of Physical Path Browse to C:\inetpub\wwwroot Click it Click Make New Folder Call it Emby Click OK Under Binding Fill in with your public host name (see dynamic dns mentioned in pre-reqs) Click OK Configure Logging Click your server Click Logging Click Select Fields Click Add Field Configure as shown Click OK Click OK Click Apply Install and Configure Certify The Web client Download From: https://certifytheweb.com Run the Certify the Web installer Click Next Click Next Click Next Click Install Click Finish Click New Certificate Click on on Contact Prompt Fill in your contact email Click Register Contact Click New Certificate again Select Emby from the sites list Name and domain will populate automatically. Click Deployment Configure as shown Complete certificate verification process Click your site in IIS manager Click Bindings Verify there is an HTTPS binding and that it looks similar to this (with your domain information) Edit Web.Config for Emby Site Click HTTP Response Headers Click Add Configure as show (we are just creating a header to get the web.config to exist, we will paste in a premed one below, so these values dont really matter) Click OK Open an Explorer window and Browse to C:\inetpub\wwwroot\Emby Right click web.config and Edit with Notepad++ Replace existing content with web.config below <?xml version="1.0" encoding="UTF-8"?> <configuration> <system.webServer> <rewrite> <rules> <clear></clear> <rule name="Redirect to https" enabled="true" patternSyntax="Wildcard" stopProcessing="true"> <match url="*" negate="false" /> <conditions logicalGrouping="MatchAny"> <add input="{HTTPS}" pattern="off" /> </conditions> <action type="Redirect" url="https://{HTTP_HOST}{REQUEST_URI}" redirectType="Found" /> </rule> <rule name="Proxy to Emby" stopProcessing="false"> <match url="(.*)" /> <serverVariables> <set name="HTTP_X_ORIGINAL_ACCEPT_ENCODING" value="{HTTP_ACCEPT_ENCODING}" /> <set name="HTTP_ACCEPT_ENCODING" value="" /> <set name="HTTP_X_REAL_IP" value="{REMOTE_ADDR}" /> </serverVariables> <action type="Rewrite" url="http://localhost:8096/{R:1}" logRewrittenUrl="true" /> <conditions> <add input="/{R:1}" pattern=".well-known" negate="true" /> </conditions> </rule> </rules> <outboundRules> <rule name="Add Strict-Transport-Security when HTTPS" enabled="true"> <match serverVariable="RESPONSE_Strict_Transport_Security" pattern=".*" /> <conditions> <add input="{HTTPS}" pattern="on" /> </conditions> <action type="Rewrite" value="max-age=31536000; includeSubDomains; preload" /> </rule> <rule name="Proxy to Emby" preCondition="ResponseIsHtml1" enabled="true"> <match filterByTags="A, Area, Base, Form, Frame, Head, IFrame, Img, Input, Link, Script" pattern="^http(s)?://http://localhost:8096/(.*)" /> <action type="Rewrite" value="http{R:1}://media.example.com/{R:2}" /> </rule> <rule name="Restore-AcceptEncoding" preCondition="NeedsRestoringAcceptEncoding"> <match serverVariable="HTTP_ACCEPT_ENCODING" pattern="^(.*)" /> <action type="Rewrite" value="{HTTP_X_ORIGINAL_ACCEPT_ENCODING}" /> </rule> <preConditions> <preCondition name="ResponseIsHtml1"> <add input="{RESPONSE_CONTENT_TYPE}" pattern="^text/(.+)" /> </preCondition> <preCondition name="NeedsRestoringAcceptEncoding"> <add input="{HTTP_X_ORIGINAL_ACCEPT_ENCODING}" pattern=".+" /> </preCondition> </preConditions> </outboundRules> </rewrite> <caching enabled="false" enableKernelCache="false" /> <httpProtocol> <customHeaders> <add name="X-Frame-Options" value="SAMEORIGIN" /> <add name="X-Xss-Protection" value="1; mode=block" /> <add name="X-Content-Type-Options" value="nosniff" /> <add name="Referrer-Policy" value="same-origin" /> <add name="Feature-Policy" value="sync-xhr 'self'" /> <add name="Cache-Control" value="no-cache" /> </customHeaders> </httpProtocol> </system.webServer> </configuration> Save changes (if prompted to restart Notepad++ in admin mode allow it and then try saving again) IIS will now be properly configured as a reverse proxy for Emby. Under IIS Manager > Rewrite you should now see the following rules: Configure Server Cyphers Download here: https://www.nartac.com/Products/IISCrypto/Download (GUI version) Run the IISCrypto too Click Templates In the template drop down box, select PCI 3.2 This will disable IIS from being able to serve via SSL 2.0, 3.0; TLS 1.0 and TLS 1.1. This will leave just the industry standard TLS 1.2. Click Apply Click OK. Reboot your server. Emby Internal Settings Navigate to your server via the localhost:8096 address Click the gear in the top right corner Click Network from the list of tabs on the right Configure as shown (use your hostname in the external domain box) Conclusion Upon rebooting your computer will start IIS services and Emby server as a service. Traffic coming in on port 80 (if someone just types your url without HTTPS in their browser's address bar) will be automatically redirected to port 443 and the HTTPS:// version of your host name. Your certificate will auto-renew every so often and re-bind to the site in IIS without any interaction on your part. This allows for a server that you can for the most part setup, and forget about and just manage your Emby installation via its web ui. There are a lot of ways to set up Emby server depending on your environment and other factors. For my environment this made the most sense and since large portions of this took quite a bit of digging and research to get working just right, I figured Id make someone else's life a little easier if they were trying to do something similar. These instructions can be adapted for Windows Server 2012 R2, Windows Server 2016, Windows 8 and Windows 10. In the end browsing to your domain should look like this in the browser Additional Information for Updating When Updating your Emby installation. Simply stop the service for Emby, install like you normally would, then just cut the system folder inside the %appdata%\emby-server folder and paste it into the C:\Emby-Server folder. When prompted replace all files, then start the service again once the copy completes. Additional Information about Connecting with Emby Apps When connecting to your Emby installation remotely with Emby apps remember to prefix your domain name with https:// and use 443 for the port number. <Edit> Additional Information about changing Emby Server Title: For those users who wish to change their page title in browser (as discussed here), here is additional Web.Config information that will let you do just that! Using IIS Re-Write rules to change the page title means, you don't have to edit files to reset it every time you upgrade your Emby Server! Add these 3 rules at the bottom of the rules list, replace whole <preConditions> block too.: NOTE: Make sure you replace ALL 4 instances of NAME_OF_YOUR_SERVER with what you want your server to display in the tab bar. <rule name="RewriteTitle" preCondition="ResponseIsHtml1" enabled="true"> <match filterByTags="None" pattern="<title>(.*)</title>" /> <action type="Rewrite" value="<title>NAME_OF_YOUR_SERVER</title>" /> </rule> <rule name="RewriteAppHeaderJs" preCondition="ResponseIsJS" enabled="true"> <match filterByTags="None" pattern="document.title="Emby"" /> <action type="Rewrite" value="document.title="NAME_OF_YOUR_SERVER"" /> </rule> <rule name="RewriteAppHeaderJs2" preCondition="ResponseIsJS" enabled="true"> <match filterByTags="None" pattern="title.Name||"Emby":"Emby"" /> <action type="Rewrite" value="title.Name||"NAME_OF_YOUR_SERVER":"NAME_OF_YOUR_SERVER"" /> </rule> <preConditions> <preCondition name="ResponseIsHtml1"> <add input="{RESPONSE_CONTENT_TYPE}" pattern="^text/(.+)" /> </preCondition> <preCondition name="ResponseIsJS"> <add input="{RESPONSE_CONTENT_TYPE}" pattern="application/javascript|text/javascript" /> </preCondition> <preCondition name="NeedsRestoringAcceptEncoding"> <add input="{HTTP_X_ORIGINAL_ACCEPT_ENCODING}" pattern=".+" /> </preCondition> </preConditions> </Edit>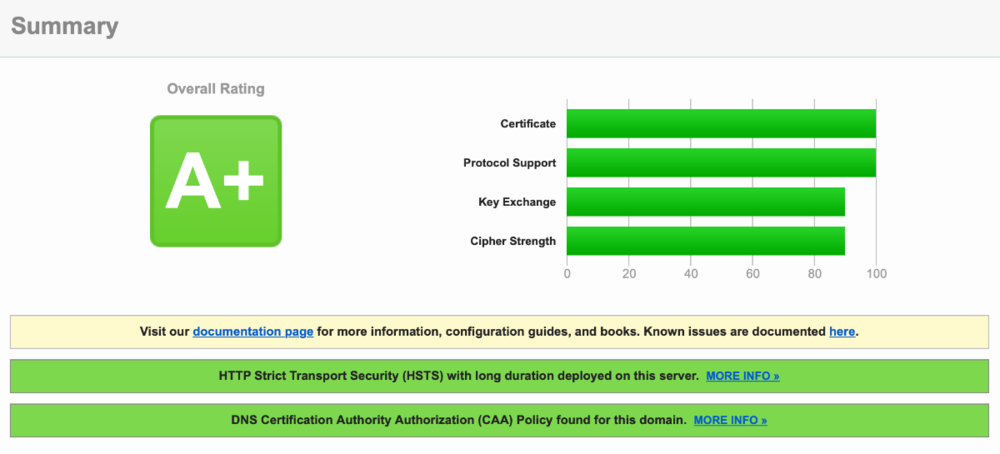


- 124 replies
-
- 15
-

-

-
- how-to
- windows server
- (and 14 more)
-

Emby as a service with NSSM, could't find path by RaiDrive
brucmao posted a topic in General/Windows
I'm using Windows 11 as my operating system and logging in with a Microsoft account. Previously, I had set up Emby Server to start automatically at boot time, but after the Windows 11 update, Emby Server no longer starts up when I haven't logged in. To fix this, I used NSSM software to register Emby Server as a service and set the same Microsoft account for the Log on settings. Now, Emby Server can run before I log in, but it's unable to play media. After checking the Emby Server logs, I found that it couldn't find the path. I'm using RaidDriver to mount the aliyun cloud as a network driver. 2024-03-16 09:34:26.304 Info Server: http/1.1 Response 404 to host1. Time: 3ms. GET http://host2/emby/videos/186557/stream.mkv?DeviceId=4c6e9b3f-3c5e-41b1-af55-990cc44373f3&MediaSourceId=abfa913b5cf1b0d8a129a7add578743b&Static=true&PlaySessionId=b3db5c243993435192b075e26803a862&api_key=x_secret1_x 2024-03-16 09:34:26.308 Info Server: http/1.1 GET http://host2/emby/videos/186557/stream.mkv?DeviceId=4c6e9b3f-3c5e-41b1-af55-990cc44373f3&MediaSourceId=abfa913b5cf1b0d8a129a7add578743b&Static=true&PlaySessionId=b3db5c243993435192b075e26803a862&api_key=x_secret1_x. Accept=*/*, Connection=close, Host=host2, User-Agent=Mozilla/5.0 (Windows NT 10.0; Win64; x64; Trident/7.0; rv:11.0) like Gecko, Accept-Encoding=gzip, deflate, X-Forwarded-Scheme=http, X-Forwarded-Proto=http, X-Forwarded-For=10.10.10.160, X-Real-IP=10.10.10.160, UA-CPU=AMD64 2024-03-16 09:34:26.311 Error Server: Error processing request *** Error Report *** Version: 4.8.3.0 Command line: C:\Users\bruce\AppData\Roaming\Emby-Server\system\EmbyServer.dll -service Operating system: Microsoft Windows 10.0.22631 Framework: .NET 6.0.27 OS/Process: x64/x64 Runtime: C:/Users/bruce/AppData/Roaming/Emby-Server/system/System.Private.CoreLib.dll Processor count: 16 Data path: C:\Users\bruce\AppData\Roaming\Emby-Server\programdata Application path: C:\Users\bruce\AppData\Roaming\Emby-Server\system System.IO.DirectoryNotFoundException: System.IO.DirectoryNotFoundException: Could not find a part of the path 'X:\aliyun\Anime\TV\Other\Jujutsu Kaisen (2020)\S01\Jujutsu.Kaisen.S01E42.2160p.WEB-DL.H264.AAC.mkv'. at Microsoft.Win32.SafeHandles.SafeFileHandle.CreateFile(String fullPath, FileMode mode, FileAccess access, FileShare share, FileOptions options) at Microsoft.Win32.SafeHandles.SafeFileHandle.Open(String fullPath, FileMode mode, FileAccess access, FileShare share, FileOptions options, Int64 preallocationSize) at System.IO.Strategies.OSFileStreamStrategy..ctor(String path, FileMode mode, FileAccess access, FileShare share, FileOptions options, Int64 preallocationSize) at System.IO.Strategies.FileStreamHelpers.ChooseStrategy(FileStream fileStream, String path, FileMode mode, FileAccess access, FileShare share, Int32 bufferSize, FileOptions options, Int64 preallocationSize) at System.IO.FileStream..ctor(String path, FileStreamOptions options) at Emby.Server.Implementations.IO.ManagedFileSystem.GetFileStream(String path, FileOpenMode mode, FileAccessMode access, FileShareMode share, Int32 bufferSize, FileOpenOptions fileOpenOptions, Int64 preAllocationSize) at Emby.Server.Implementations.IO.ManagedFileSystem.GetFileStream(String path, FileOpenMode mode, FileAccessMode access, FileShareMode share, Int32 bufferSize, FileOpenOptions fileOpenOptions) at Emby.Server.Implementations.IO.IOManager.GetResponse(HttpRequestOptions options, MediaProtocol protocol) at Emby.Server.Implementations.IO.IOManager.GetResponse(HttpRequestOptions options) at Emby.Server.Implementations.HttpServer.HttpResultFactory.GetContent(StaticFileResultOptions options, Int64 offset, Int64 length, CancellationToken cancellationToken) at Emby.Server.Implementations.HttpServer.FileWriter.SetContentResponseHeaders(Nullable`1 reportedTotalContentLength, CancellationToken cancellationToken) at Emby.Server.Implementations.HttpServer.HttpResultFactory.GetStaticResult(IRequest requestContext, StaticResultOptions options) at Emby.Server.MediaEncoding.Api.Progressive.BaseProgressiveStreamingService.ProcessRequest(StreamRequest request, Boolean isHeadRequest) at Emby.Server.Implementations.Services.ServiceController.GetTaskResult(Task task) at Emby.Server.Implementations.Services.ServiceHandler.ProcessRequestAsync(HttpListenerHost httpHost, IServerApplicationHost appHost, IRequest httpReq, IResponse httpRes, IStreamHelper streamHelper, RestPath restPath, String responseContentType, CancellationToken cancellationToken) at Emby.Server.Implementations.HttpServer.HttpListenerHost.RequestHandler(IRequest httpReq, ReadOnlyMemory`1 urlString, ReadOnlyMemory`1 localPath, CancellationToken cancellationToken) Source: System.Private.CoreLib TargetSite: Microsoft.Win32.SafeHandles.SafeFileHandle CreateFile(System.String, System.IO.FileMode, System.IO.FileAccess, System.IO.FileShare, System.IO.FileOptions) -
Hi all, Wondering if I can get some help with an issue that has been plaguing me for a little while. I currently have Emby installed on a Windows machine in which it runs as a service (created via NSSM from memory, was a long time ago). One of my key use cases is that I turn on my machine and Emby starts up in the background and just works, however on occasion when it tries to update, it fails. A by product of this is that the zip file remains in the updates folder and the server crashes because it doesn't start if there are any pending updates. (Or so I assume?) Has anyone dealt with this issue before and / or have thoughts on how to fix it? I apologise if this is a duplicate, I did attempt a search, but I couldn't find a match for any keywords I thought applied. Any and all help would be appreciated! Cheers!
-

Playback freezes every 10 minutes or so - using Emby 4.6.7.0
PeterEr posted a topic in General/Windows
I have a weird problem. Some days I can watch movies for 6-8 hours without a problem. Other days, Emby on Samsung (Tizen) freezes playback after 10 minutes - and to fix it, I have to 'wake up the pc' by pressing a key on the keyboard/moving the mouse every time 10 or so minutes has passed! - love the exercise but after 8-10 runs I get tired Notes: The PC is not at sleep, not hibernating, screen saver is turned off etc. For some reason, Emby goes to sleep and 'wakes up' if the mouse moves / keyboard pressed. Google yields no solutions. Using Emby 4.6.7.0 Emby for Samsung 1.1.06 on a Samsung Smart TV (UA49RU7100KXXA). Connection between TV and PC is a Wifi router - Netgear AC1750. Strong signal. Running Emby as a service via via NSSM - the Non-Sucking Service Manager (nssm 2.24-101-g897c7ad (2017-04-26)). Thinking it could be related to certain file formats or the NSSM service perhaps, but then again that does not explain why it does happen all the time. Last movie played has these characteristics and then it Emby froze. Nothing out of the ordinary (many other movies do the same)... Any help / troubleshooting appreciated. Title1080p H264 CodecH264 AVCYes ProfileHigh Level40 Resolution1920x1080 Aspect Ratio16:9 InterlacedNo Framerate23.976 Bitrate5,100 kbps Color Primariesbt709 Color Spacebt709 Color Transferbt709 Bit Depth8 bit Pixel Formatyuv420p Reference Frames1 hardware_detection-63776144843.txt embyserver.txt