Search the Community
Showing results for tags 'caddy'.
-
Hey all, I used a Caddy guide and Caddy combined with a domain from noip to try to set up my Emby server through a reverse proxy. Everything seems to be working correctly when I go to my domain name remotely in a web browser or by manually entering my domain name and port in the apps, but for whatever reason, EmbyConnect is not saving the proper connection or is not connecting properly. Every time I try to log in with EmbyConnect, it says it can't connect. Here's what Caddy shows me when it runs: 2024/09/02 21:55:55.834 INFO using adjacent Caddyfile 2024/09/02 21:55:55.835 INFO adapted config to JSON {"adapter": "caddyfile"} 2024/09/02 21:55:55.835 WARN Caddyfile input is not formatted; run 'caddy fmt --overwrite' to fix inconsistencies {"adapter": "caddyfile", "file": "Caddyfile", "line": 2} 2024/09/02 21:55:55.842 INFO admin admin endpoint started {"address": "localhost:2019", "enforce_origin": false, "origins": ["//localhost:2019", "//[::1]:2019", "//127.0.0.1:2019"]} 2024/09/02 21:55:55.842 INFO tls.cache.maintenance started background certificate maintenance {"cache": "0xc000430e80"} 2024/09/02 21:55:55.842 INFO http.auto_https server is listening only on the HTTPS port but has no TLS connection policies; adding one to enable TLS {"server_name": "srv0", "https_port": 443} 2024/09/02 21:55:55.842 INFO http.auto_https enabling automatic HTTP->HTTPS redirects {"server_name": "srv0"} 2024/09/02 21:55:55.844 INFO http.log server running {"name": "remaining_auto_https_redirects", "protocols": ["h1", "h2", "h3"]} 2024/09/02 21:55:55.844 INFO http enabling HTTP/3 listener {"addr": ":443"} 2024/09/02 21:55:55.844 INFO http.log server running {"name": "srv0", "protocols": ["h1", "h2", "h3"]} 2024/09/02 21:55:55.844 INFO http enabling automatic TLS certificate management {"domains": ["my doman"]} 2024/09/02 21:55:55.845 INFO autosaved config (load with --resume flag) {"file": "C:\\Users\\Andy\\AppData\\Roaming\\Caddy\\autosave.json"} 2024/09/02 21:55:55.845 INFO serving initial configuration 2024/09/02 21:55:55.848 INFO tls storage cleaning happened too recently; skipping for now {"storage": "FileStorage:C:\\Users\\Andy\\AppData\\Roaming\\Caddy", "instance": "f9be30e8-14fd-4b07-9fdd-7dd8f1b965ad", "try_again": "2024/09/03 21:55:55.848", "try_again_in": 86400} 2024/09/02 21:55:55.848 INFO tls finished cleaning storage units I'm pretty sure I set port forwarding up correctly, but I have a question about that as well. When I go to forward ports 80 and 443, do I forward the external ports 80 & 443 to internal ports 80 & 443, or do I forward them to the internal Emby local ports 8096 and 8290? If anyone has any ideas as to why I can connect to the server in a web browser using the domain name and why I can connect to it using manual entry in the Emby apps, but not with Emby Connect, I would be greatly appreciative of any assistance you might be able to offer. I'm kind of a newbie when it comes to some of this stuff, so if you need more information from me that I didn't think to provide in order to accurately assess or help me troubleshoot my issue, please let me know! Thanks!
- 7 replies
-
- remote access
- emby connect
-
(and 2 more)
Tagged with:
-
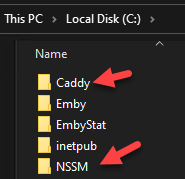
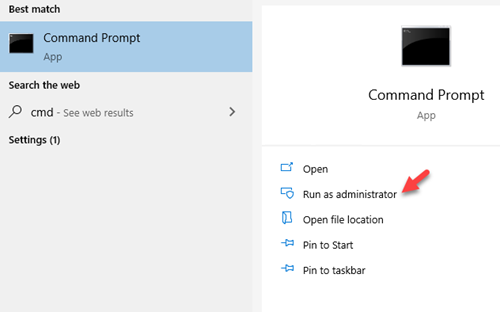
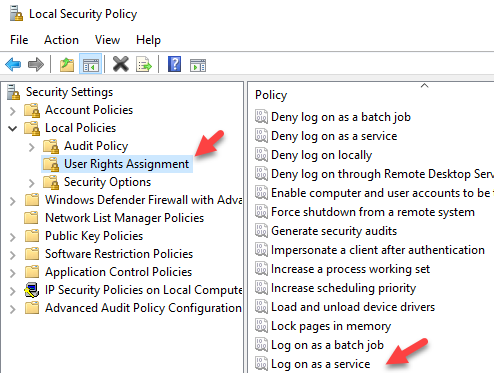
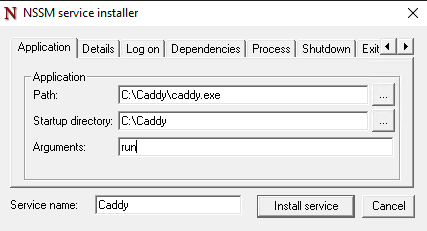
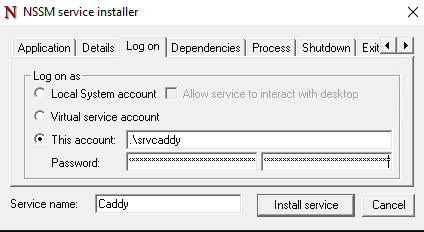
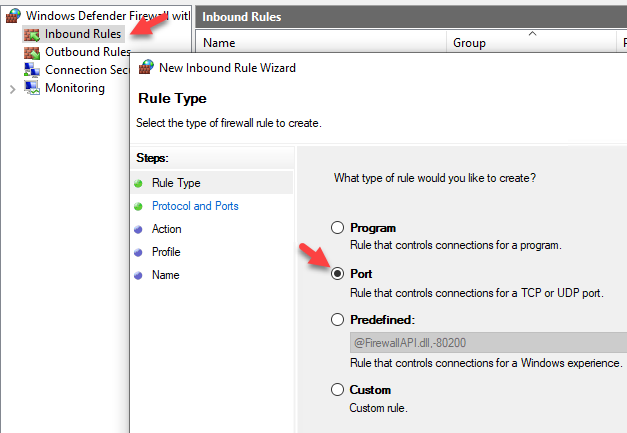
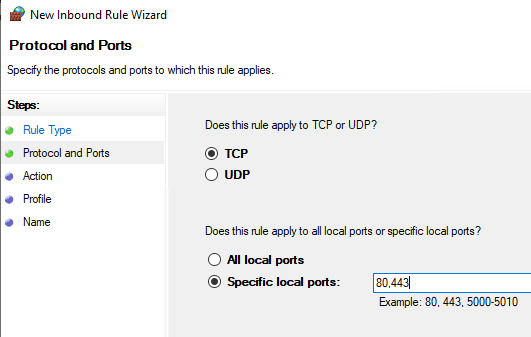
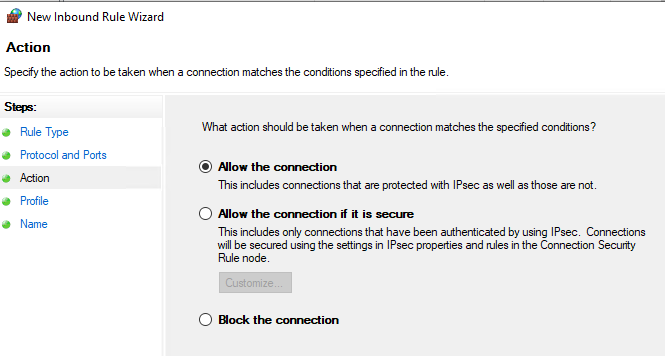
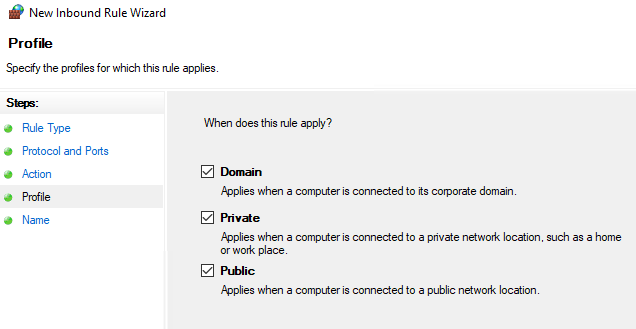
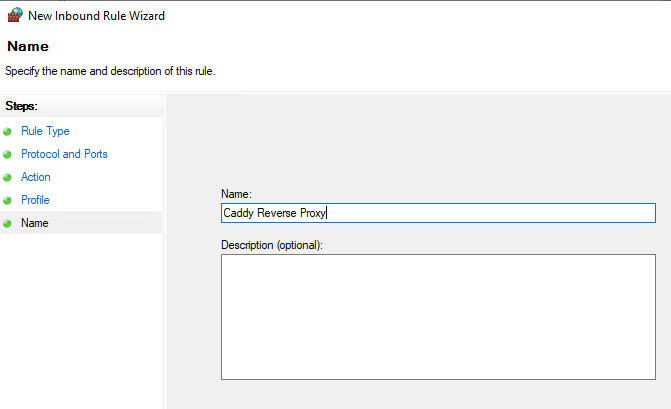
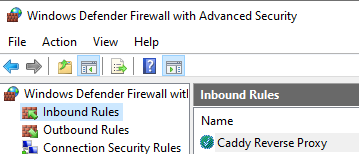
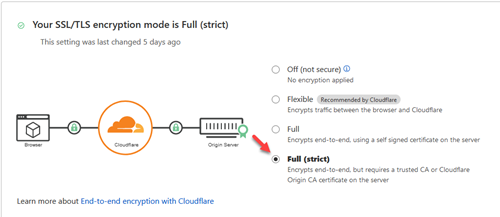
It took me a while to get Caddy v2 setup and working by itself. Then there were some struggles with getting it to work with Cloudflare. I thought I would share a guide to assist those who want to go that route. Prerequisites: Have your own domain Have the DNS of your domain setup with Cloudflare Have your Cloudflare API key/token "For this checkout my other article on setting up DNS updates via API" Have your Emby server set with a static internal IP Step 1: Download Caddy Visit https://caddyserver.com/download to download your binary. You will need to add a couple plugins for this to work. You will want to select 'caddy-dns/cloudflare' and 'kirsch33/realip' Review at the top that it shows "Extra features = 2' and select 'Download' Step 2: Download NSSM from https://nssm.cc/download "We will use this to run Caddy as a service" Step 3: Create folders for NSSM and Caddy on the root of the C:\ drive Step 4: Rename the caddy binary to just caddy.exe and put it in C:\Caddy\. Extract NSSM so you just have the nssm.exe and put that in your NSSM folder. Step 5: Create your caddyfile The caddyfile has no extension. You can open this with your favorite text editor. I use Notepad++. Below is the a sample caddyfile. The first email is the email address that you want to use to receive notifications if there are issues with the cert Adjust your domain to what you are using for Emby. Either 'domain.com', 'login.domain.com' or 'emby.domain.com' etc. The second email address is your email address for your Cloudflare account This also sets up logging for the reverse proxy which is really handy I choose to use the actual IP address of the server instead of localhost. Either will work. { email email@gmail.com } yourdomain.com { tls email@gmail.com { dns cloudflare 'Your Cloudflare API Key No Quotes' } log { output file C:\caddy\logs\emby_access.log { roll true # Rotate logs, enabled by default roll_size_mb 10 # Set max size X MB roll_gzip true # Whether to compress rolled files roll_local_time true # Use localhost time roll_keep 3 # Keep at most X log files roll_keep_days 7 # Keep log files for X days } } encode gzip reverse_proxy http://10.0.0.5:8096 { header_up X-Real-IP {remote_host} } } If you wanted to run any of the arr's as subsites to your main reverse proxy you can add the following to your caddyfile If you are running it on the same box instead of using the full domain name you would just use http://yourip:port You need to login to each of the arr applications and setup the base URL Login go to settings/general/base url Add the correct subsite. So for Radarr you would add /movies save and restart. { email email@gmail.com } yourdomain.com { tls email@gmail.com { dns cloudflare 'Your Cloudflare API Key No Quotes' } log { output file C:\caddy\logs\emby_access.log { roll true # Rotate logs, enabled by default roll_size_mb 10 # Set max size X MB roll_gzip true # Whether to compress rolled files roll_local_time true # Use localhost time roll_keep 3 # Keep at most X log files roll_keep_days 7 # Keep log files for X days } } encode gzip reverse_proxy http://10.0.0.5:8096 { header_up X-Real-IP {remote_host} } reverse_proxy /movies/* https://radarr.domain.com { header_up Host {upstream_hostport} header_up X-Forwarded-Host {host} } redir /movies /movies/ reverse_proxy /tv/* https://sonarr.domain.com { header_up Host {upstream_hostport} header_up X-Forwarded-Host {host} } redir /tv /tv/ reverse_proxy /music/* https://lidarr.domain.com { header_up Host {upstream_hostport} header_up X-Forwarded-Host {host} } redir /music /music/ reverse_proxy /audiobooks/* https://readarr.domain.com { header_up Host {upstream_hostport} header_up X-Forwarded-Host {host} } redir /audiobooks /audiobooks/ } Step 6: Create a user for caddy to run as and set password. You will need this password later down when we setup the service. I'm going to use srvcaddy. Step 7: Allow srvcaddy user to run as service You want to open up Local Security Policy Go to 'Local Policies/User Rights Assignment/Log on as a service' and add our new user srvcaddy Step 8: Add your domain under Emby network settings Login go to settings/network/external domain and add your domain name Step 9 : Launch cmd prompt as administrator Step 10: Install Caddy as a service We will need to type cd "C:\NSSM" in cmd prompt. Then you will need to type nssm install Caddy We will want to edit Log on to our service account Then select 'Install service' Now you can open up services and start caddy The first time this runs it will take a few minutes to generate your certificate on the computer. Step 11: Adjust firewall rules You now only want the local computer to talk on Emby's port 8096. All other devices you will want to have it connect via ports 80,443. Open up windows firewall Make sure all of Emby's rules are disabled Create a new rule Step 12: Create a port forward in your router/firewall from external port 443 to your server port 443. Do to the differences in every router/firewall you will need to refer to manual or Google on this step. For even more security you can lock down only Cloudflare's IP addresses to be able to route to your server. Since we are updating the cert via API you only need port 443 open to Cloudflare. No need for port 80 to be open external. Step 13: Create a DNS entry in your router/firewall for your server. Again do to to many differences you will need to consult your device's manual or google on how to accomplish this. You will want to create an internal record that takes your domain name for your Emby server and points it to the local IP. This way you can take advantage of local login with pin. Step 14: Set Cloudflare's SSL/TLS Encryption Login to Cloudflare, select your domain, and go to SSL/TLS You want to set this to Full/Strict That's it... you should now have a fully encrypted connection to your Emby server internal and external. You will now be connecting to your server via port 443 instead of 8096. Hope this helps anyone struggling with setting this up.
- 25 replies
-
- 3
-

-

-
- caddy
- reverse proxy
-
(and 1 more)
Tagged with:


