Leaderboard


Popular Content
Showing content with the highest reputation on 01/03/25 in all areas
-
I was getting the error when trying to play video media. I am running a completely new (two weeks old) setup of linux docker emby server v4.8.10.0 . Problems began after a house power failure. Nothing solved the problem (reboot base linux, (restart-stop-start) docker emby server). I solved the problem using all the same config files by removing emby server docker container and creating a new emby server docker container with prior configuration files.2 points
-
FWIW, Unraid is not traditional RAID, hence the name2 points
-
I would stick to what you know, if you don't like to tinker. I switched from windows to unRaid, but it was a steep learning curve. But got there eventually.2 points
-
Ok thanks a lot, this helped to find the problem. I've had a couple css-tweaks from this board set up for a long time. div.dialogContainer div.listItemBody-2-lines div.listItemBodyText-secondary {display: none;} This one, which i have actually no idea what it did, was responsible for hiding this second line. Thank you again!2 points
-
My hardware fully supports AV1, its a great codec, but I'm probably in the 1%. I would be very happy with HEVC transcoding (encoding) for now. It is widely supported at this point. It makes a huge difference over rural internet connections.2 points
-
We can add a More option into the gear menu of the video player. Clicking more will bring up the menu you had before. It will mean a second click, but it will give you what you want.2 points
-
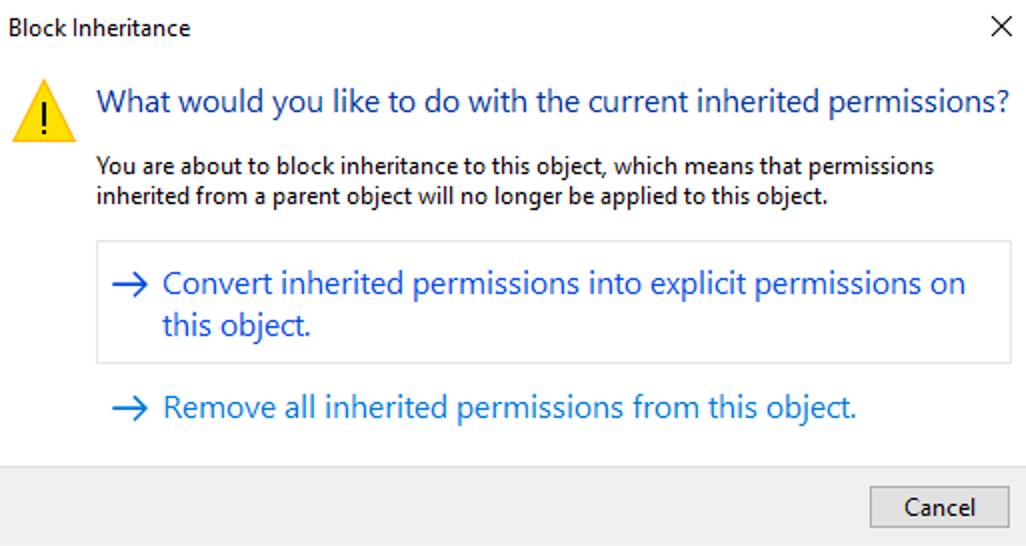
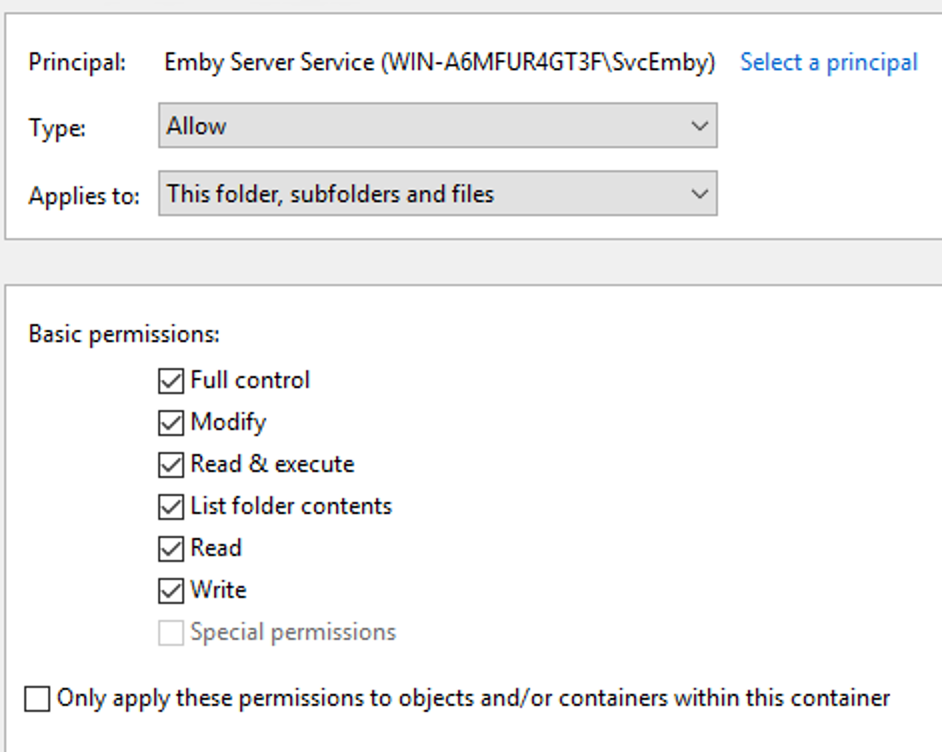
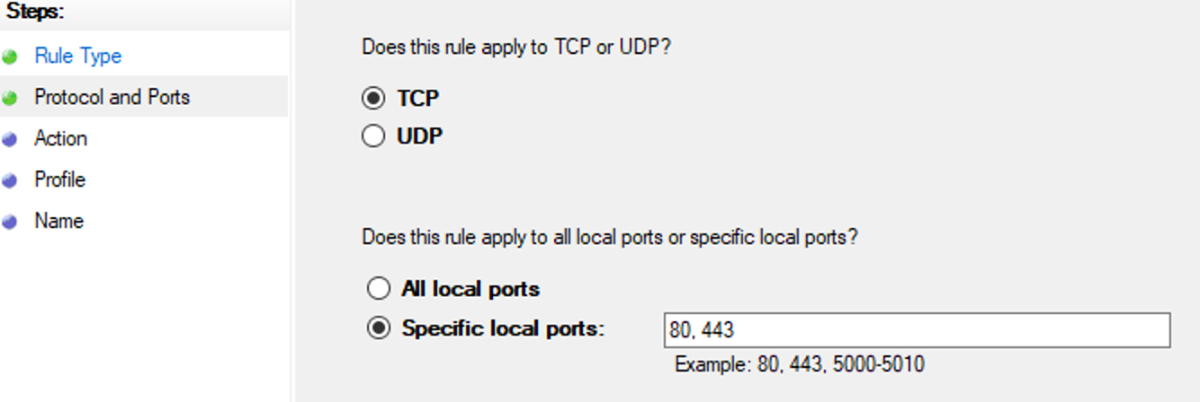
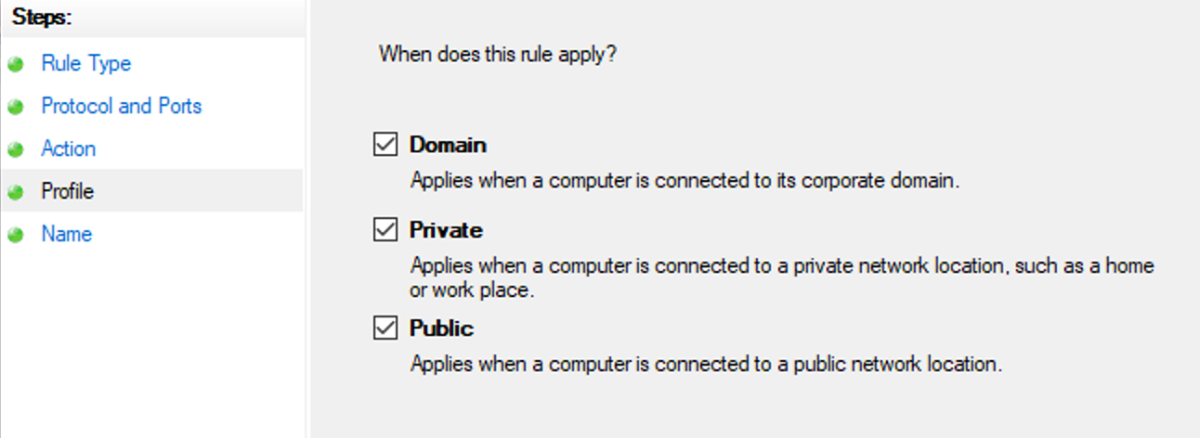
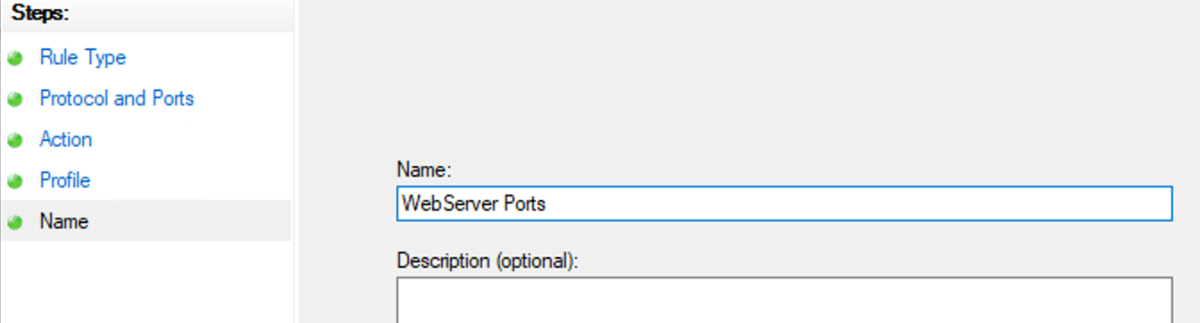
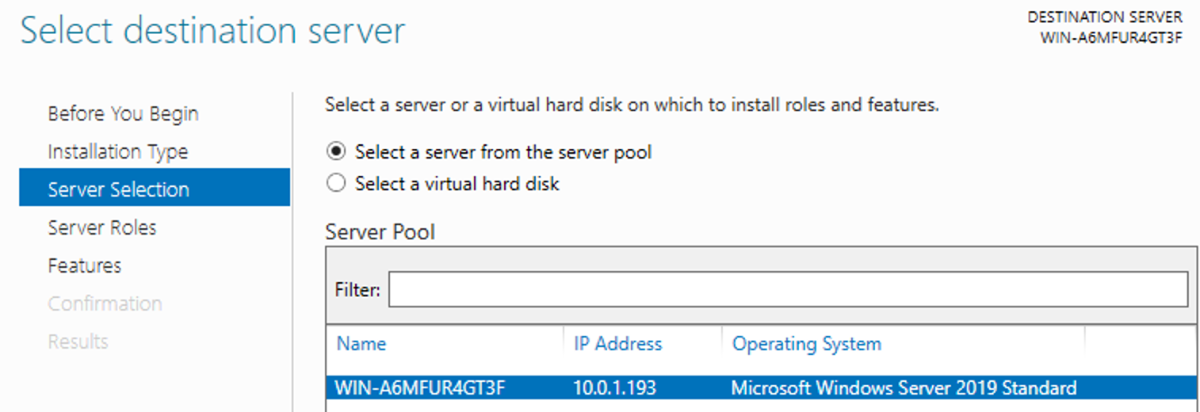
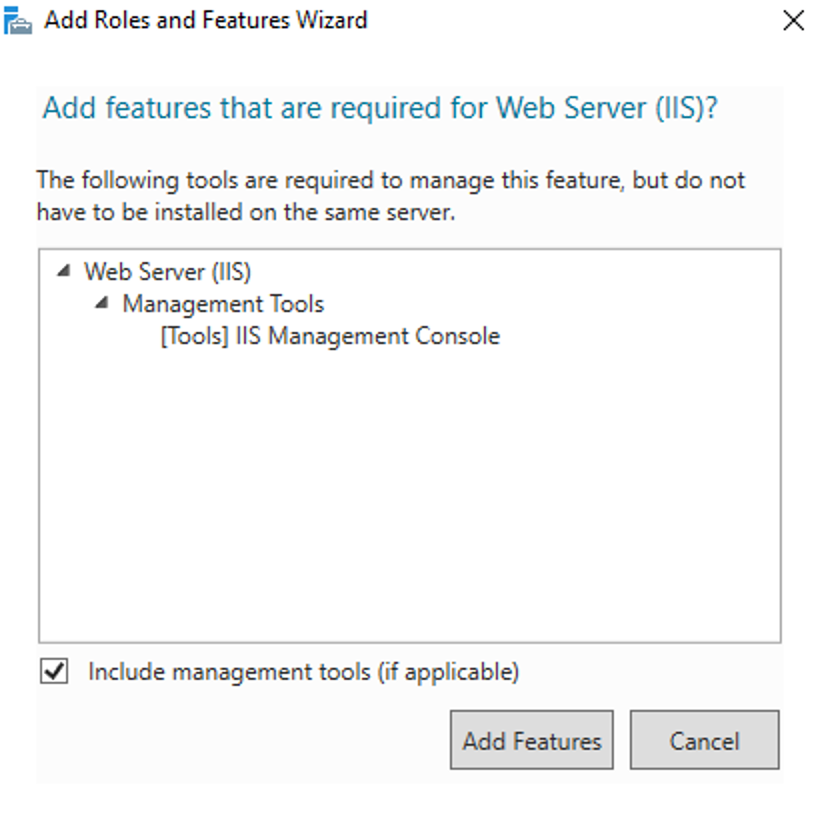
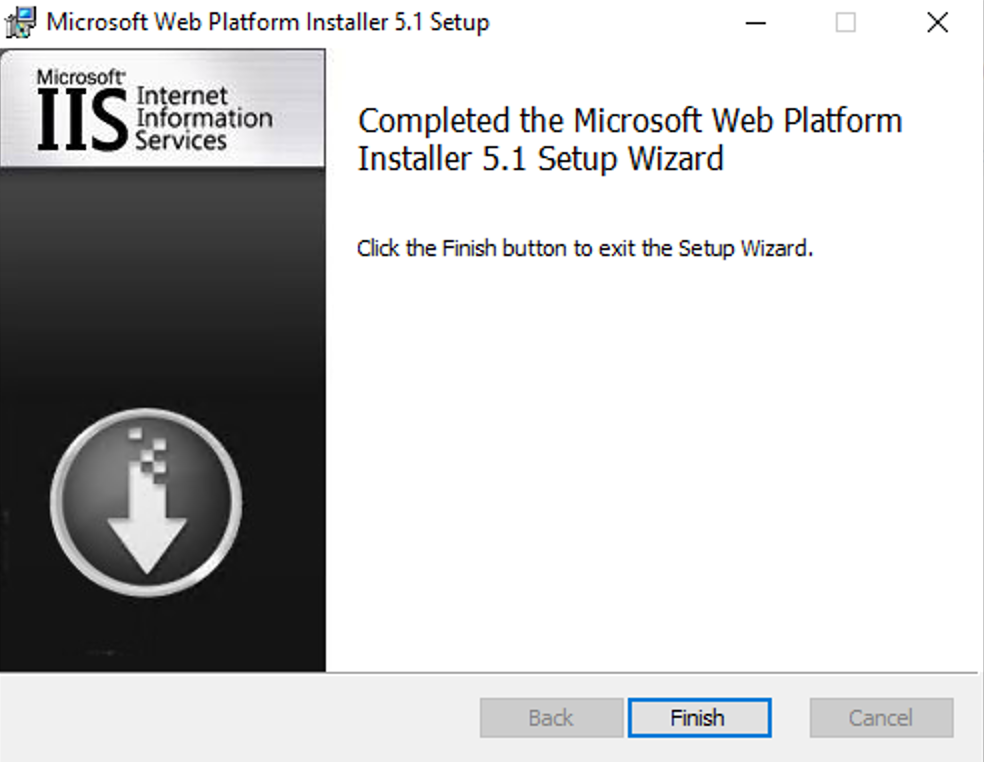
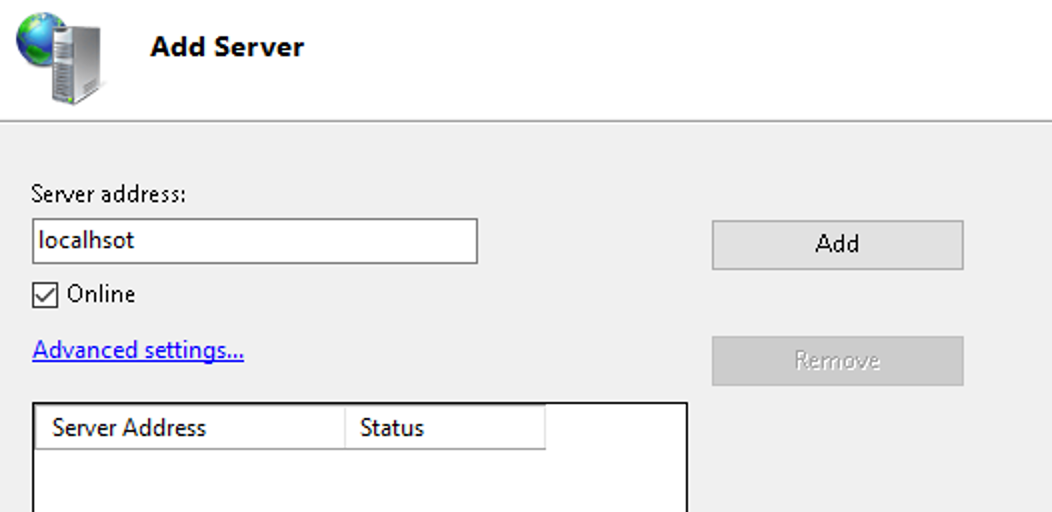
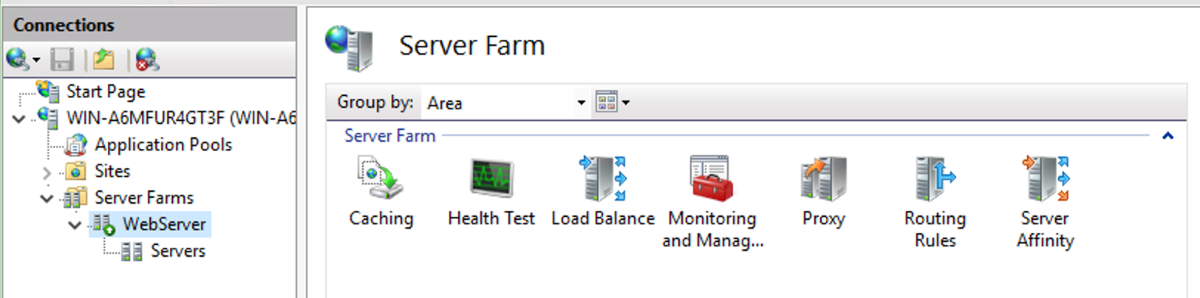
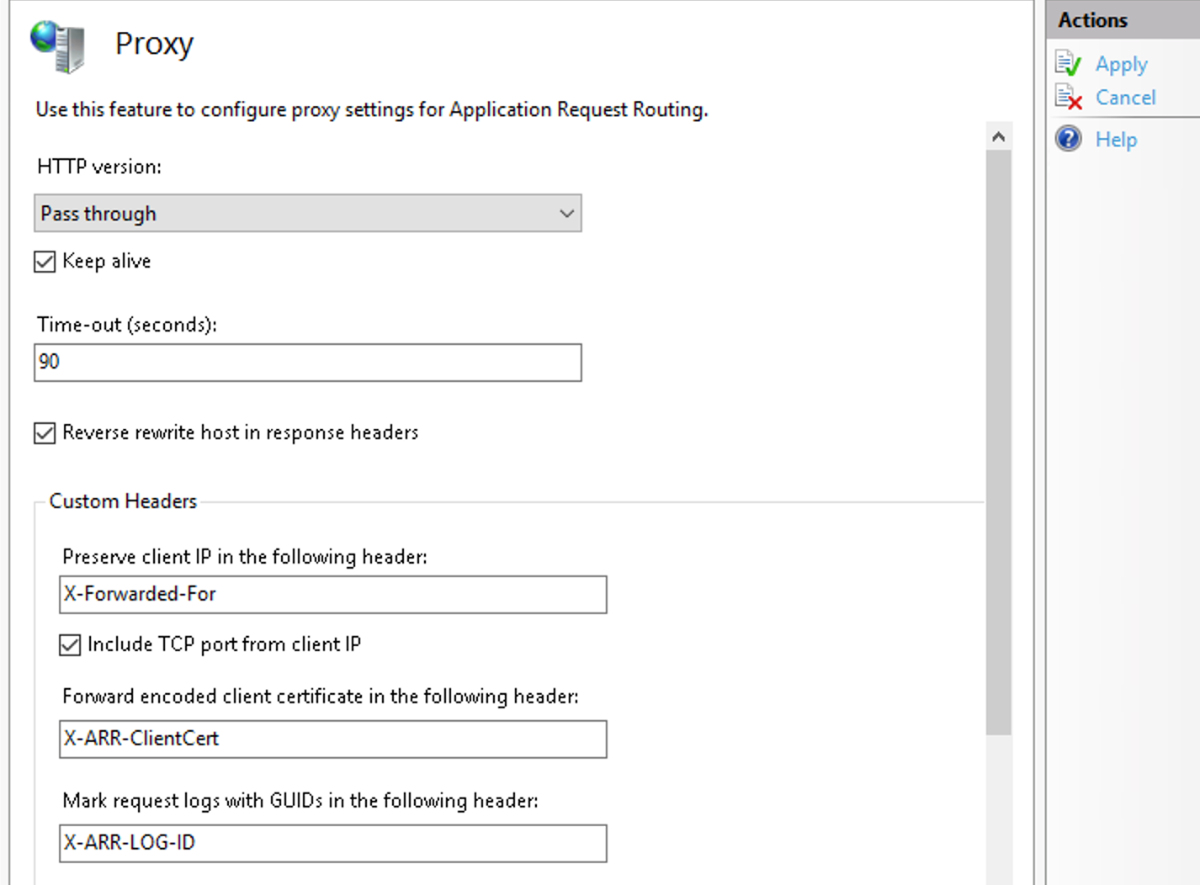
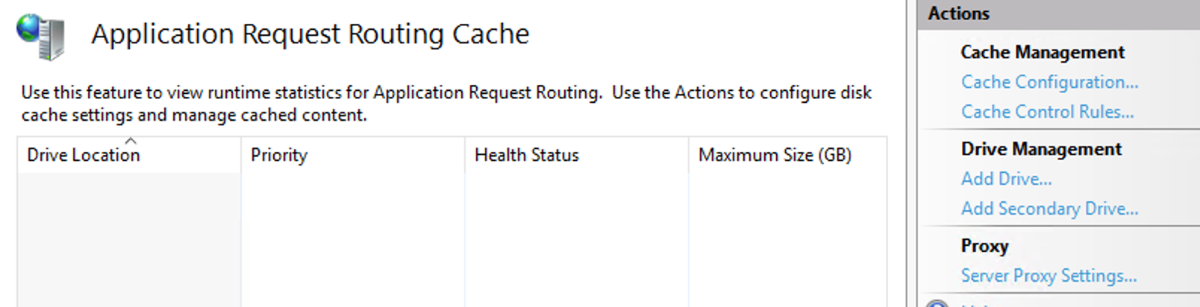
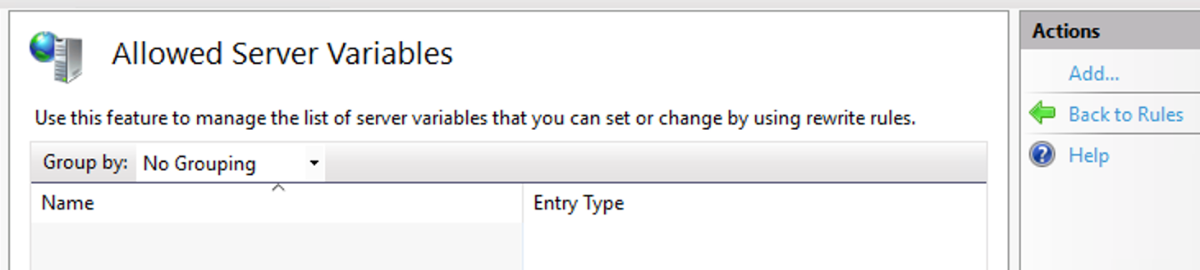
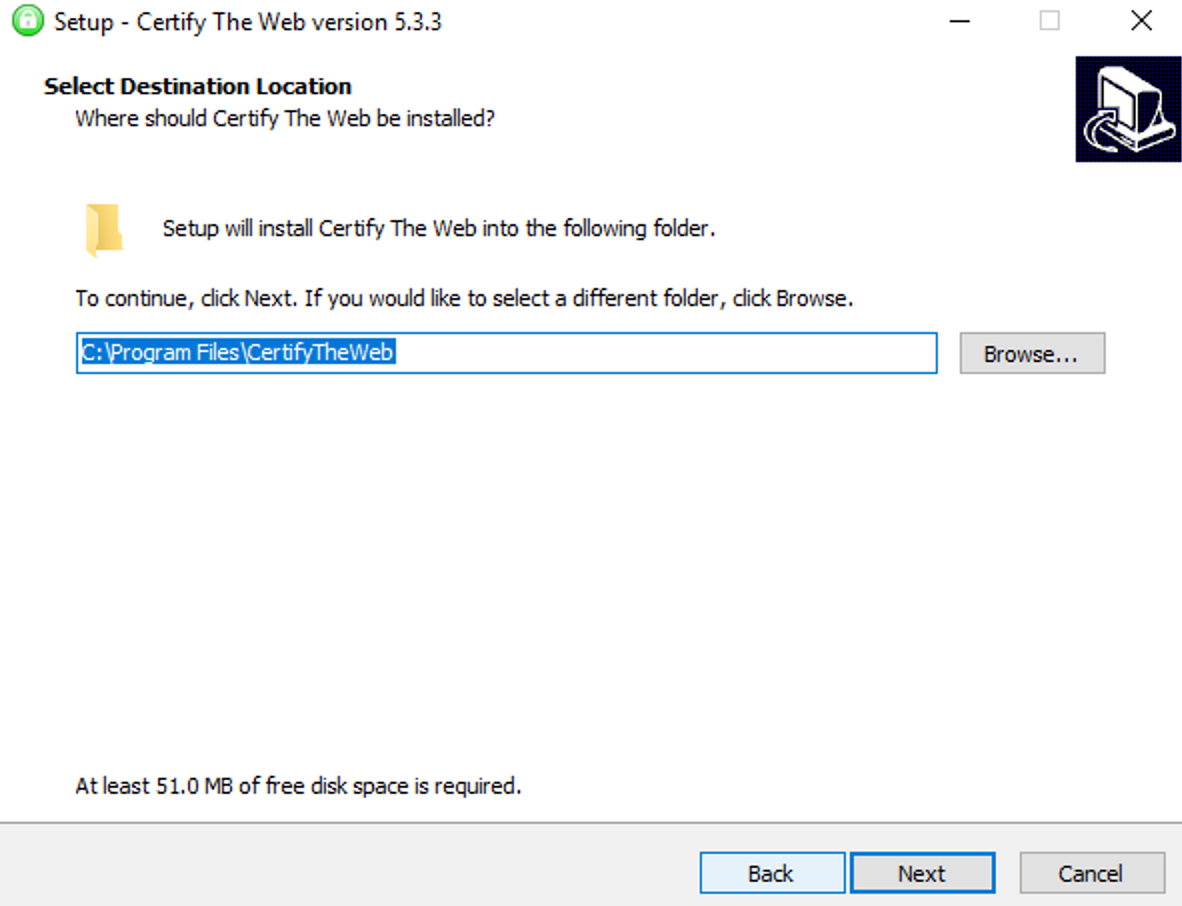
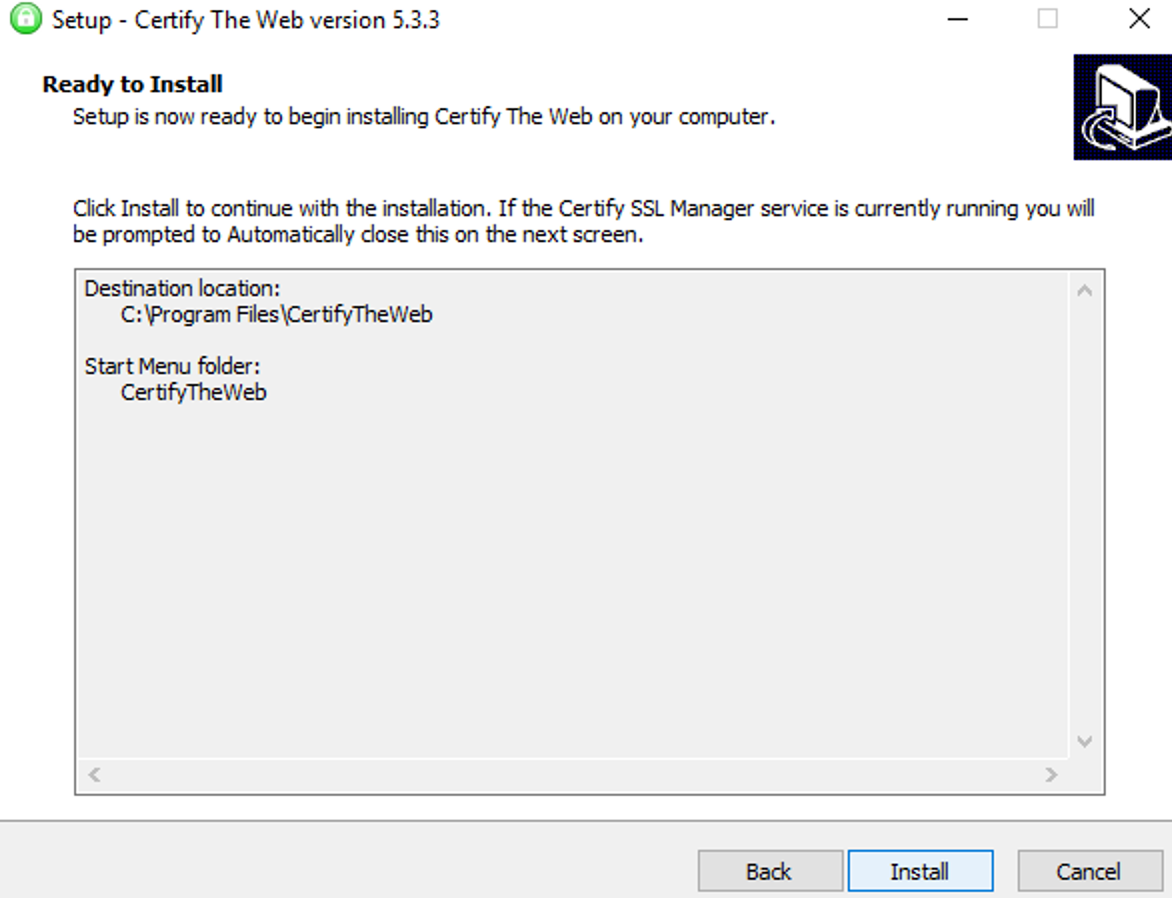
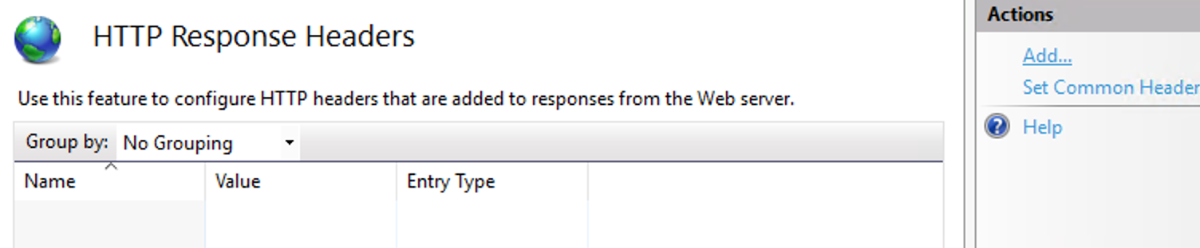
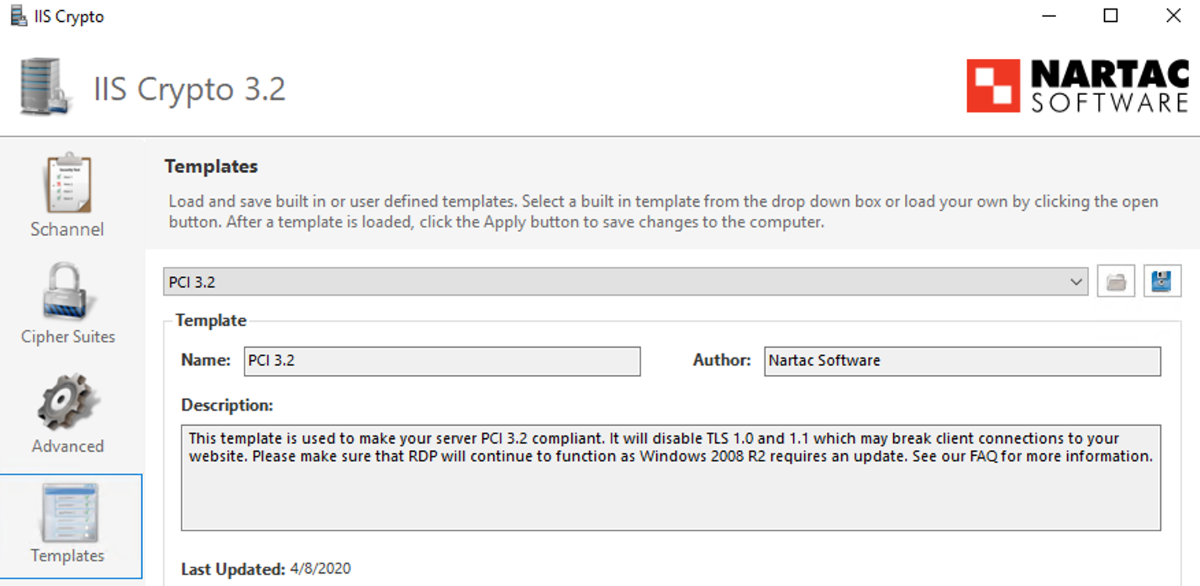
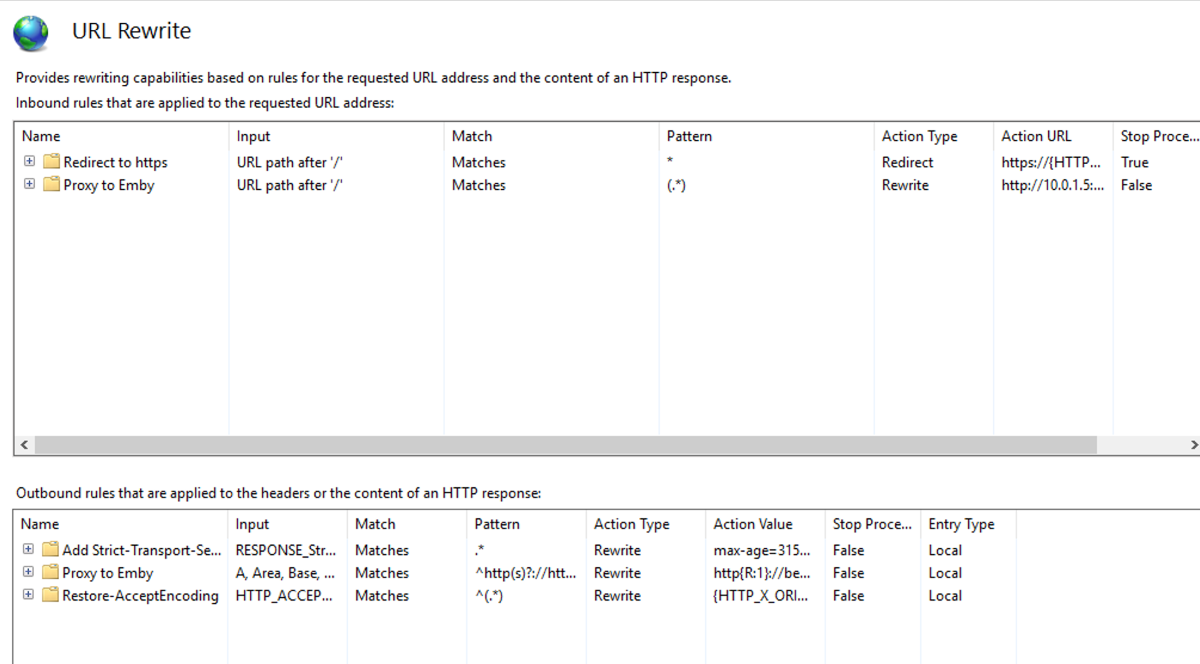
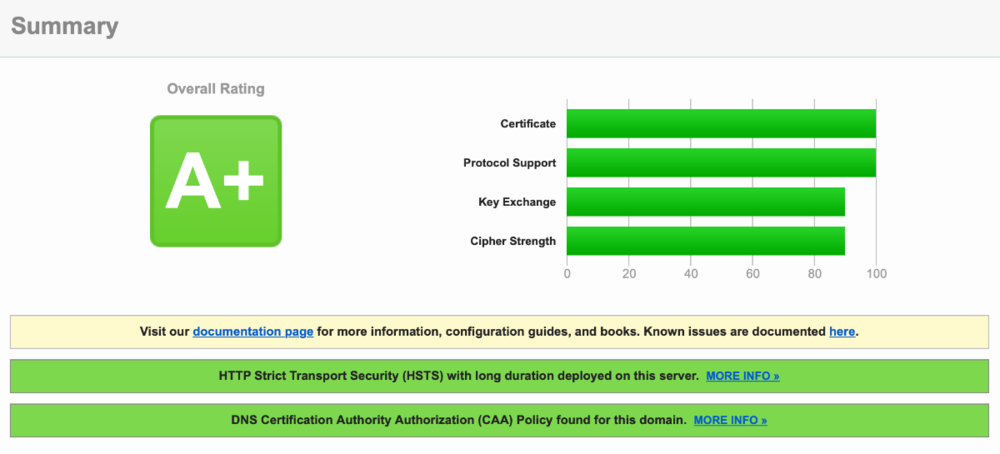
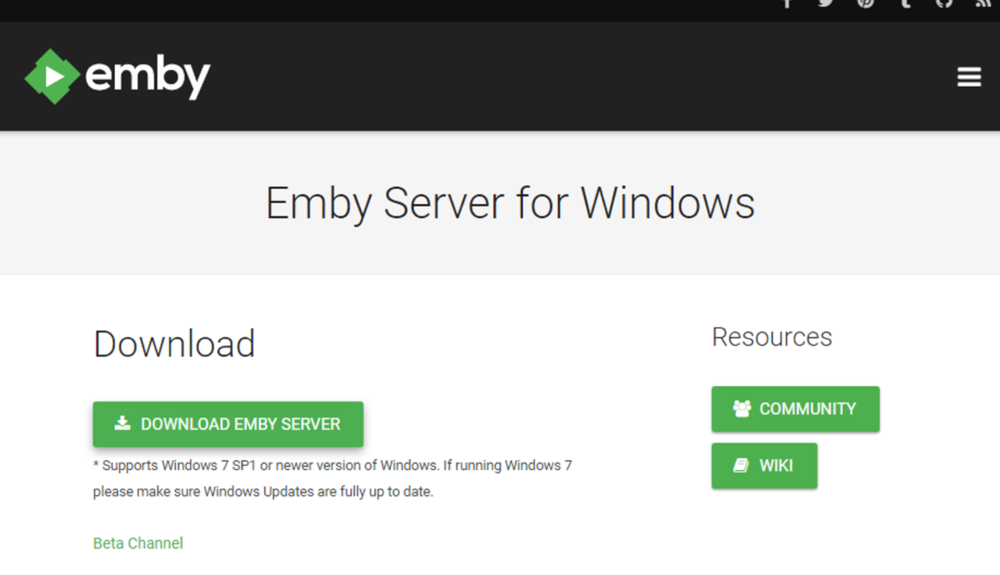
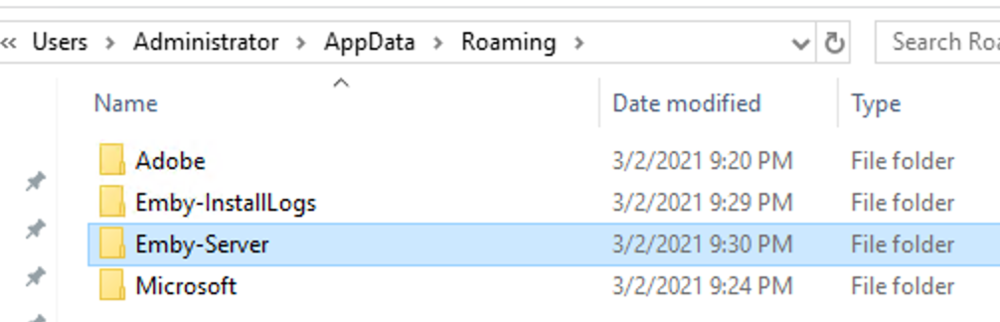
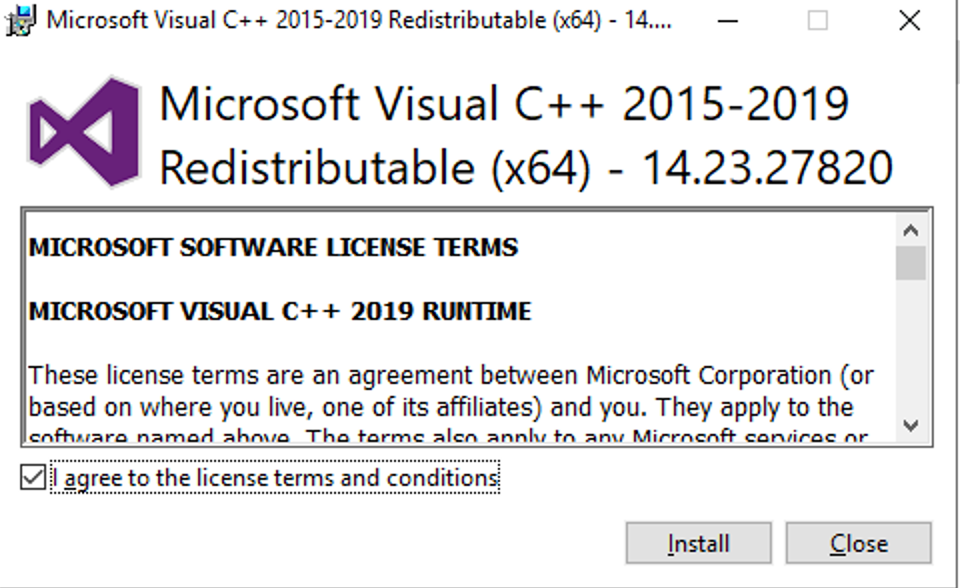
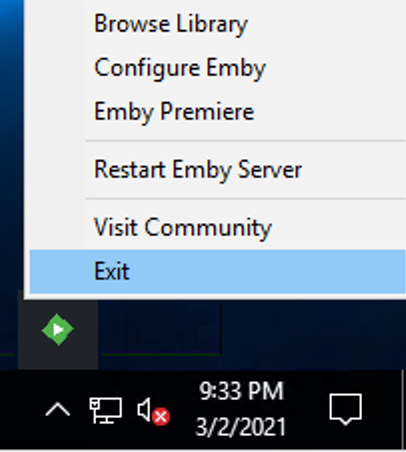
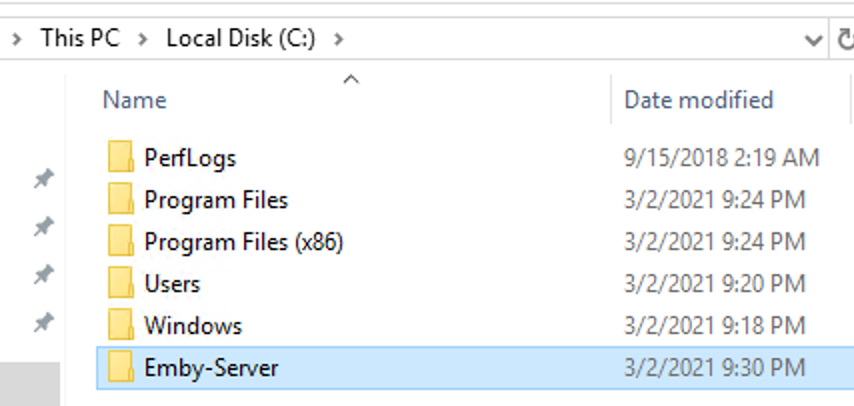
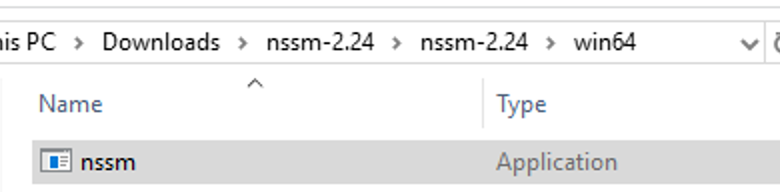
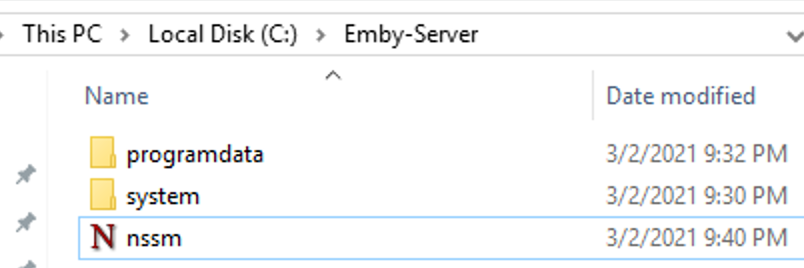
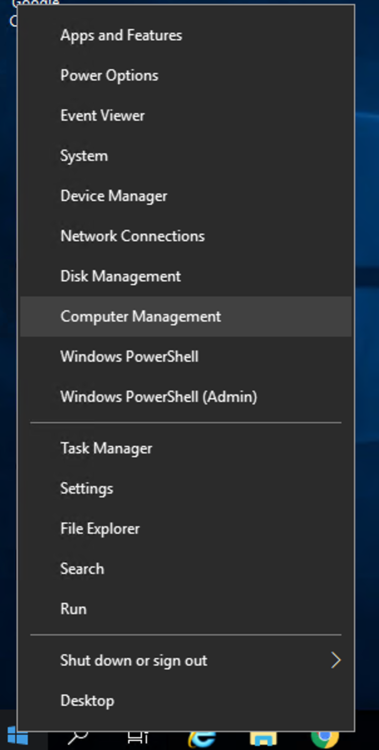
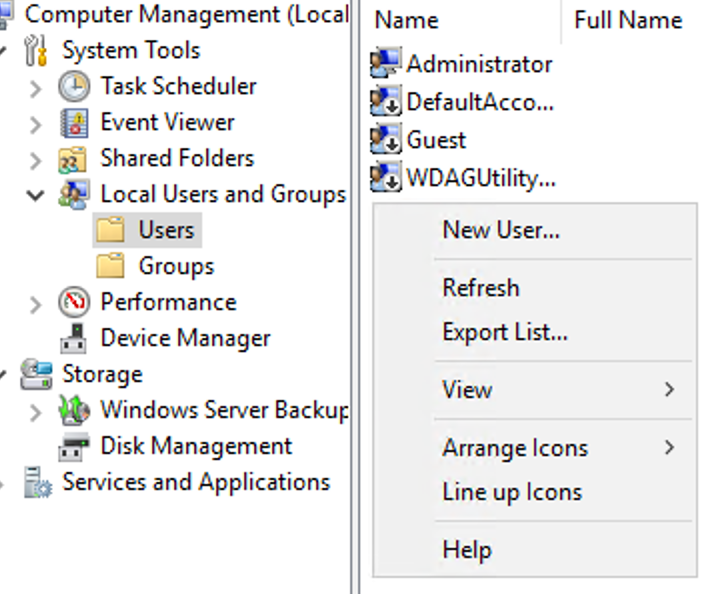
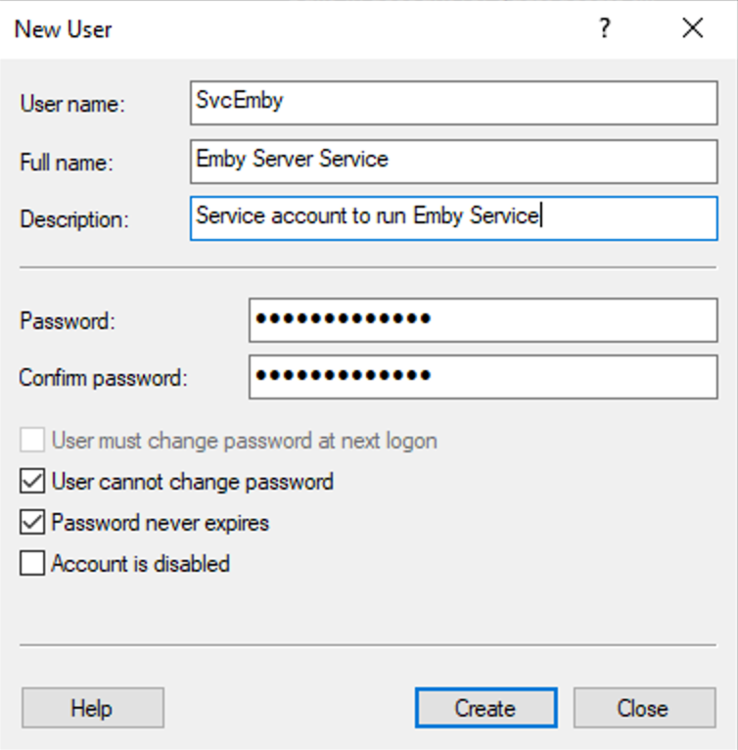
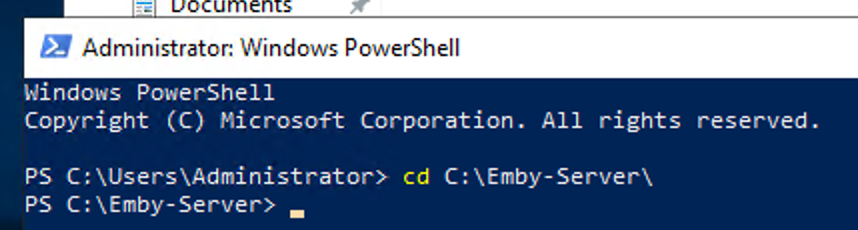
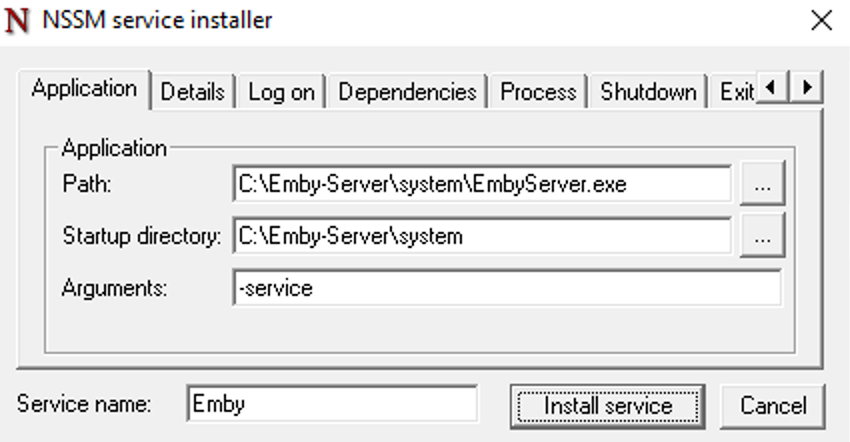
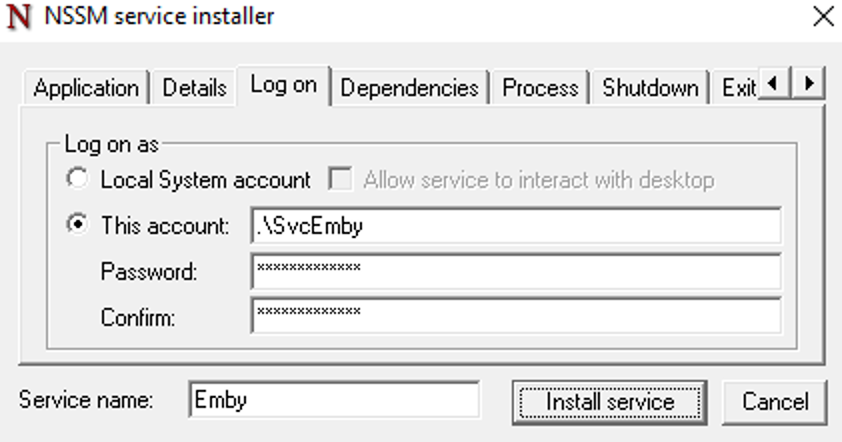
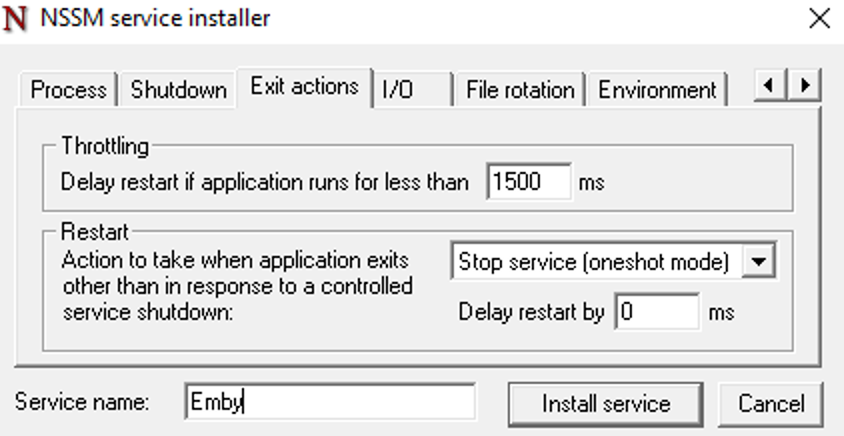
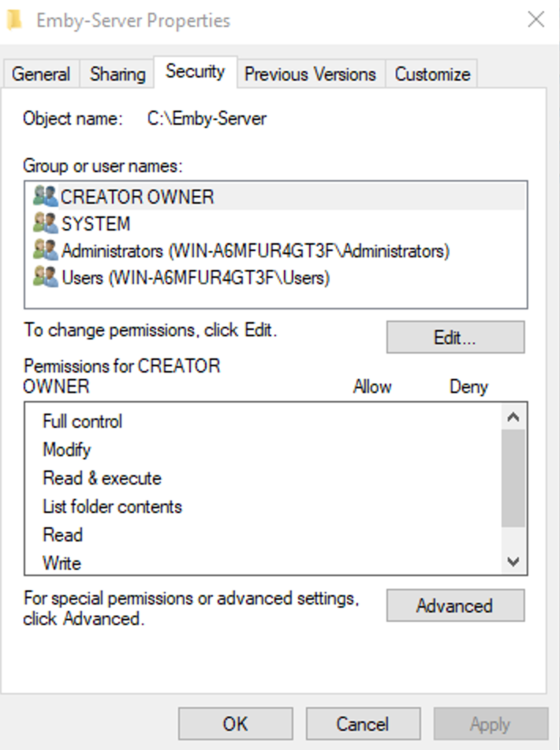
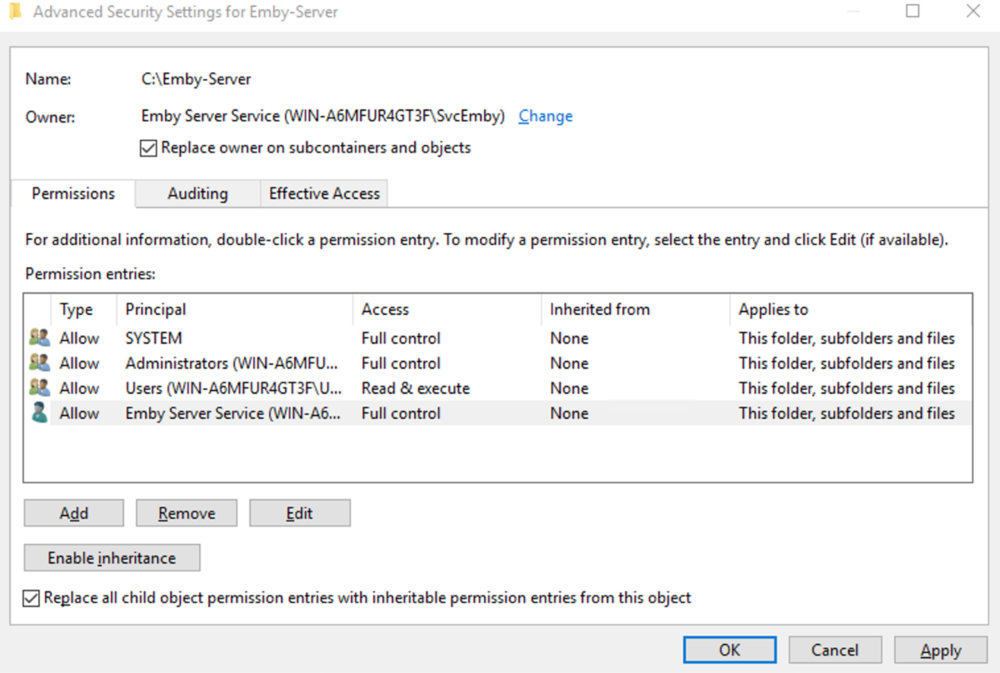
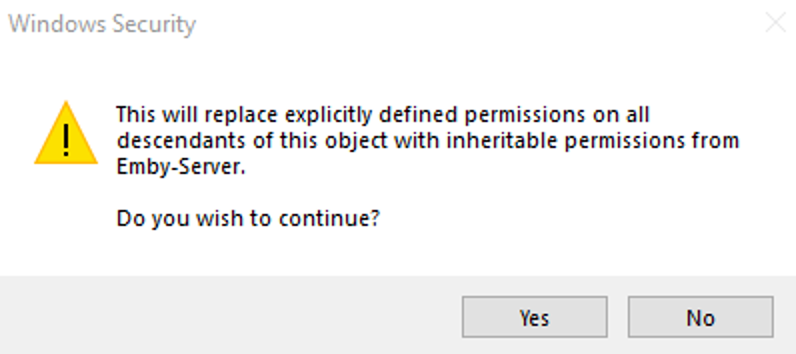
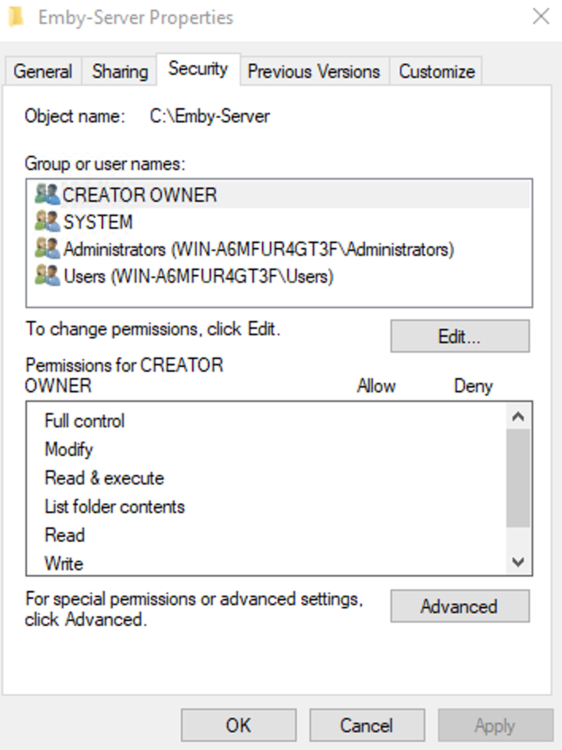
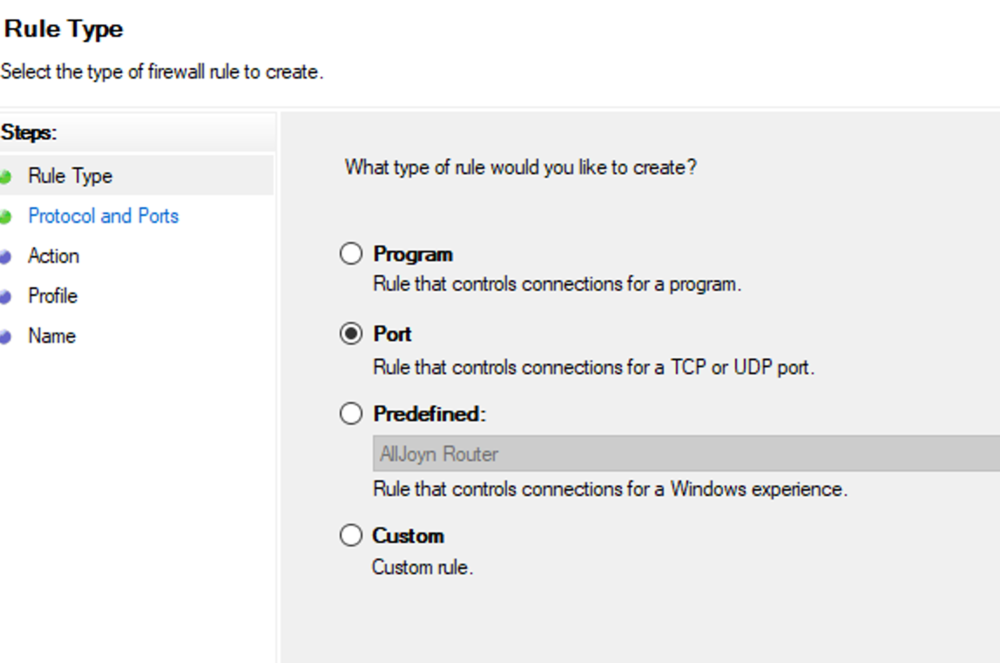
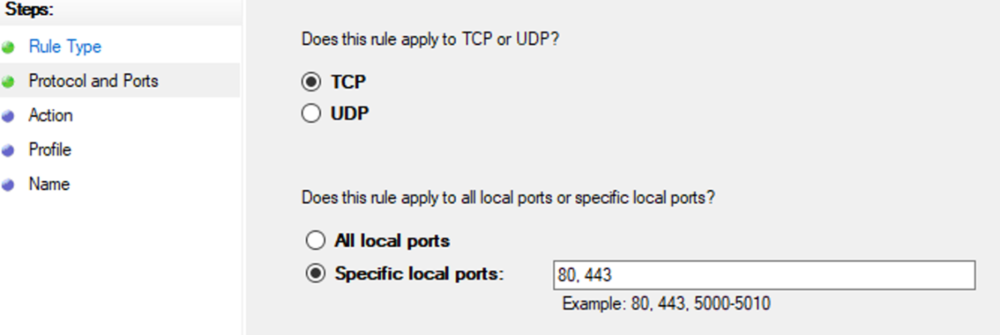
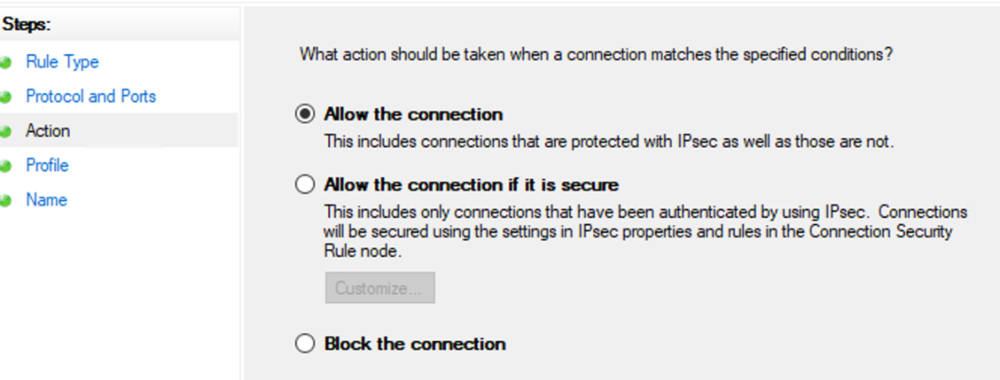
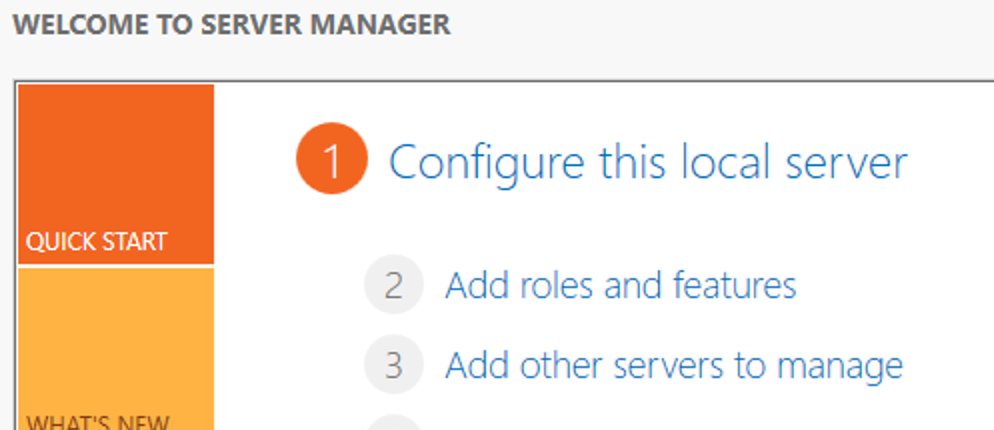
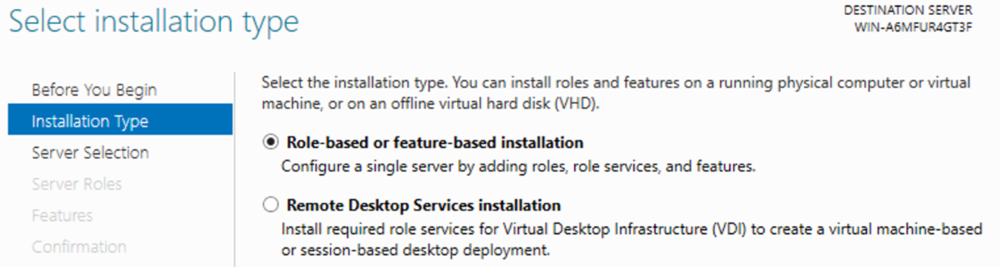
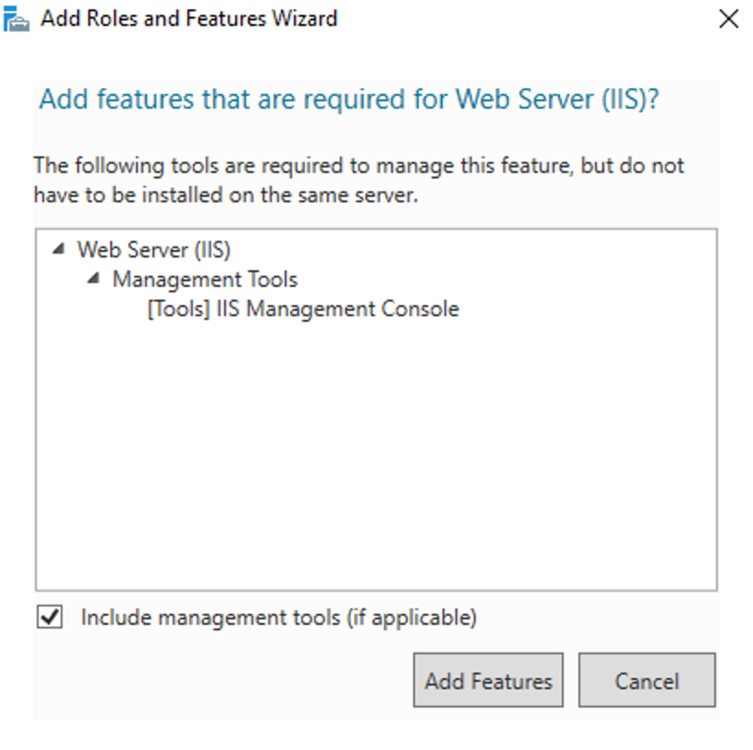
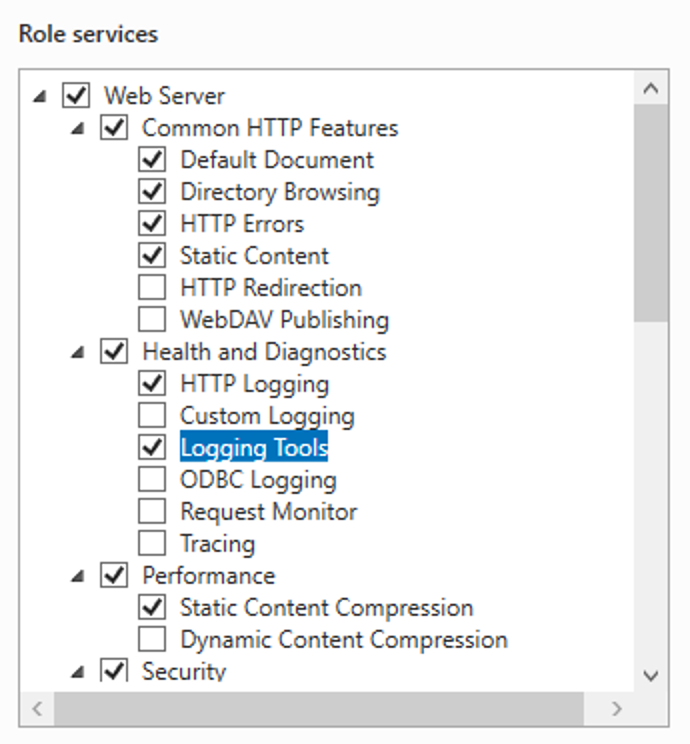
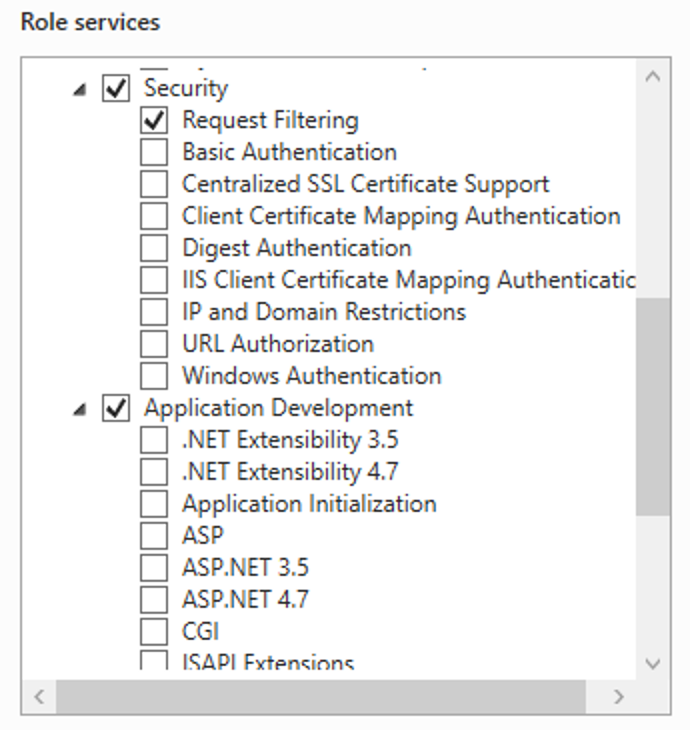
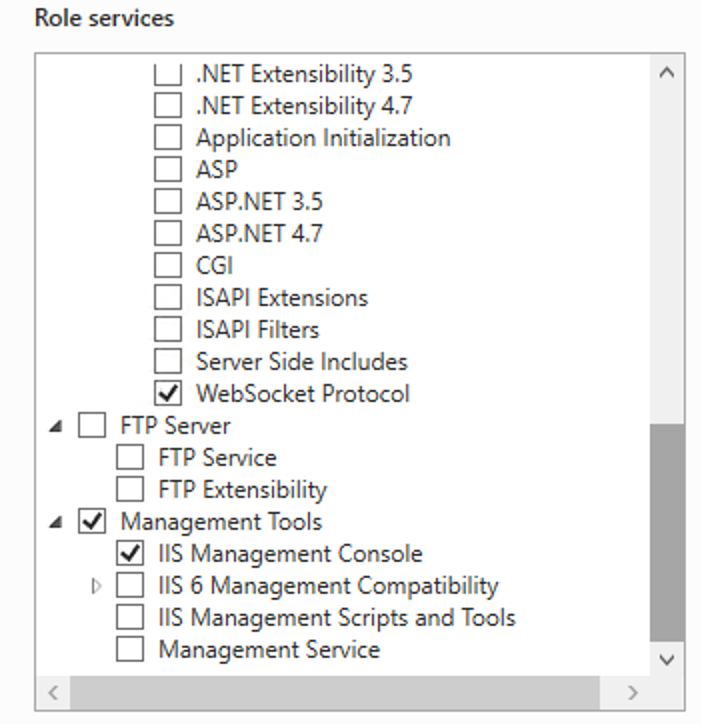
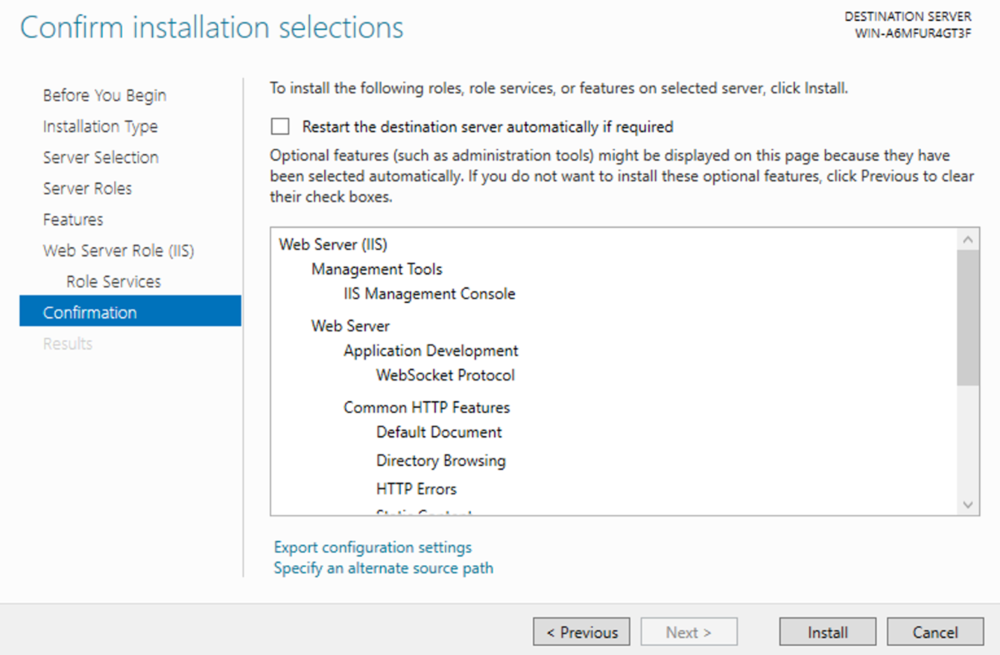
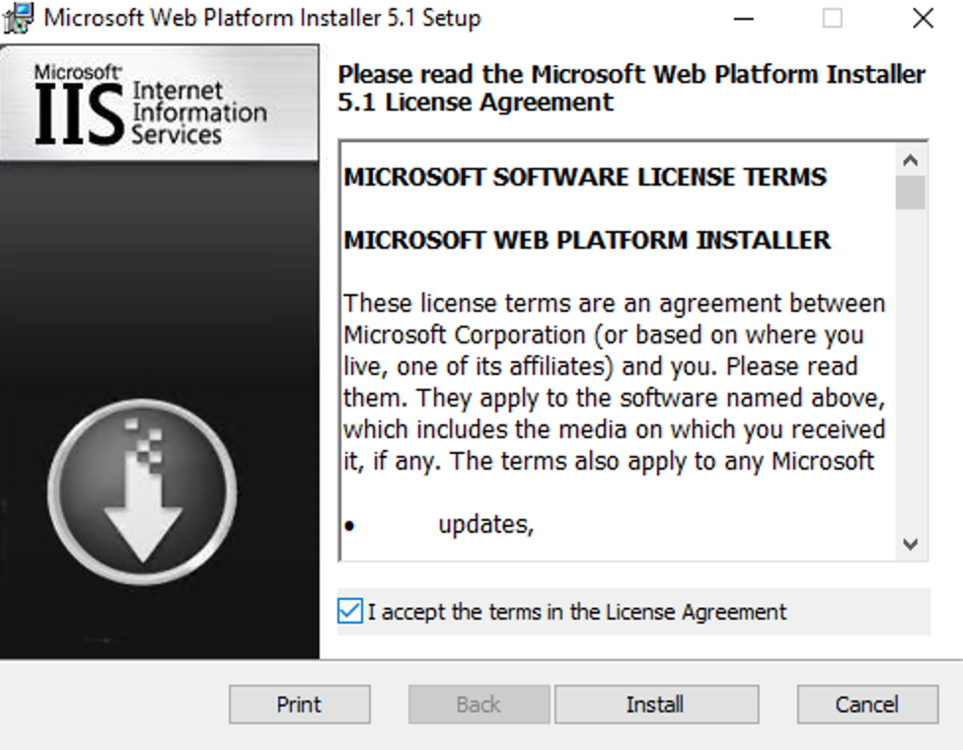
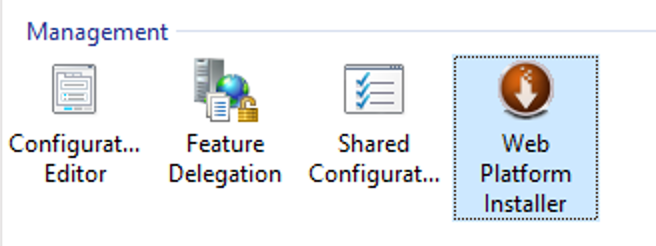
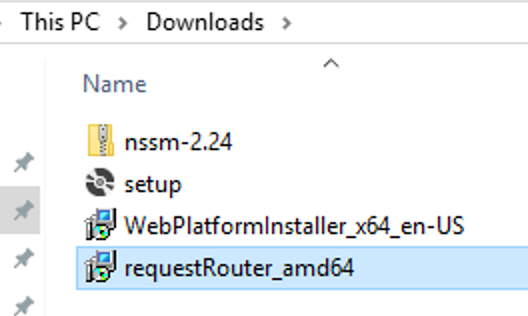
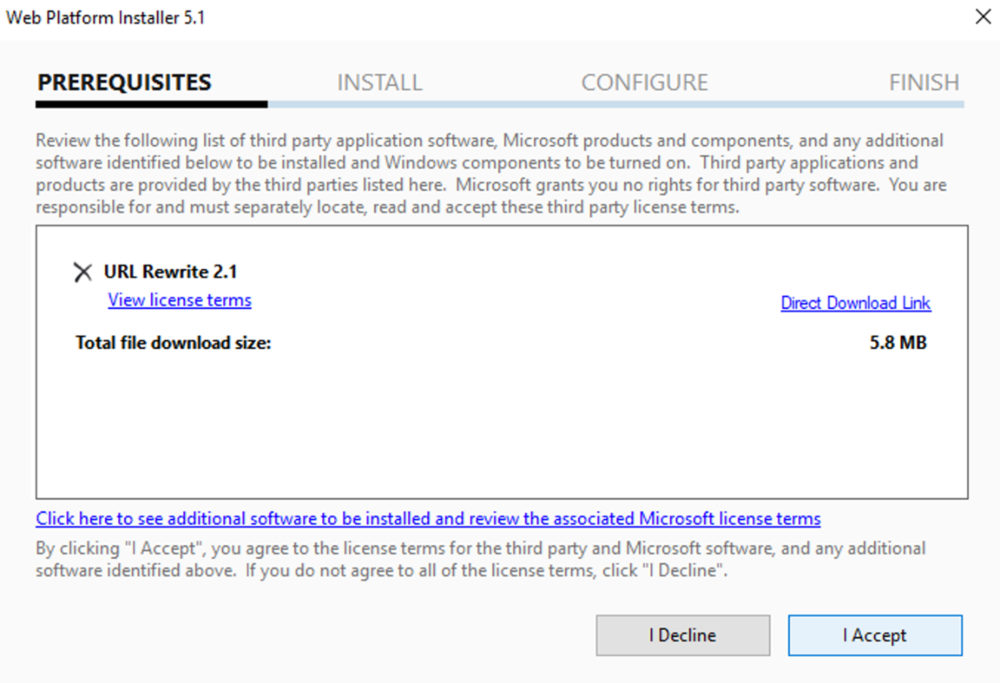
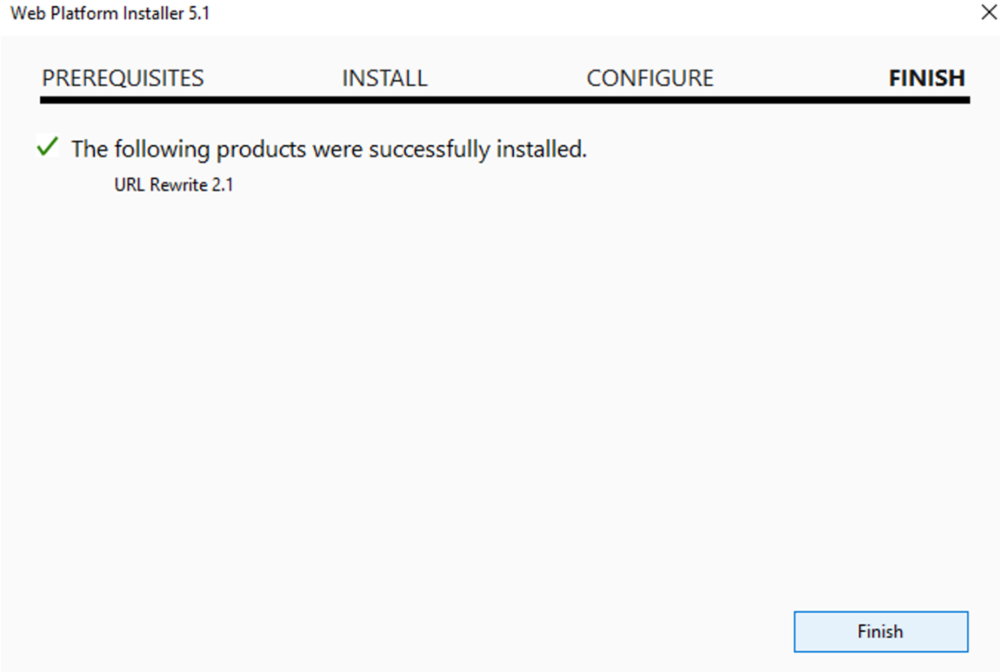
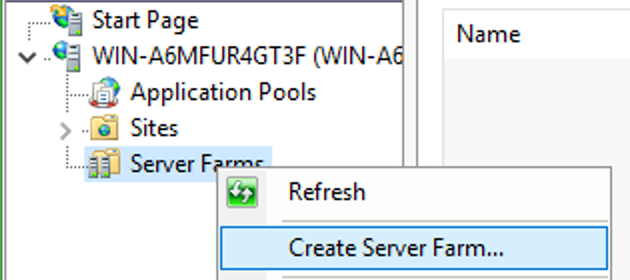
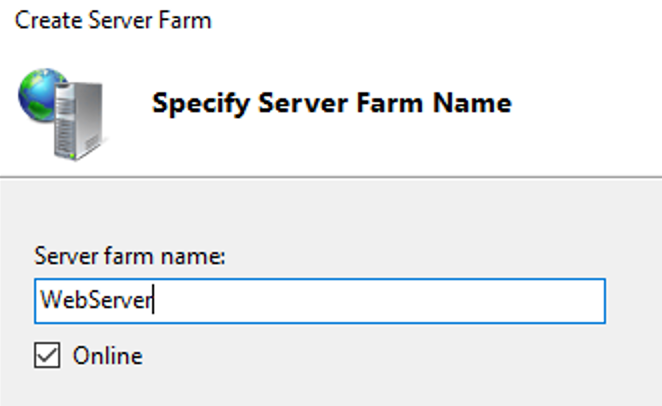
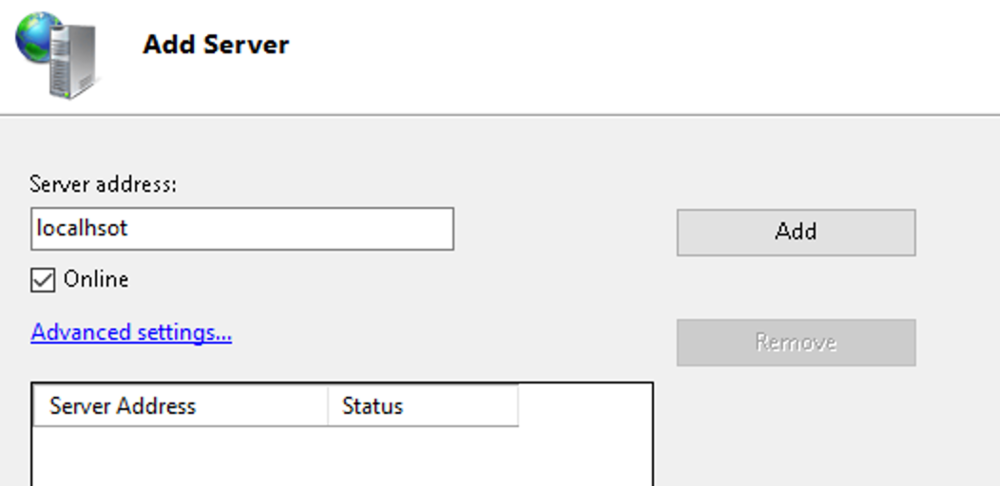
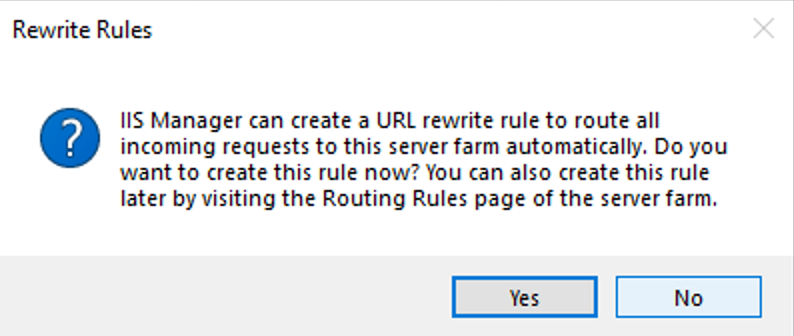
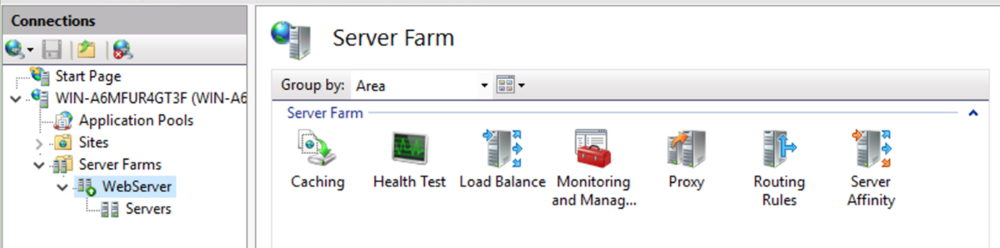
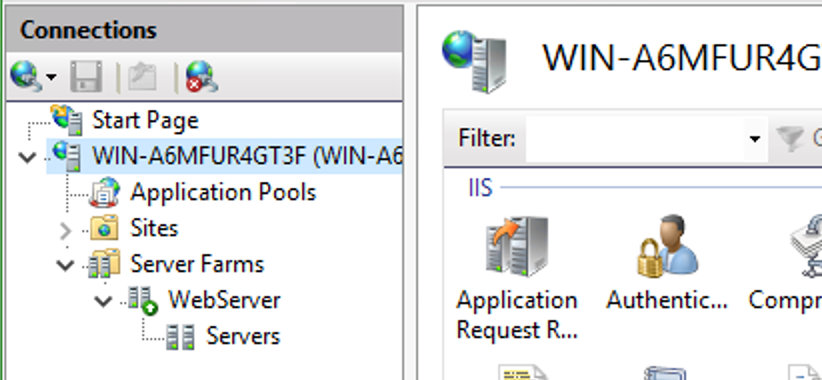
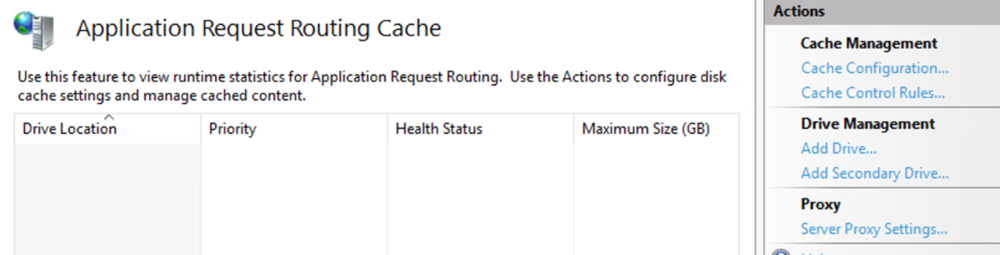
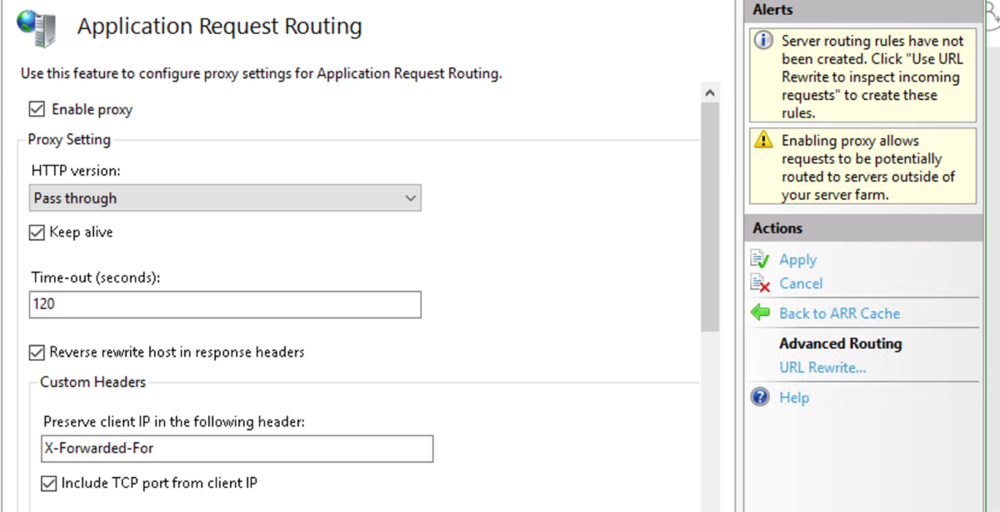
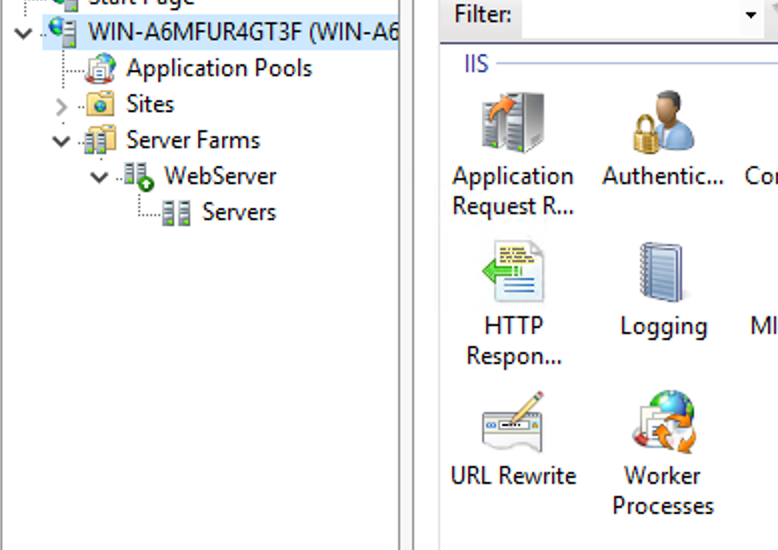
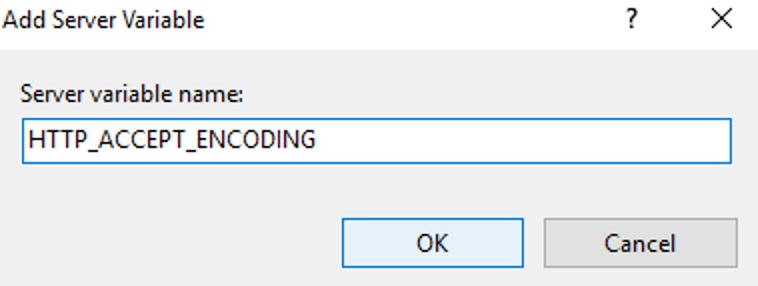
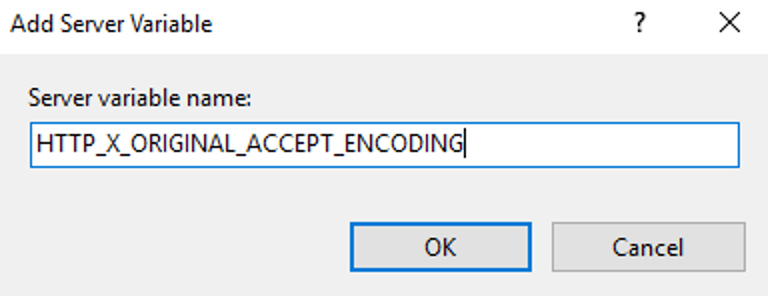
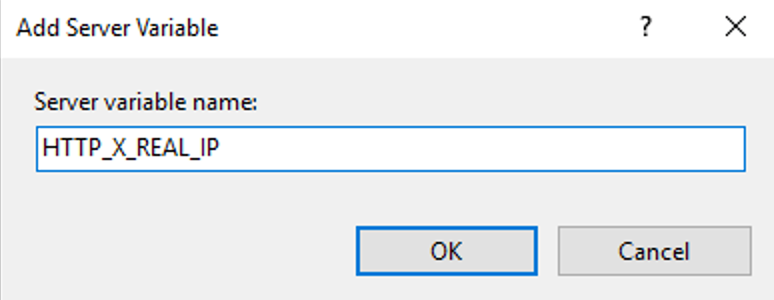
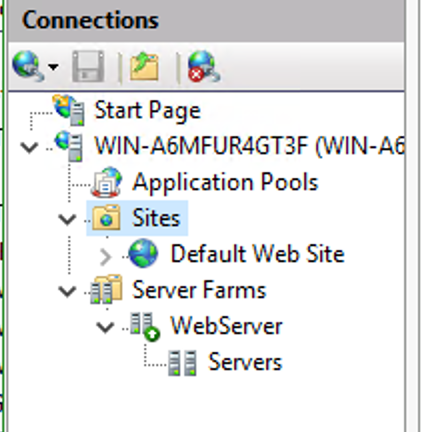
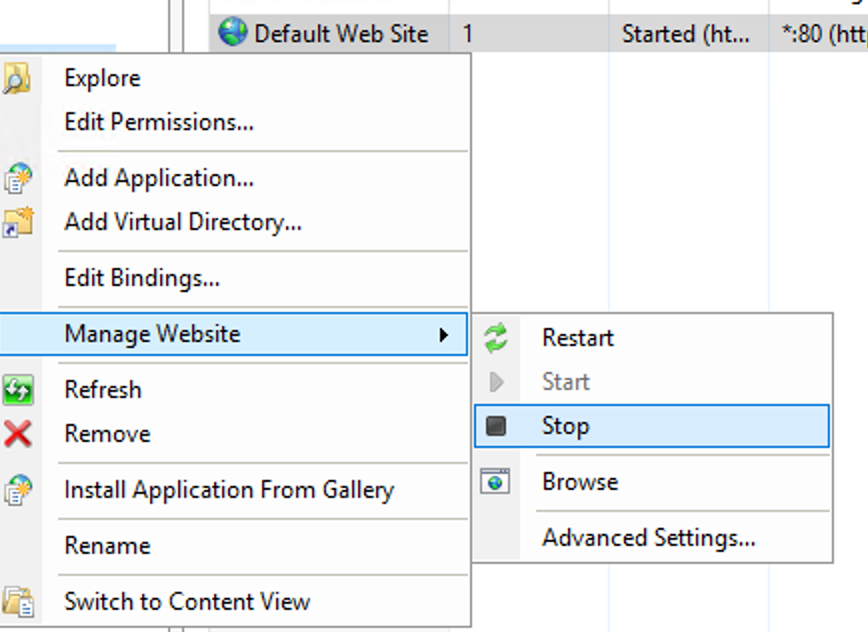
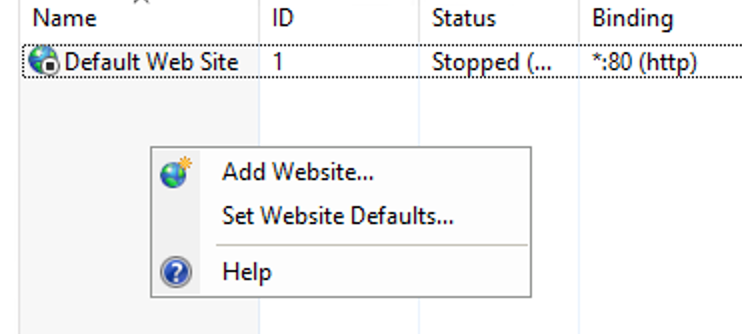
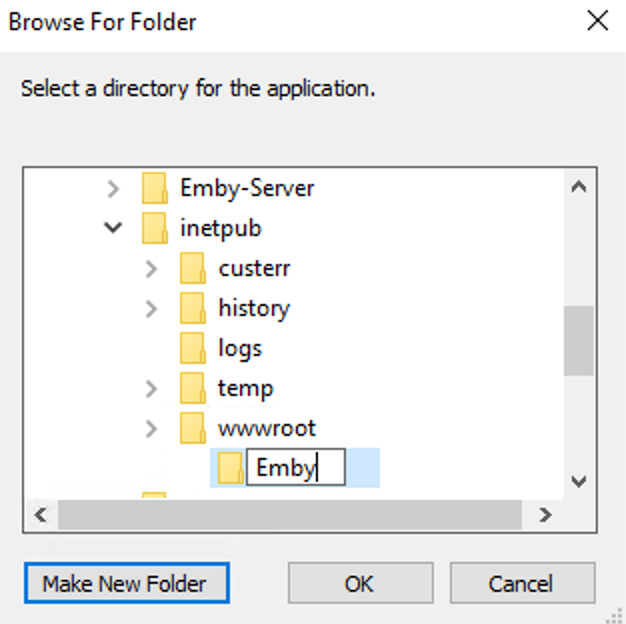
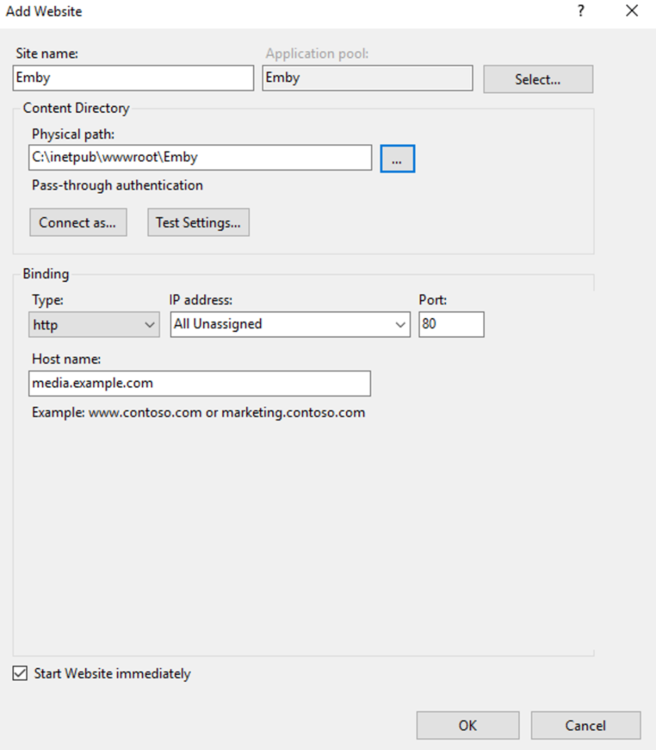
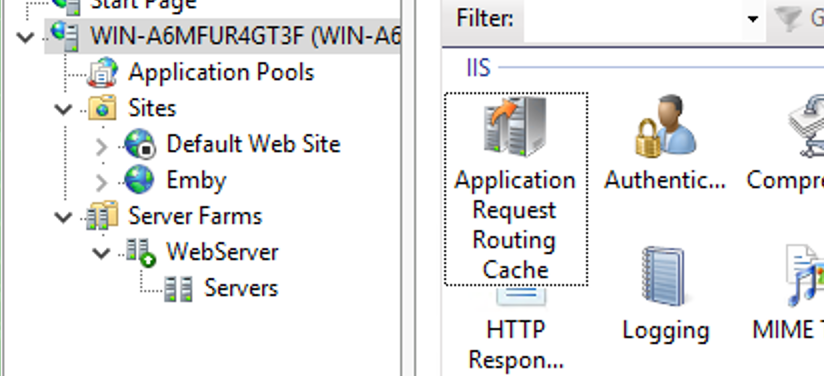
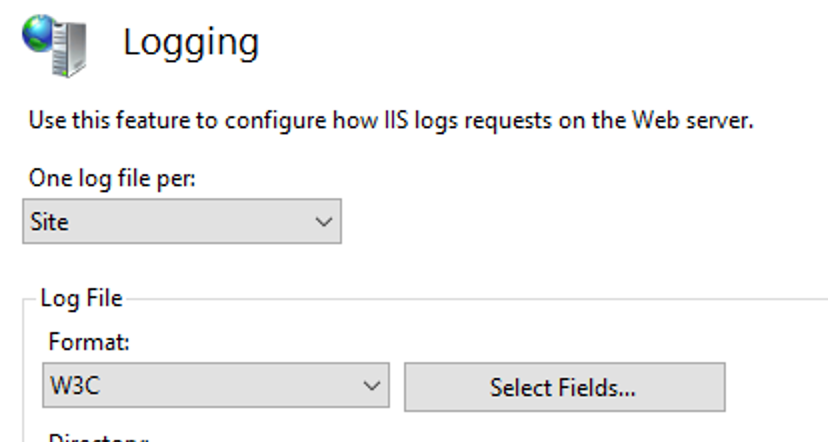
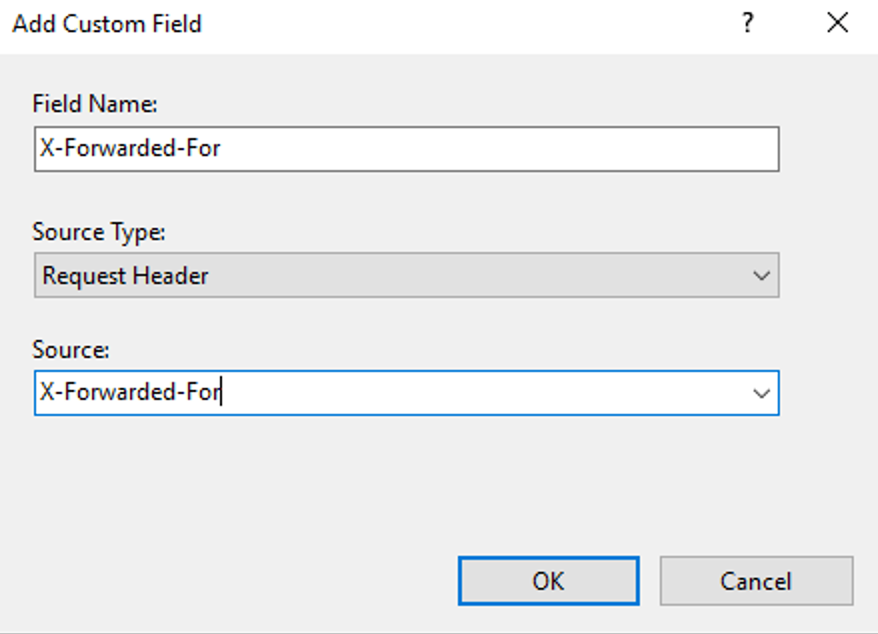
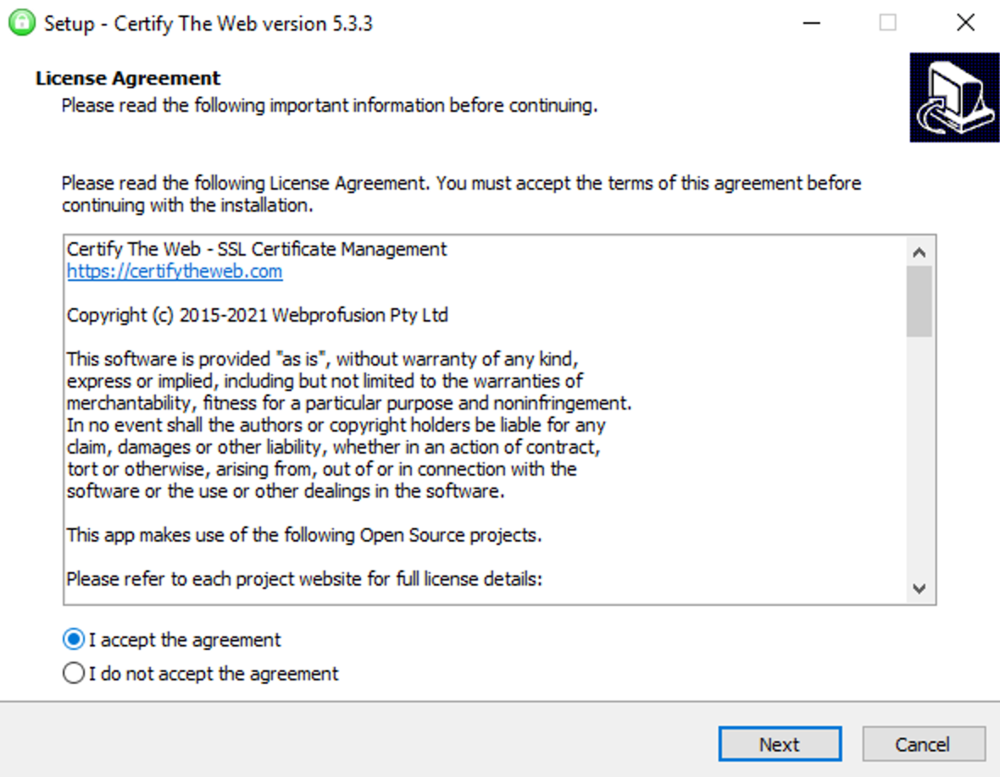
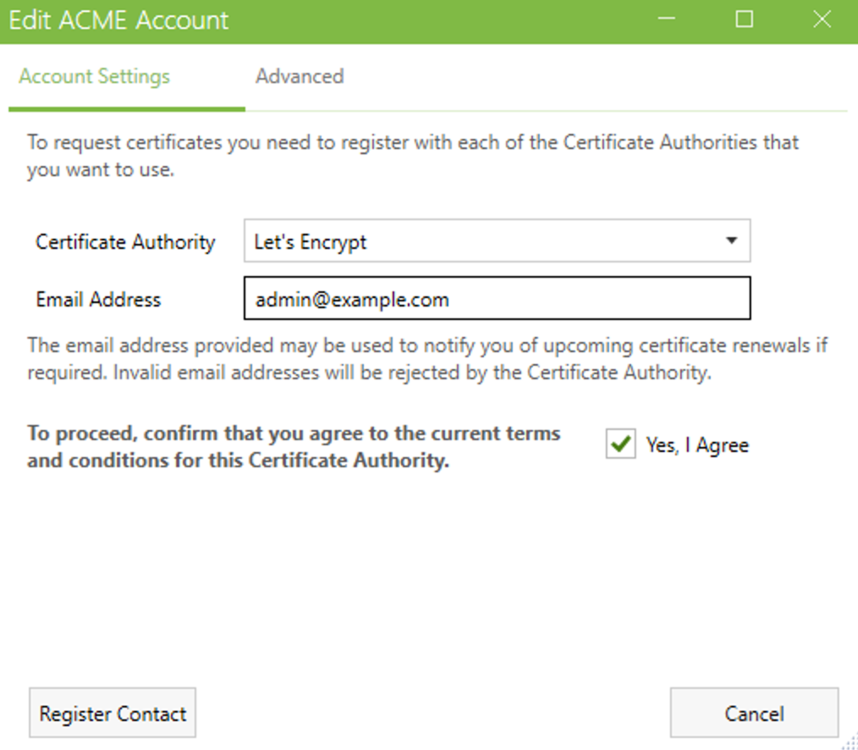
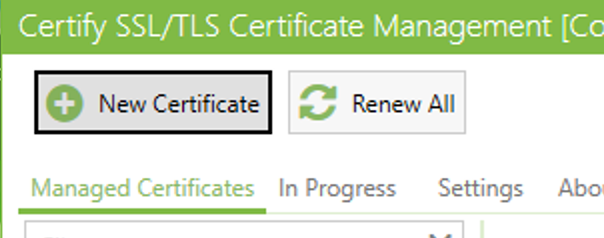
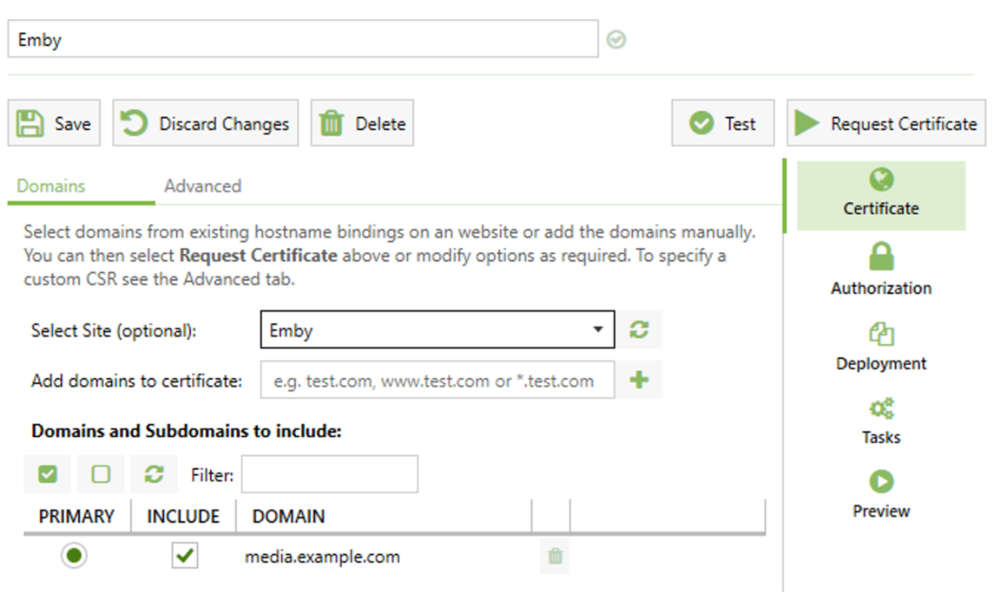
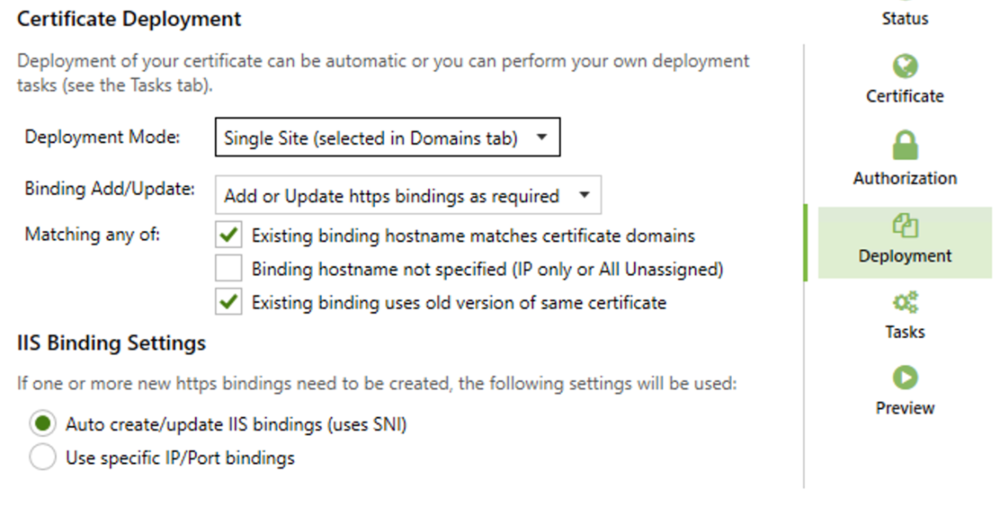
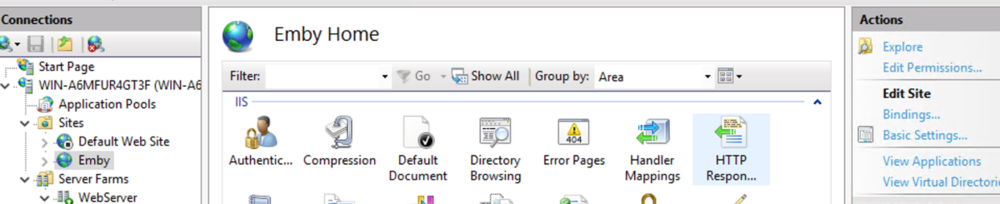
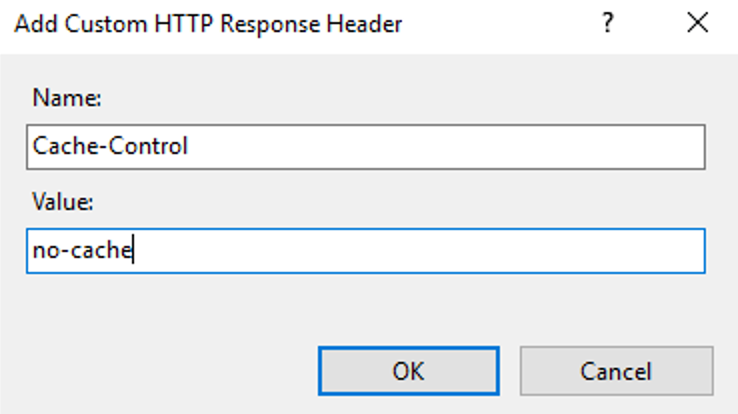
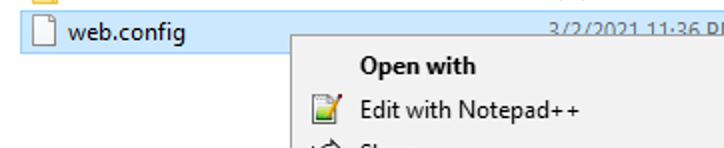
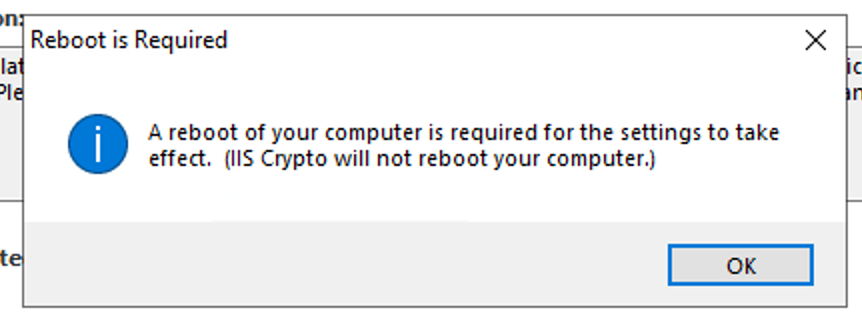
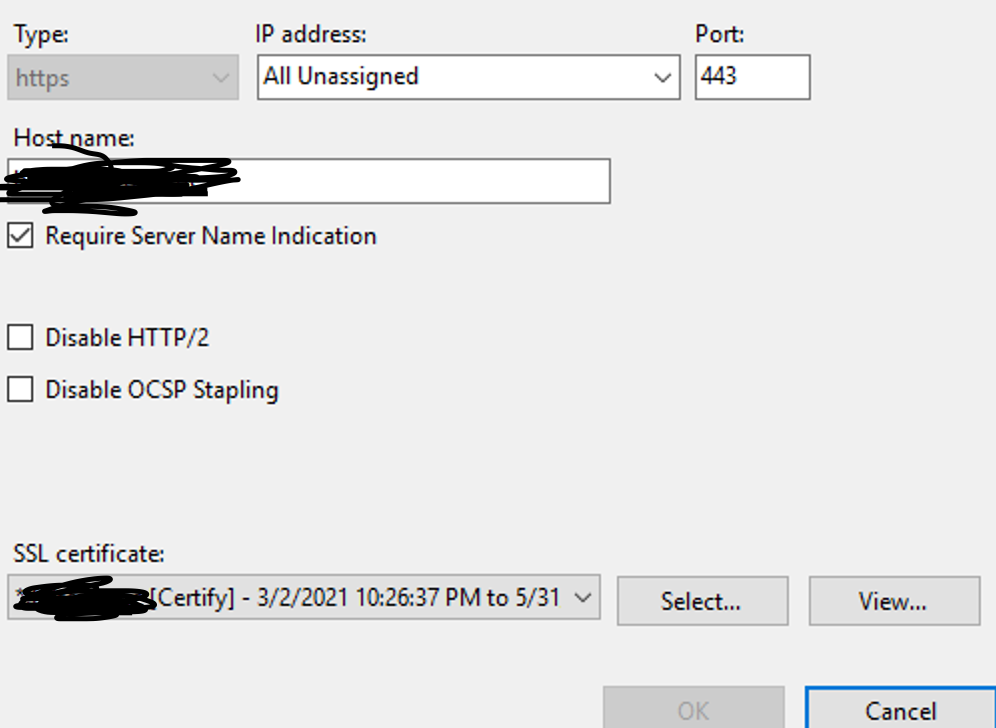
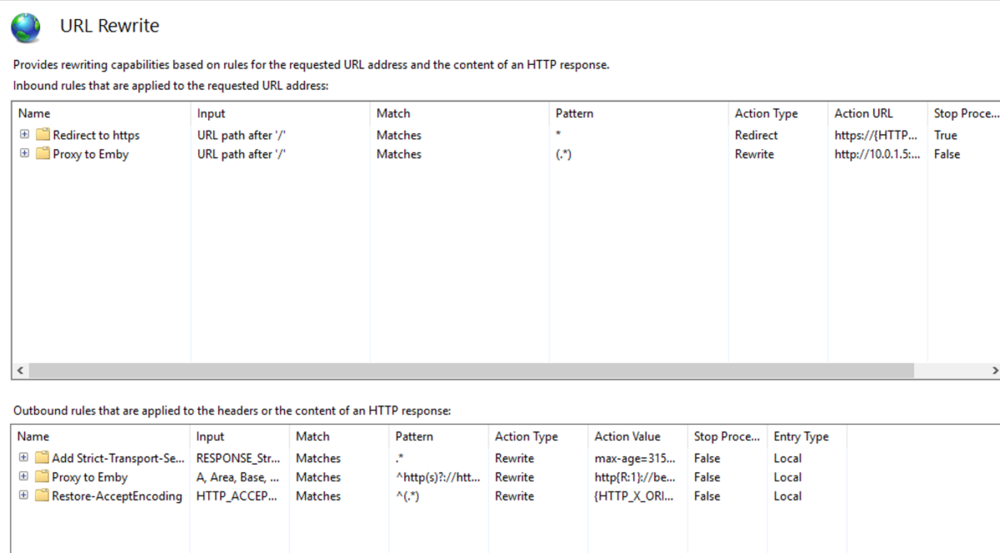
This guide will explain how to setup a Windows Server instance of Emby server with IIS as full transparent reverse proxy with SSL offload and auto-renewing certificates via Lets Encrypt. First, What is IIS? IIS or Internet Information Services is the web server service provided with Windows and Windows server installations. It is industry standard technology and is widely supported and regularly maintained by Microsoft. Second, What is a reverse proxy? A reverse proxy will take requests coming into your server (in this case HTTPS on port 443) and route them to a backend application (in this case Emby Server on port 8096 on the same box or another). Reverse proxies are very useful if you only have 1 public IP and multiple services you would like to run on a single port (443, for example is standard secure web traffic) or multiple servers that need to appear as one. Third, Why do I want a certificate for my site from Lets Encrypt? Well, most sites now days are secure (read they encrypt your traffic to prevent people from seeing your data), browsers these days flag sites that are not using properly signed certificate chains or run on insecure ports. If you use a self signed certificate in Emby, you may have difficulty getting things like the iOS app or Roku app to work properly outside your home. (Not sure about the rest of you, but Emby on the kid’s iPad is a life saver for long car rides). Let’s Encrypt provides free SSL certificates that are signed by certificate authorities that will be recognized on all devices and platforms. I will be using Windows Server 2019 with IIS 10 and AAR 3. All of this should work with Windows Server 2012R2 and Windows Server 2016 as well as Windows 10, however there may be some differences. You can use either stable or beta version of Emby Server, however in this guide we will use the stable version. At the time of writing, this guide will get you a full A+ rating from SSLlabs.com security test. (For comparison purposes, Facebook’s rating is a B.) In this guide we will: Install Emby Server Move Emby Server Installation to a non-user-locked location Setup a service user to run Emby Server as Configure Emby Server to run as a service Configure Windows Firewall Install IIS Install AAR Install IIS Rewrite module Configure AAR Configure IIS as a reverse proxy for Emby Configure SSL cypher suites for the server Install the Certify the Web client. Configure Certify the Web for auto-renewing SSL certificate for your domain Note: To be externally accessible, you will need to configure your route/modem to port forward 80 and 443 to your server. Pre-reqs/Assumptions: A physical server or VM running Windows Server An Internet Connection A DynDNS/No-IP URL (or similar routable dns name pointed at your router’s public IP) You have port forwarded ports 80 and 443 through your router to the machine you will use as a reverse proxy (in this guide we will use the same box for the reverse proxy and Emby server, but these can be run on different hosts). You have installed Notepad++ on the machine you will be setting up. Install Emby Server Download Emby Server Run the Installer Click Run when prompted If prompted by smart screen, click run anyway If prompted to install Visual C++ runtime, click install It will install to default location of %APPDATA%\Emby-Server. Move Emby Server to Non-User Locked Location Ensure that Emby Server is not running (right click icon in system tray if present and click Exit) Navigate to default location of %APPDATA% (%userprofille%\appdata\roaming) Right click the folder and click "cut" Navigate to C:\ (or root of the drive you wish to have Emby run from) Right click in the whitespace and paste. (if prompted to provide administrator permission, approve) Create a Service Account to run Emby as Note: Instructions show how to do this using local users and computers, you can also do this with Active Directory Users and Computers if your server is running that role. Right click on the start button (Windows flag) on the left side of the task bar Click Computer Management Expand Local Users and Groups on the left side Click Users Right click the whitespace and click new user Complete the new user dialog as shown (make sure you save whatever password you use as you will need it later, ProTip: don't re-use passwords) Click create Click close Close the computer management window Setup NSSM NSSM (Non-Sucking Service Manager) is needed to run Emby Server as a service as Emby Server does not include the nessicary components to run as a Windows service by default. Download here: https://nssm.cc/download Double click downloaded zip to open it in windows explorer Navigate to /win64 folder inside zip Copy/extract 64 bit version of the file to C:\Emby-Server Setup Folder Permissions Navigate to C:\ Right click the Emby-Server folder Click Properties Click Security tab Click Advanced Click Disable Inheritance Click Convert to Explicit Select CREATOR OWNER Click Remove Select Users (special) Click Remove Click Add Enter SvcEmby in the dialog Click OK Click Full Control Click OK Click Change next to owner at the top of the box Type SvcEmby in the dialog Click OK Check the Replace owner check box Check the Replace permissions checkbox Verify the dialog window looks similar to this (computer name will be different) Click OK When prompted if you want to replace permissions click Yes Verify security tab looks like this Click OK Setup Emby as a Service using NSSM Right click the start button on the left side of the task bar Click Windows Powershell (Admin) Type: "cd C:\Emby-Server" and press enter Type ".\nssm.exe install Emby" and press enter The install service dialog will launch, fill out as follows: Application Tab Details Tab Logon Tab (note, if you are using active directory it should be: YOURDOMAIN\SvcEmby) Exit Actions Tab Click Install Service Click OK Config ure Windows Firewall Click Start Click Control Panel Click Windows Defender Firewall Click Advanced Settings on the left hand side Click Inbound Rules Click New Rule on the right hand side Click Port Click Next Type 80, 443 in the ports box Click Next Click Next Click Next Name it Web Server Ports Click Finish Install IIS (Internet Information Services) Click Start Click Server Manager Click Add Roles and Features Click next on the Before you Begin page Click Role Based install Click Next Verify you are installing on your local server Click Next Check the box for "Web Server (IIS)" When prompted to install management tools Click Add Features Click Next Under Features, click Next Click Next again to get to role services Check the boxes for all of the following role services Make sure you check the box for web sockets under Application Development, this is needed for various features of Emby to work right. Click Next Click Install Once installation completes, click close Install Web Platform Installer add-on Download from: https://www.microsoft.com/web/downloads/platform.aspx Run the Web Platform Installer add-on installer Click Install Click Finish Install AAR (Advanced Application Routing) Download from: https://www.microsoft.com/en-us/download/details.aspx?id=47333 Run the Request Router installer Click Install Install IIS Re-Write Module Click Start Click Administrative Tools Open Internet Information Services (IIS) Manager Click the name of your server on the left Double Click on the Web Platform Installer In the search box type "url rewrite" Click Add Click Install Click I Agree Click Finish Configure AAR Click Start Click Administrative Tools Open Internet Information Services (IIS) Manager Click the name of your server on the left Right Click Server Farms Click Create Server Farm Name your Server Farm Click Next Enter the IP address of the server or "localhost" Click Add Click Finish Click No in the dialog that pops up Expand your newly created Server Farm Click Proxy Configure settings as shown Click Apply Click your Server Click Application Request Routing Click Server Proxy Settings Configure settings as shown Click Apply Click Your Server Configure IIS Server Variables Click Url Re-Write Click View Server Variables Click Add Type "HTTP_ACCEPT_ENCODING" Click OK Click Add Type "HTTP_X_ORIGINAL_ACCEPT_ENCODING" Click OK Click Add Type "HTTP_X_FORWARDED_FOR" Click OK Click Add Type "HTTP_X_REAL_IP" Click OK Click Your Server Create Emby Site Expand Sites on the left hand side Right Click "Default Web Site" Highlight "Manage Website" Click Stop Right Click the white space in the Sites list Click Add Website Click the "..." button to the right of Physical Path Browse to C:\inetpub\wwwroot Click it Click Make New Folder Call it Emby Click OK Under Binding Fill in with your public host name (see dynamic dns mentioned in pre-reqs) Click OK Configure Logging Click your server Click Logging Click Select Fields Click Add Field Configure as shown Click OK Click OK Click Apply Install and Configure Certify The Web client Download From: https://certifytheweb.com Run the Certify the Web installer Click Next Click Next Click Next Click Install Click Finish Click New Certificate Click on on Contact Prompt Fill in your contact email Click Register Contact Click New Certificate again Select Emby from the sites list Name and domain will populate automatically. Click Deployment Configure as shown Complete certificate verification process Click your site in IIS manager Click Bindings Verify there is an HTTPS binding and that it looks similar to this (with your domain information) Edit Web.Config for Emby Site Click HTTP Response Headers Click Add Configure as show (we are just creating a header to get the web.config to exist, we will paste in a premed one below, so these values dont really matter) Click OK Open an Explorer window and Browse to C:\inetpub\wwwroot\Emby Right click web.config and Edit with Notepad++ Replace existing content with web.config below <?xml version="1.0" encoding="UTF-8"?> <configuration> <system.webServer> <rewrite> <rules> <clear></clear> <rule name="Redirect to https" enabled="true" patternSyntax="Wildcard" stopProcessing="true"> <match url="*" negate="false" /> <conditions logicalGrouping="MatchAny"> <add input="{HTTPS}" pattern="off" /> </conditions> <action type="Redirect" url="https://{HTTP_HOST}{REQUEST_URI}" redirectType="Found" /> </rule> <rule name="Proxy to Emby" stopProcessing="false"> <match url="(.*)" /> <serverVariables> <set name="HTTP_X_ORIGINAL_ACCEPT_ENCODING" value="{HTTP_ACCEPT_ENCODING}" /> <set name="HTTP_ACCEPT_ENCODING" value="" /> <set name="HTTP_X_REAL_IP" value="{REMOTE_ADDR}" /> </serverVariables> <action type="Rewrite" url="http://localhost:8096/{R:1}" logRewrittenUrl="true" /> <conditions> <add input="/{R:1}" pattern=".well-known" negate="true" /> </conditions> </rule> </rules> <outboundRules> <rule name="Add Strict-Transport-Security when HTTPS" enabled="true"> <match serverVariable="RESPONSE_Strict_Transport_Security" pattern=".*" /> <conditions> <add input="{HTTPS}" pattern="on" /> </conditions> <action type="Rewrite" value="max-age=31536000; includeSubDomains; preload" /> </rule> <rule name="Proxy to Emby" preCondition="ResponseIsHtml1" enabled="true"> <match filterByTags="A, Area, Base, Form, Frame, Head, IFrame, Img, Input, Link, Script" pattern="^http(s)?://http://localhost:8096/(.*)" /> <action type="Rewrite" value="http{R:1}://media.example.com/{R:2}" /> </rule> <rule name="Restore-AcceptEncoding" preCondition="NeedsRestoringAcceptEncoding"> <match serverVariable="HTTP_ACCEPT_ENCODING" pattern="^(.*)" /> <action type="Rewrite" value="{HTTP_X_ORIGINAL_ACCEPT_ENCODING}" /> </rule> <preConditions> <preCondition name="ResponseIsHtml1"> <add input="{RESPONSE_CONTENT_TYPE}" pattern="^text/(.+)" /> </preCondition> <preCondition name="NeedsRestoringAcceptEncoding"> <add input="{HTTP_X_ORIGINAL_ACCEPT_ENCODING}" pattern=".+" /> </preCondition> </preConditions> </outboundRules> </rewrite> <caching enabled="false" enableKernelCache="false" /> <httpProtocol> <customHeaders> <add name="X-Frame-Options" value="SAMEORIGIN" /> <add name="X-Xss-Protection" value="1; mode=block" /> <add name="X-Content-Type-Options" value="nosniff" /> <add name="Referrer-Policy" value="same-origin" /> <add name="Feature-Policy" value="sync-xhr 'self'" /> <add name="Cache-Control" value="no-cache" /> </customHeaders> </httpProtocol> </system.webServer> </configuration> Save changes (if prompted to restart Notepad++ in admin mode allow it and then try saving again) IIS will now be properly configured as a reverse proxy for Emby. Under IIS Manager > Rewrite you should now see the following rules: Configure Server Cyphers Download here: https://www.nartac.com/Products/IISCrypto/Download (GUI version) Run the IISCrypto too Click Templates In the template drop down box, select PCI 3.2 This will disable IIS from being able to serve via SSL 2.0, 3.0; TLS 1.0 and TLS 1.1. This will leave just the industry standard TLS 1.2. Click Apply Click OK. Reboot your server. Emby Internal Settings Navigate to your server via the localhost:8096 address Click the gear in the top right corner Click Network from the list of tabs on the right Configure as shown (use your hostname in the external domain box) Conclusion Upon rebooting your computer will start IIS services and Emby server as a service. Traffic coming in on port 80 (if someone just types your url without HTTPS in their browser's address bar) will be automatically redirected to port 443 and the HTTPS:// version of your host name. Your certificate will auto-renew every so often and re-bind to the site in IIS without any interaction on your part. This allows for a server that you can for the most part setup, and forget about and just manage your Emby installation via its web ui. There are a lot of ways to set up Emby server depending on your environment and other factors. For my environment this made the most sense and since large portions of this took quite a bit of digging and research to get working just right, I figured Id make someone else's life a little easier if they were trying to do something similar. These instructions can be adapted for Windows Server 2012 R2, Windows Server 2016, Windows 8 and Windows 10. In the end browsing to your domain should look like this in the browser Additional Information for Updating When Updating your Emby installation. Simply stop the service for Emby, install like you normally would, then just cut the system folder inside the %appdata%\emby-server folder and paste it into the C:\Emby-Server folder. When prompted replace all files, then start the service again once the copy completes. Additional Information about Connecting with Emby Apps When connecting to your Emby installation remotely with Emby apps remember to prefix your domain name with https:// and use 443 for the port number. <Edit> Additional Information about changing Emby Server Title: For those users who wish to change their page title in browser (as discussed here), here is additional Web.Config information that will let you do just that! Using IIS Re-Write rules to change the page title means, you don't have to edit files to reset it every time you upgrade your Emby Server! Add these 3 rules at the bottom of the rules list, replace whole <preConditions> block too.: NOTE: Make sure you replace ALL 4 instances of NAME_OF_YOUR_SERVER with what you want your server to display in the tab bar. <rule name="RewriteTitle" preCondition="ResponseIsHtml1" enabled="true"> <match filterByTags="None" pattern="<title>(.*)</title>" /> <action type="Rewrite" value="<title>NAME_OF_YOUR_SERVER</title>" /> </rule> <rule name="RewriteAppHeaderJs" preCondition="ResponseIsJS" enabled="true"> <match filterByTags="None" pattern="document.title="Emby"" /> <action type="Rewrite" value="document.title="NAME_OF_YOUR_SERVER"" /> </rule> <rule name="RewriteAppHeaderJs2" preCondition="ResponseIsJS" enabled="true"> <match filterByTags="None" pattern="title.Name||"Emby":"Emby"" /> <action type="Rewrite" value="title.Name||"NAME_OF_YOUR_SERVER":"NAME_OF_YOUR_SERVER"" /> </rule> <preConditions> <preCondition name="ResponseIsHtml1"> <add input="{RESPONSE_CONTENT_TYPE}" pattern="^text/(.+)" /> </preCondition> <preCondition name="ResponseIsJS"> <add input="{RESPONSE_CONTENT_TYPE}" pattern="application/javascript|text/javascript" /> </preCondition> <preCondition name="NeedsRestoringAcceptEncoding"> <add input="{HTTP_X_ORIGINAL_ACCEPT_ENCODING}" pattern=".+" /> </preCondition> </preConditions> </Edit>


 1 point
 -
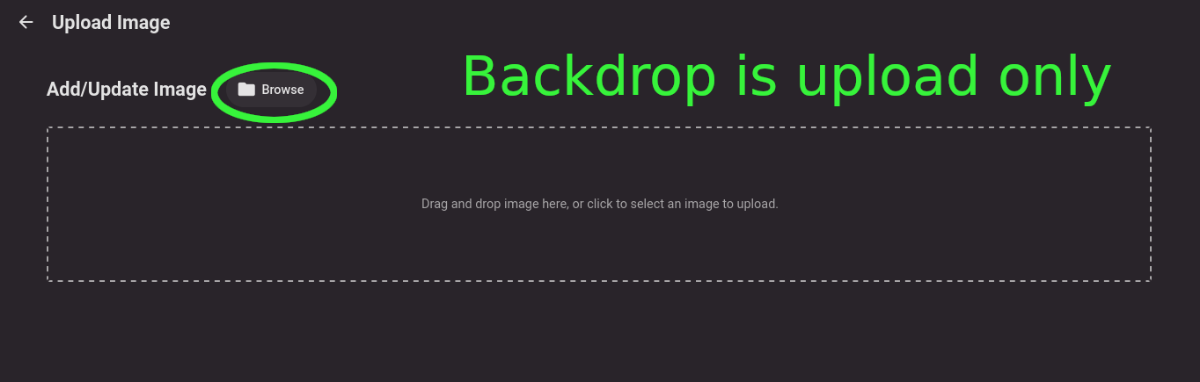
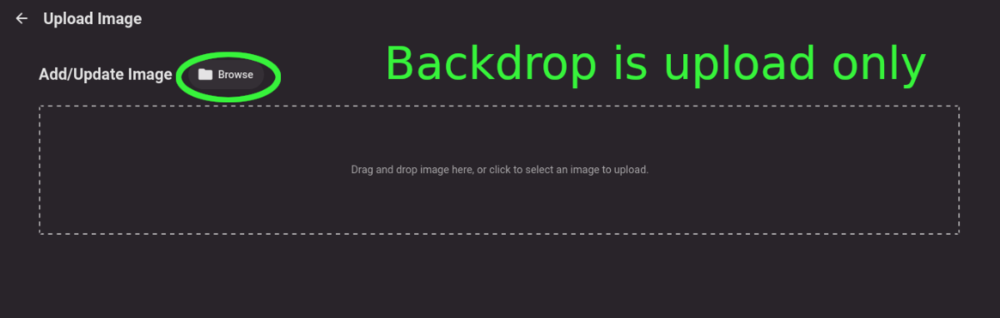
Title describes what I want but also here are some web app screenshots: The Image editor for all the types under 'Images' has a wonderful selector that includes a 'Set Image from URL' option: The Backdrops section only allows for adding images by file upload: I'd like to add Backdrops from URLs please.

 1 point
 -
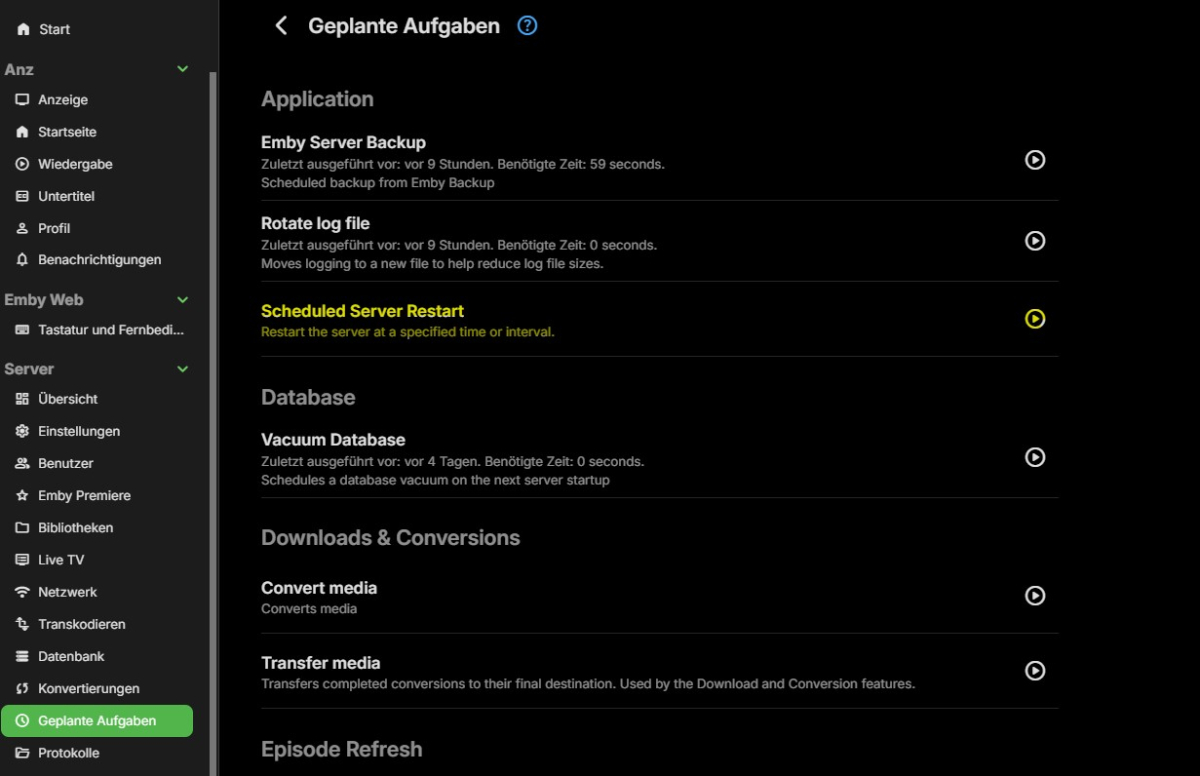
Hallo, habe hier durch Zufall diesen Thread gefunden, da ich nach einer Möglichkeit gesucht habe meinen Emby Server nach Zeitplan neu zu starten. Nachdem ich die restart.dll mit WinSCP nach /volume1/@appdata/EmbyServer/Plugins auf meiner Synolgy kopiert habe und die Rechte angepasst hatte, hab ich jetzt den gewünschten Menüpunkt unter geplante Aufgaben. Das ist eine Funktion die ich schon sehr lange vermisst habe. @LukeWarum wurde diese Funktion nicht schon längst in Emby integriert? Finde ich sehr praktisch und würden bestimmt einige zu schätzen wissen. Ich habe den Thread hier mal eröffnet, damit andere die auch nach so einer Möglichkeit suchen, ihn hier finden. Ich jedenfalls, bin jetzt sehr zufrieden, das es funktioniert
 1 point
 -
All fine i have done it with chmod 757 and then i have Upload the file to the Directory1 point
-
Just want to say thank you -- this has been fixed. I'm not sure when but I went back to check and I can see my favorites now. You guys are the best!1 point
-
Tried it again and had the same issue, I have attached the logs. I am currently in the process of migrating my server to a new machine that will be unraid instead of windows and also has a lot of hardware upgrades so when that is done I will let you know if anything changes. embyserver.txt1 point
-
How to Train Your Dragon 3 (Hidden World) in 4k1 point
-
You have to stop the Emby Server as the library.db will not copy when it's in use. Also, I would like to caution you, that if for whatever reason you loose network on your LAN i.e from your Server to where you actual Emby Folder is now residing, there are some weird issues that crop up such as library out of sync, playback points not syncing. This is what I have done: Create a VHDX using disk2vhd and migrated that to a secondary Windows Server 2019 with Hyper-V and made sure it booted. Changed the IP Address to make sure it doesn't conflict. In this VHD, I stopped the Emby Server and copied the the entire install folder to a centralized location. Then renamed my existing install folder to emby-server_backup. Created the symbolic link from the central location back into the VHD C:\users\user\appdata\roaming folder and launched Emby. It totally worked with now a replicated backup Emby Server. This is due to the fact that my libraries in Emby Server are defined using IP Address of NAS server, so nothing to reconfigure. Now, to note is that does not keep both installs synchronized as they are both independent, but it can indeed be done if both production server and backup VHD server where pointing to the same centralized install server. The backup VHD server never actually get's used directly anyway.1 point
-
Yes, it looks like the guide has the correct content now. Thanks for the follow-up. Now, if we could just get 29.3 and 29.4 working ...1 point
-
Okay, forget it! The audio setting in my Fire Tube was set to Dolby Digital+ and I now set to to "best available" and I´m getting Atmos sound out of the Fire TV Cube , when using Emby. I know, there was a reason, why I had set the Cube to Dolby Digital+ in the past, but I unfortunately forgot it..... Thanks for your patience and your help and sorry for the confusion!1 point
-
I also took the Pt # portion off of the end of each video, and changed it to Vid #... this also works1 point
-
Thanks for the suggestions... Looks like switching to wifi worked
 1 point
 -
La ultima parte de seleccionar el dispositivo si no le llega, no le veo sentido hahaha, pero está todo aclarado, muchas gracias Luke1 point
-
I would give the wireless a try and see if that works a little better. If you only need to transcode audio for playback that is a very light operation that should not affecting their gaming. I know that wifi can still be hit or miss, for whatever reason the 5 Ghz on my LG C8 basically doesn't work at all and I have to use 2.4 instead, but that's fine for me because I just use a Shield anyway (which does have a 1 gig port on it, but I'm still using wifi).1 point
-
@Lukewasn't it fixed and removed again for Playlist due to parental issues? 4.8.4.0 Don't generate images for playlist libraries 4.8.3.0 Fix playlist library folder not generating an image1 point
-
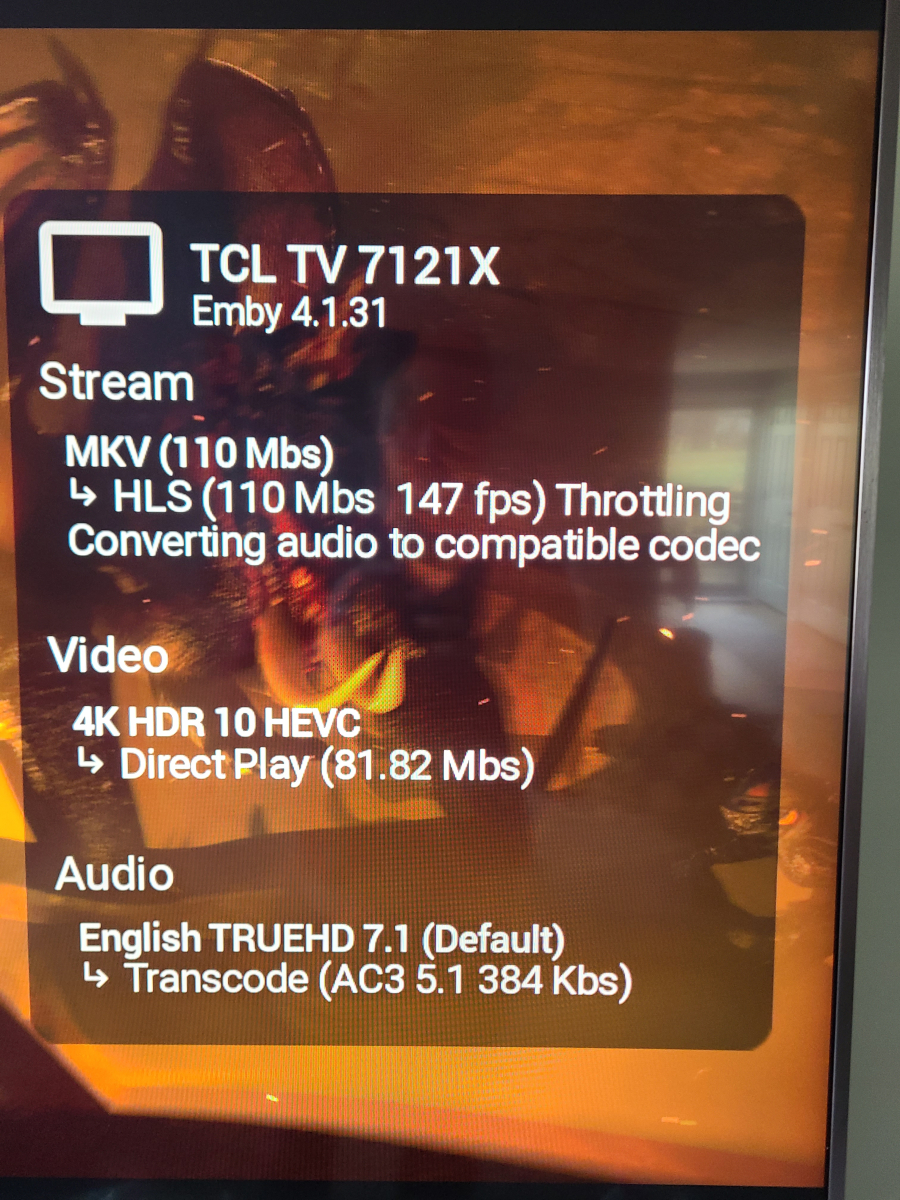
That is a very high bitrate even for a 4k Remux, not surprised that either the Roku hardware would struggle to play back the chunks or your wireless may struggle to deliver the TS segments fast enough. Would need to see the ffmpeg-transcode and server logs to ensure it's transcoding fast enough (it should be since the video encode/decode are not pegged, so throttling should be kicking in if it's enabled) and how long segments are taking to deliver. Is your kid also trying to game on this same machine or do you mean that while streaming it affects their gaming due to high network traffic? Nevermind I see that detail now. Encoding/decoding while gaming should not have much impact on their gaming, it's the same hardware that would get used for streaming with OBS for example, but honestly not something I've tried since I have a dedicated machine. Extra GPU usage may be necessary for the tone mapping for example.1 point
-
Sry no i dont connect via https or a reverse proxy Hispanico1 point
-
@LukeYes that would work!1 point
-
This is a free product created by you that I get to use for my pleasure and I greatly appreciate it! I'm not demanding anything, and I certainly understand that the last couple of weeks have been very busy for most people around the world. I'm just hoping for an update of when you might expect the update to come out now. I'm on 11.1.10, and I've checked the "versions" listing in the add-on, and it shows that this is still the latest version. I'll be thrilled to have it whenever it's available, I'd just like to know roughly when I should start checking again. Thanks for all your hard work on this and have a very successful & prosperous 2025!1 point
-
Why not answer this vital question ?1 point
-
Yeah i think i am confusing the two. I am still learning this networking game. All my knowledge is surface level, listening to guides and advice. Like i dont even know what i should be logging in with (ref quote).1 point
-
@Carlo Hey Carlo, thanks for the suggestion! It looks like moving each video into a separate folder is working just fine. I'll see if I can correct the rest of the videos this way. Appreciate the help!1 point
-
This topic is closed. SSHFS to mount another VPS. I want to thank this wonderful community for giving me recommendations to pursue and evaluate. rClone to mount other drives. I mounted google - https://rclone.org/drive/1 point
-
Emby for LG 1.0.45 has been released. This is largely a bug fix release. Here are the changes: Fix photos not showing in collections Fix top portion of home screen cut off when scrolling down (only on certain models) Increase allowed range of subtitle offset Fix parental rating multi-select filter Fix series status filter View the full article1 point
-
@Happy2Playand @ebr may have some tips on configuring the cover art plugin.1 point
-
Thank you so much!1 point
-
Hello, sorry now i get the solution by myself. After i have remove all the libraries and connected the libraries once again i can use emby normal as before. After thinking about the last days i know the solution. I have changed the Password of the user which is using emby. Thanks for your great support ;-) Now you can close this topic1 point
-
But in the recent version of the plugin, there can be a lot more checkboxes depending on the user count. So i think it's a good idea and should be easy to implement.1 point
-
Can I add my voice to say those slow startup times are deadly and the animations just rub salt in the wound? Please fix the slow startup, and until then at least give us the option to kill the animation. Otherwise great app and I've had no other issues. But on a multi-use media PC on which I may load Emby Theatre multiple times/day a fast app start is a priority for me.1 point
-
It will never happen. Ever since Emby had began audiobook support (2015 maybe?) it's been a music player library with the same progress tracking and next up logic that tv shows has (except in my experience the progress tracking is not reliable - I've taken long car rides and lost that progress more times than I find reasonable). If that is all you need then be happy with what it is. If you are looking for more like a self-hosted audible then use audiobookshelf. Emby is great at movies and tv shows, and music when online.1 point
-
Hi, the upcoming 4.9 server release has added support for quite a few more settings to be included in this.1 point
-
Hallo Luke, ich kann ja kein Beispiel nennen, weil es von der Familie kommt die von außen auf meinen Server zugreift und mir das dann erst am nächsten Tag mitteilt. Ich habe für mich die Erfahrung gemacht, das es nicht vorkommt, wenn ich alle 2 Tage den Server neu starte. Wir müssen jetzt auch keine Fehlersuche starten, da ich für mich mit der Lösung sehr zufrieden bin und mich freue, das es jetzt automatisch funktioniert. Ich wollte hier nur für diejenigen die auch so eine Lösung suchen, einen Beitrag hinterlassen und auf die Möglichkeit hinweisen, das es auch automatisch funktioniert Ich danke dir jedenfalls, das du wie immer sehr schnell reagierst, und zu helfen versucht hast. In dem Fall war es nur ein Info Thread für andere die darauf stoßen. Grüße und schönen Sonntag Anz1 point
-
Then Emby is NOT for you. The price for a lifetime premier license is tiny compared to the value you get.1 point
-
The Emby team hopes you and yours are enjoying a Happy Holiday Season. We would like to announce a couple of changes that will hopefully increase the value of Emby in all of your households. First, to aid in the transition from our old TV-only Android TV app to the new Standard Android app on that platform, we will be eliminating the need for the app unlock by allowing free playback for up to five TV devices per Emby Server. Devices beyond that limit will require Emby Premiere. Previously purchased unlocks will still be honored. This should allow most households to move to the new app more easily. Second, recognizing that today's households have more and more devices, we are increasing our standard Emby Premiere License device limit from 25 to 30. We will then also increase the extended premiere plans from 45 to 50 and 75 to 80. Existing extended subscriptions will remain the same but new ones will be at these new levels. All standard licenses will be automatically updated to the new 30 device limit immediately. You should see all of these changes rolling out over the next week or so. Happy Holidays from the Emby Team! View the full article1 point
-
Sounds, the helpers are not installed? Did you install "Emby for Kodi Next Gen (Video)" Plugin?1 point
-
Good to see there is still no announcement after one month1 point
-
Hi, has this helped?1 point
-
I recently purchased a lifetime Emby Premiere subscription, and I’m very happy with it. In Jellyfin, this feature is available and works seamlessly without any configuration. I was wondering, why hasn’t this feature been implemented in Emby yet? I’m not trying to say it’s easy, but has it been considered? From a post by softworkz, I understand that implementing this feature while maintaining the high quality standards you’ve set is very challenging. However, the responsibility for audio quality and synchronization doesn’t rest solely on you, does it? I also believe that the fact this feature might not be perfect 100% of the time shouldn’t stop it from being implemented. That said, I’m very happy with Emby and want to thank the team for being so responsive—it truly means a lot.1 point
-
To be fair to the devs, this wasn't easy so far. I'd been expecting to publish more than a month ago. I had to solve more than fifty different issues (this is not an exaggeration) with the help of my poor users (ten people) who had to suffer through many unstable sessions. I'm (ab)using the Remote Control features to make this work - in other words, the ability to remotely tell a client to play, stop, pause, unpause and seek, as well as the client reporting to the server that it's playing, paused, unpaused, and its current position (every ten seconds or after seeking). These are native features, but remote control as implemented is heavily client-based, with clients talking to other clients and the server largely just bouncing things around. Things that require client support include: Blocking pause and unpause when the user shouldn't be pausing and unpausing, namely when the user's client is supposed to be waiting for other participants (essential). That's why remote control of non-client-modified sessions introduces potential instability if used. Responding to server ping. Emby Party is a real time feature built on top of an asynchronous server. It pings the client every 30 seconds. Without ping, if the user is having connection troubles or simply closes the tab, everyone else in the party will be subjected to instability (this usually manifests as things not working or going out of sync). The sidebar isn't a standard piece of UI; it requires full DOM access. One thing it has to do is put the rest of the application inside a container so it can be reliably rendered side by side with it. The vanilla web client inserts all kinds of things directly as children of the body HTML tag, so they can't be reliably squeezed aside. There is of course no reason why any of it can't be implemented in any of the other clients but I only had access to the source code of this one.1 point
-
Hi , this is an extremely great idea to see Emby support external audio file as well. This feature has been suggested long time ago and hopefully finally see it on emby. Any update on this matter?1 point
-
Bump... Jellyfin supports external audio tracks just fine. Even as MKA. Would love to see this in Emby.1 point
-
So here is what I did so far so I can get my Movies and Tv shows to come back, I hope this helps out other people but so far this works for me but I have not added my users yet or config everything else in Emby just yet but I made some head way on this issue for me. I took some screenshot of my setting so I hoping this help out someone but I still wanted to config. permission and ACL on Truenas Scale. 1. I had Emby running on Truenas Core with no issue for years until I upgraded my system to Truenas Scale, my mistake was adding the host path that I shared with SMB to Emby from Truenas Core. It looks like Truenas Scale does not like this on Emby so I had to turn off SMB and then added it to Emby host path in order for this work again on Emby, so lets start by adding Emby software to Truenas Scale: Which you see I already installed it but don't have it running at this time so I can config the rest of the stuff. 2. I login into Emby by the 3 dots just in case people don't know and bring up the config window for Emby. and started setting up Emby by enable host Network 3. The next step I did was was setup the path for Emby Config Volume which I already did before I loaded Emby onto Truenas Scale, so I pointed and enable the host path for Emby server config volume on my truenas scale to /mnt/HOME/Emby 4. I then setup the Emby Server Extra Host Path Volumes and here is where I ran into trouble !! The "Mount Path in Pod" is what you are going to see when you add the fold to Emby when you have it running but the most important part is this: "HOST PATH" this is where your Movies or Tv shows are at in SMB or where ever you had it before ! BUT before you do this !!! PLEASE MAKE SURE YOU HAVE SMB SHARES OFF !! OR TURN IT OFF !! BEFORE YOU ADD THIS PATH ONTO EMBY !! SO TURN IT OFF !!! 5. Just in case you dont' know where to turn it OFF, I will show you, its under SHARES and just disenable it so you can added this to the host path, SO TURN IT OFF BEFORE YOU ADDED THIS TO EMBY ! this should be STEP 1 but I am doing this on the FLY right now! again TURN IT OFF !!! 6. Here are some of the Paths I have on Turenas Scale and these are just examples of my setup and again i am trying to setup ownership and permission on my end but will do this on another day, but these are just examples! 7. Once you turn it off we can continue on with the setup on Emby and we are going to SAVE the setting on Emby. The rest of the information I left the same and have not change anything yet. 8. I am going to mess around with the setting to give permission and ACL and added addition information on the "Environment Variables for Emby Server" at a later time but this got my movies and TV show showing up on Emby again so I made some head way on this and happy for now!! I will give it some more time later on this week and setup my user on Emby ! but I hope this help out someone and gets them started on seeing there movies and show again.


 1 point
 -
This is the greatest windows tutorial I have seen in a long time. Usually us window server admins are forgotten and majority of tutorials for apps like emby are in linux. THANK YOU1 point
-
I have a bunch of scenes in movies that I like to watch when I'm testing or demoing my home theater. Depending on what I'm testing or demoing (picture, color, surround sound, etc.) I will use different movie scenes. For instance, for surround sound, I'll play the following: * John Wick (chapter 7) * Wall-E (chapter 22) * The Matrix (chapter 30) * Baby Driver (chapter 1) Right now, I have to resort to going into the first movie, select the chapter, skip forward to the scene I wanna show (I often don't want to play the whole chapter), wait til the scene ends, exit the movie, navigate to the next movie and repeat. What would be awesome is if we could go into a movie or show or whatever, and in the menu for that media title there would be a "Create Clip..." option where you can specify the Start Time (either manually enter it or select a chapter), the Stop Time (either manually enter it, type in a duration, or select a chapter), and give the clip a name. Then you hit the "Create Clip" button. This won't literally create a new video clip, but it would create some kind of Metadata file that Emby reads that tells it which media file to play, the start time, and the duration. After creating a bunch of clips (from the same movie or different movies), you can then create a regular Playlist and add these "clips" to it. Boom, you now have a nice Playlist of specific movie scenes that will play automatically.1 point