Leaderboard


Popular Content
Showing content with the highest reputation on 01/14/22 in all areas
-
I read through them but nothing really that I’m concerned with. Applied it anyway. It all still works!2 points
-
Ya. That's what I keep telling the wife and she doesn't believe me.2 points
-
It will be right on the log screen, and the toggle will apply to all functions - the built-in log viewer, downloading a log file, opening in a new window, etc.
 2 points
 -
I forgot to mention I also deleted ATV and reinstalled it. nVidia did mention that also in your link2 points
-
Below is the latest code. I just cleaned up a few things and removed a couple of trivial bugs. Vic EmbyTagApp26.html2 points
-
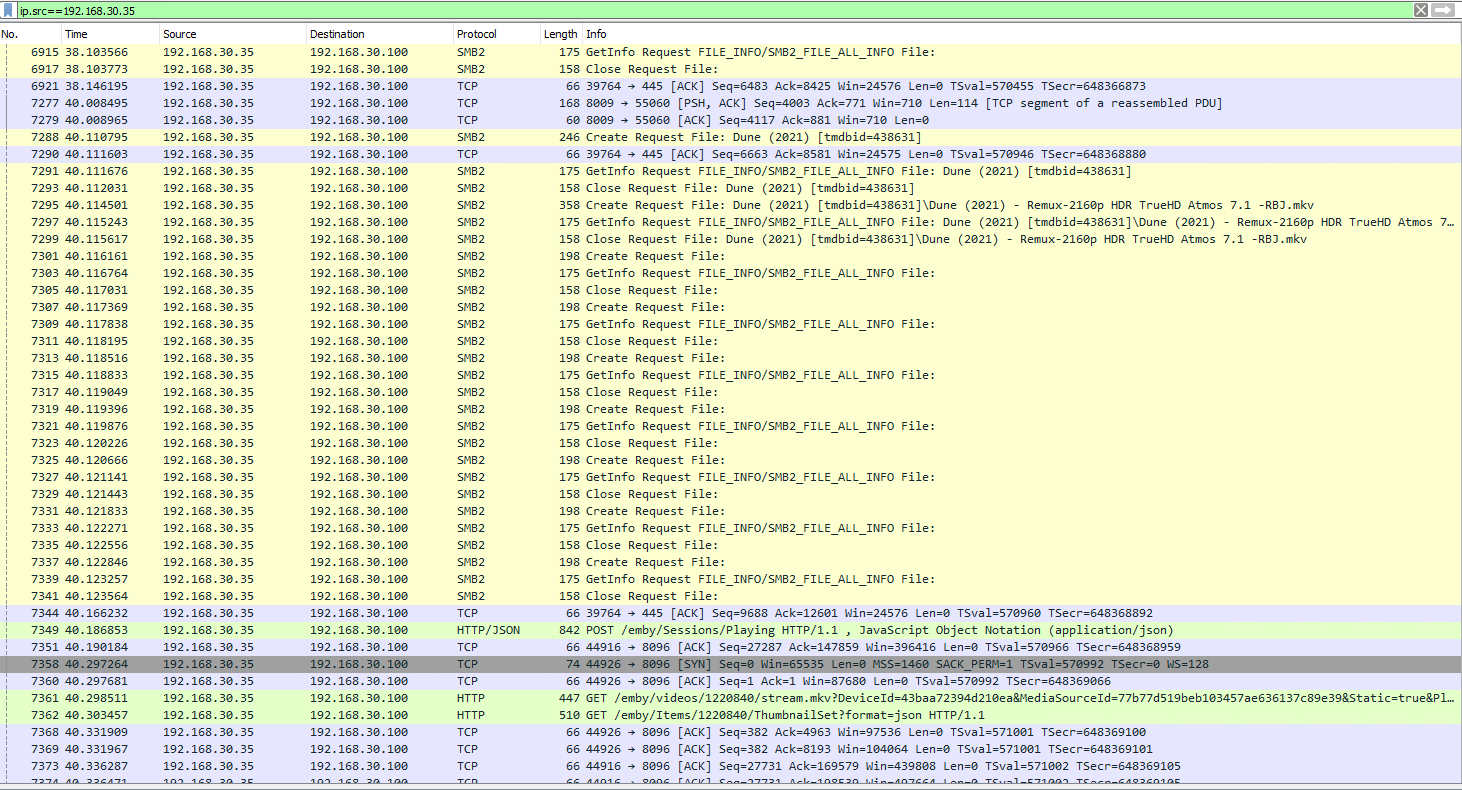
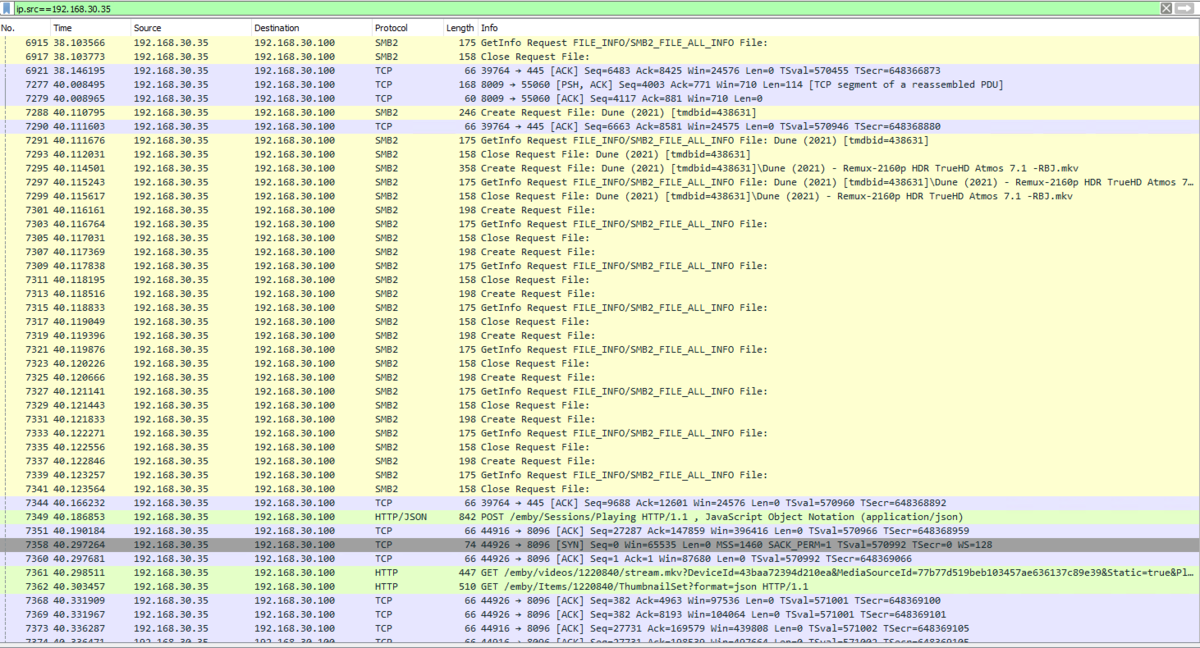
So I went for it .. and upgrade to Android 11. The good news is HTTP is working with 4K Remux's but no File for me at the moment. A quick packet capture suggests emby is sending an SMB2 request (TCP 445) - but is not getting a response to it's Request File - and thus falls back to HTTP (TCP 8096) Compared to VLC/X-plore etc where a SMB query gets a ReadFile response and connects via SMB2. It's late here in the UK - so I'll investigate more tomorrow to compare the two traces... The joys of the 'Upgrade' ... lol
 2 points
 -
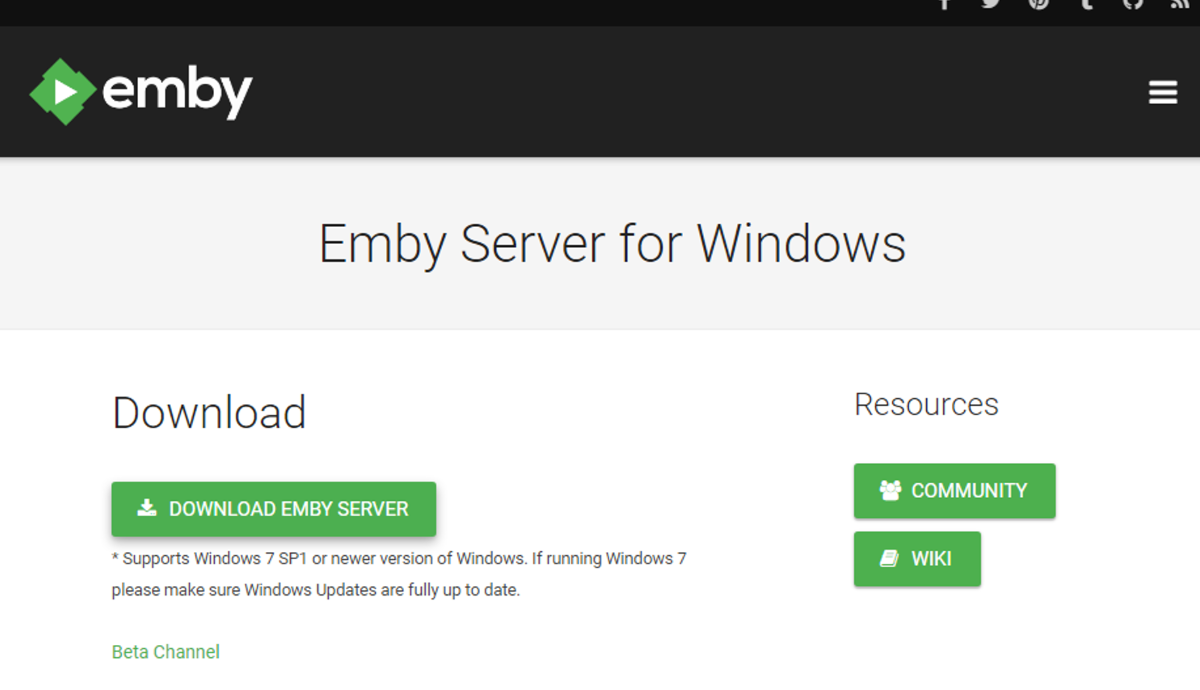
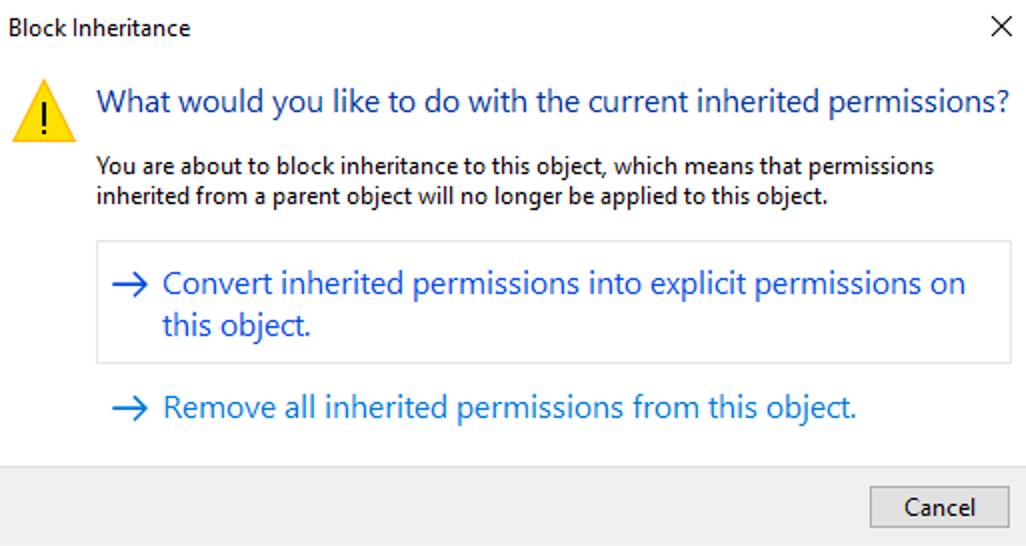
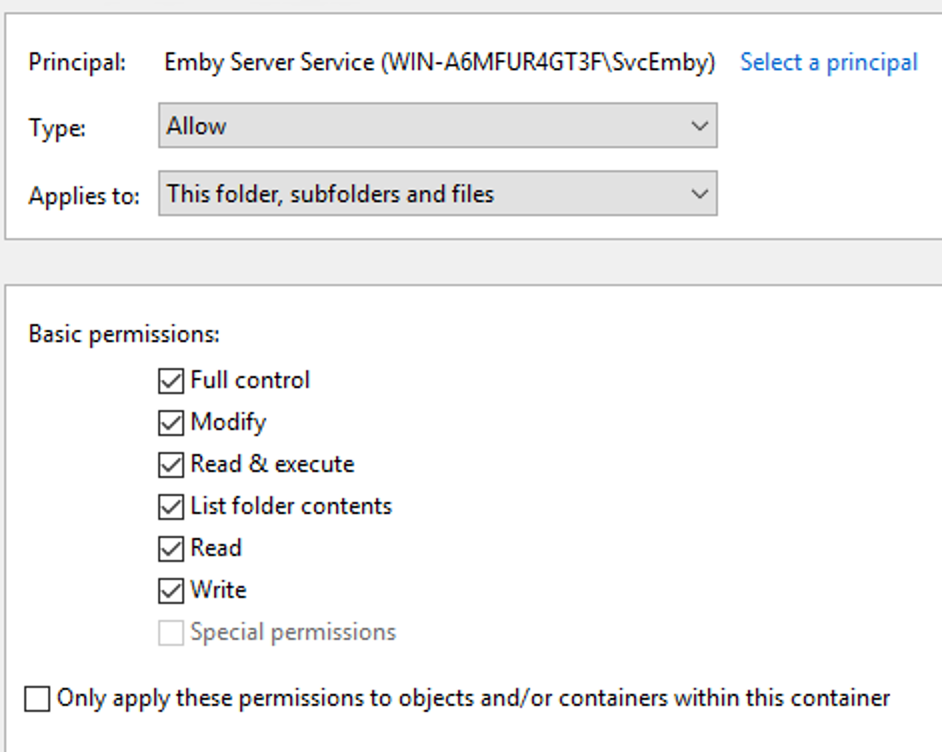
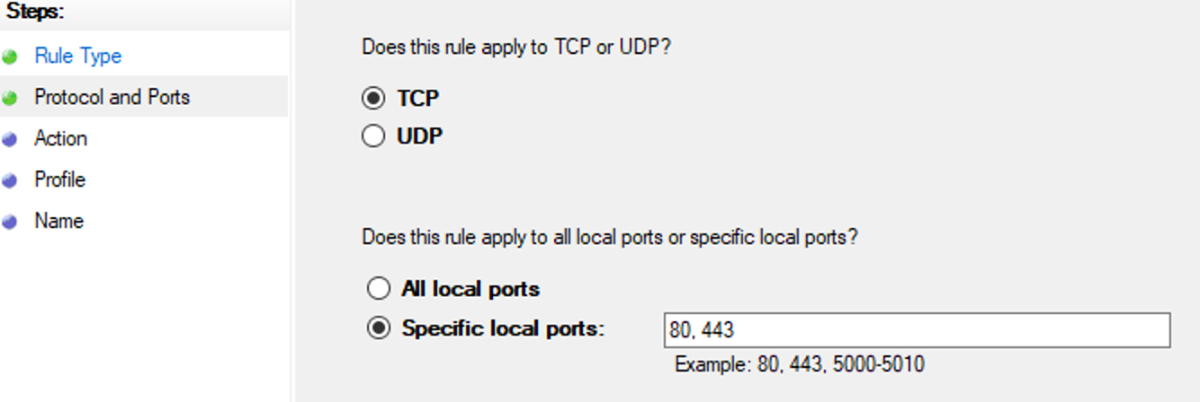
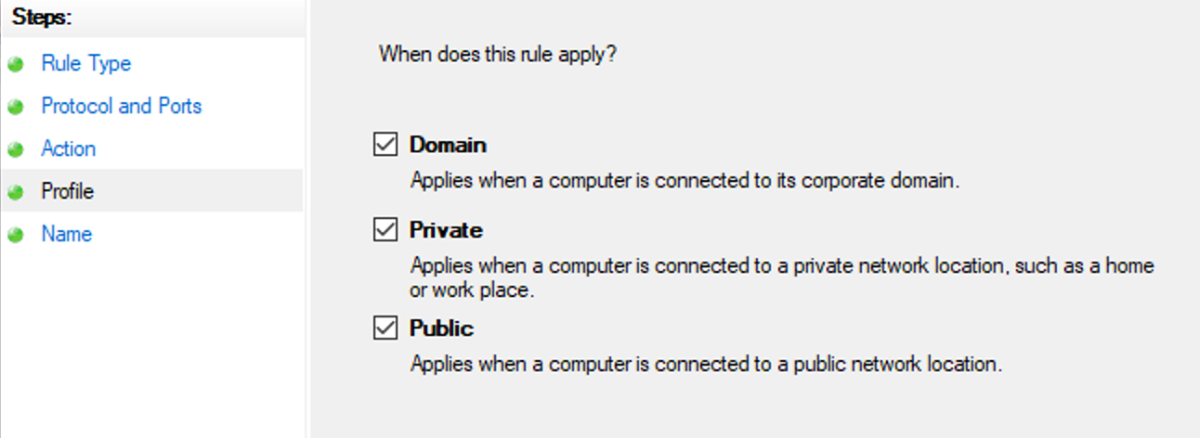
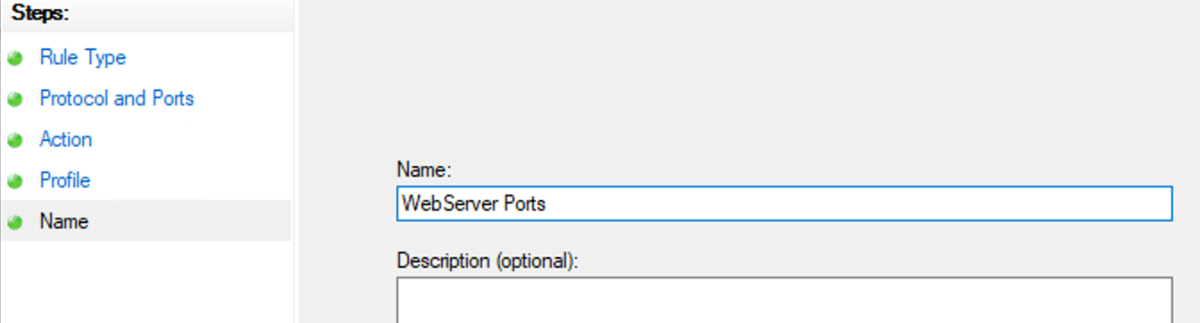
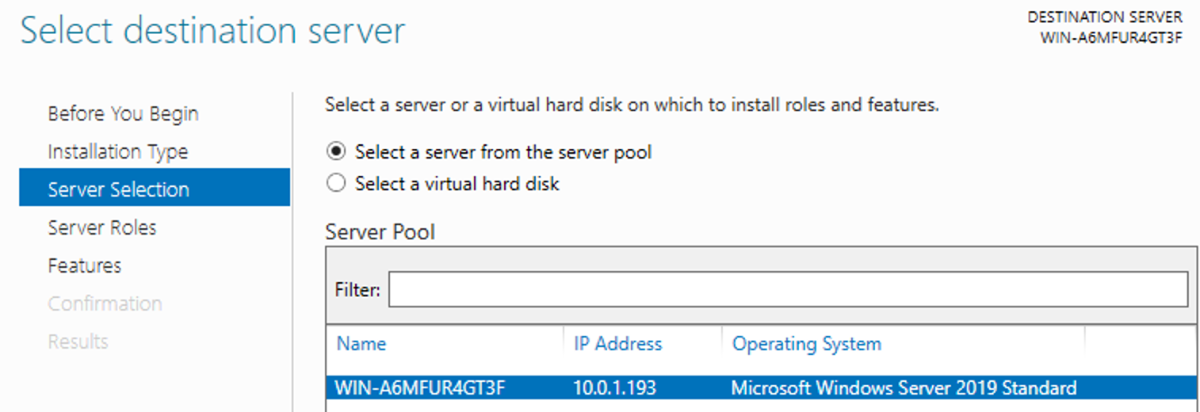
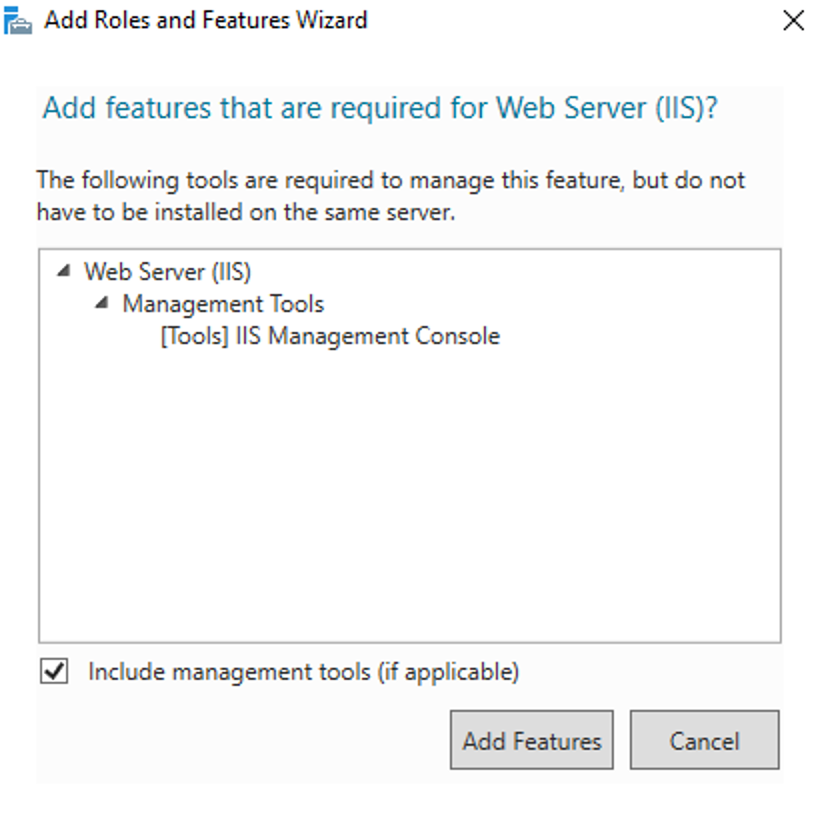
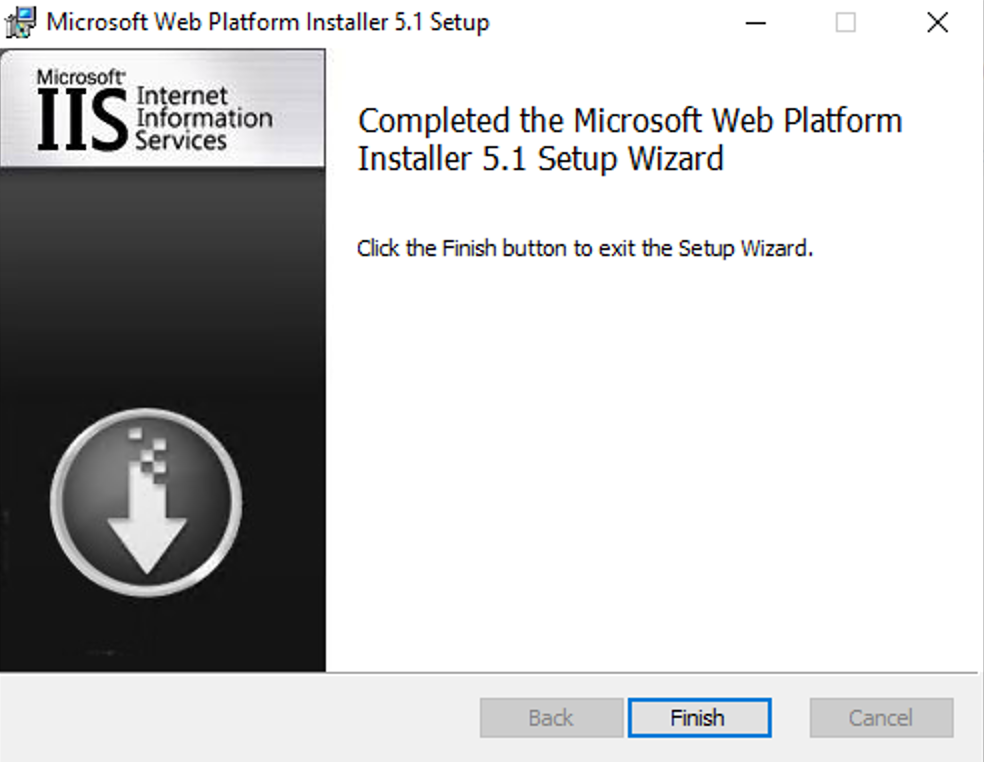
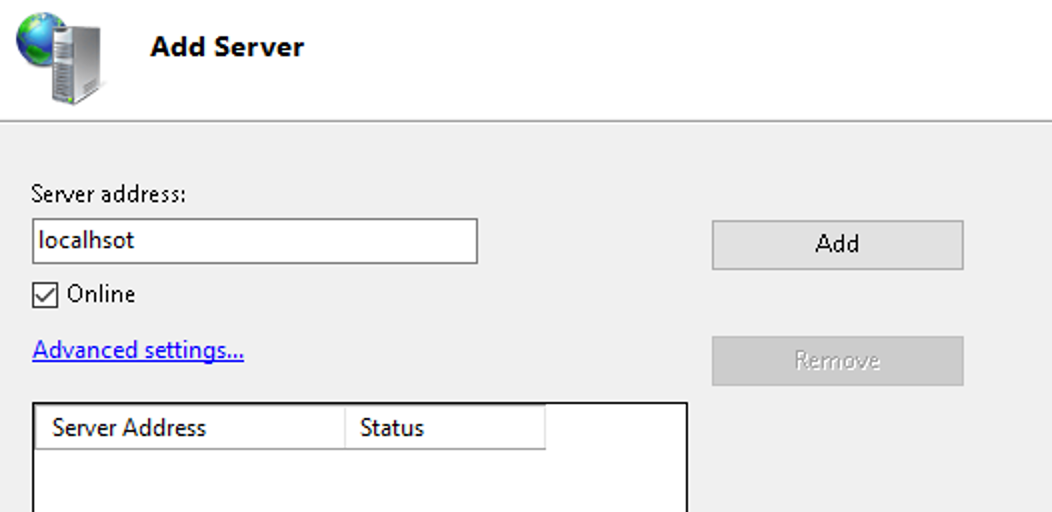
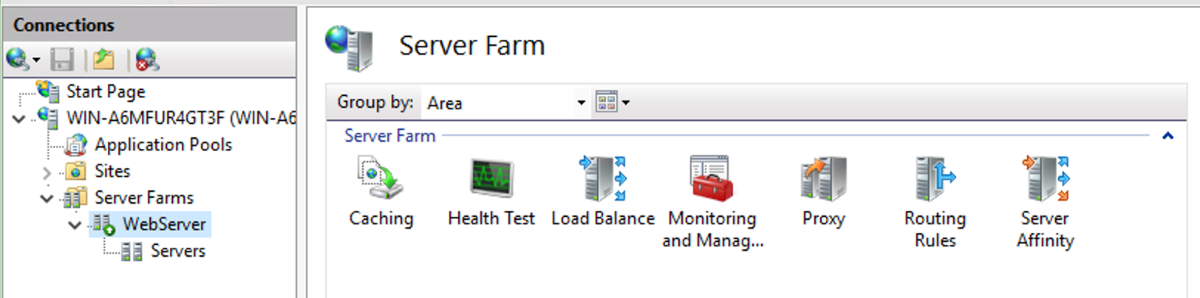
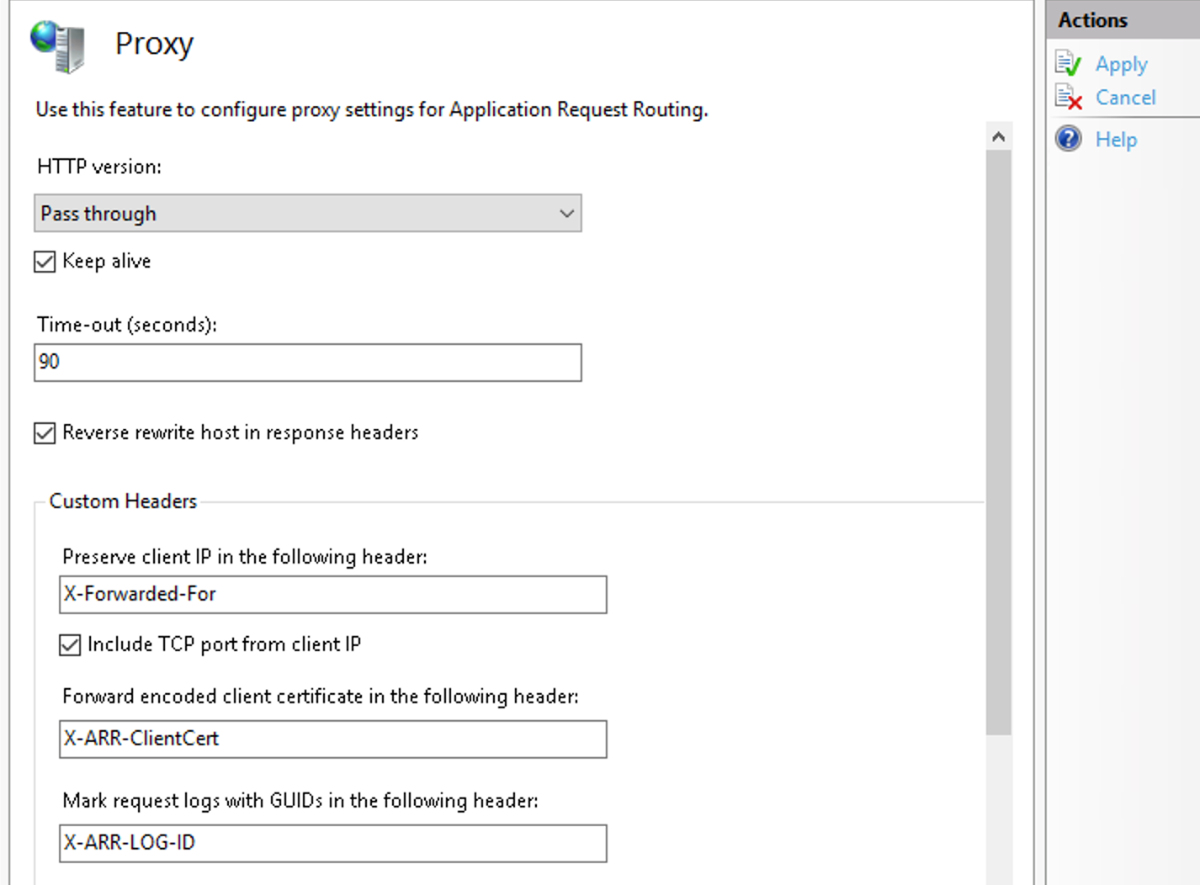
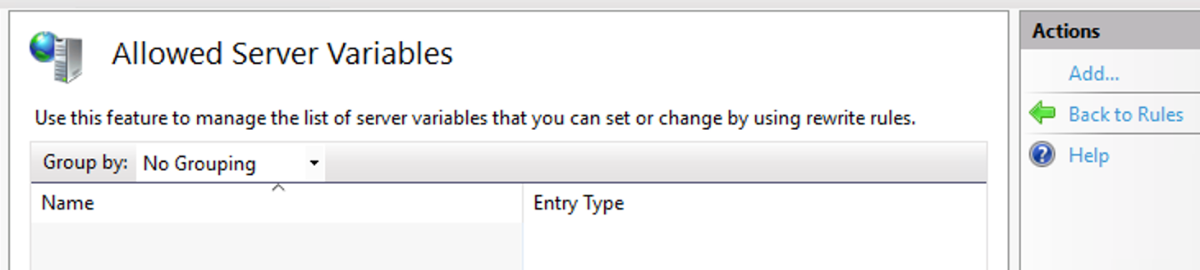
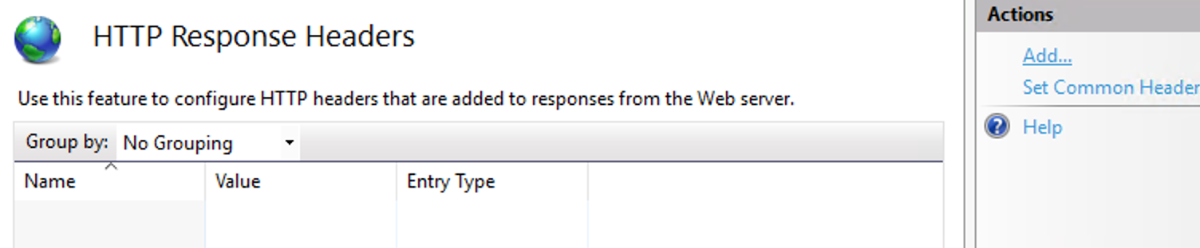
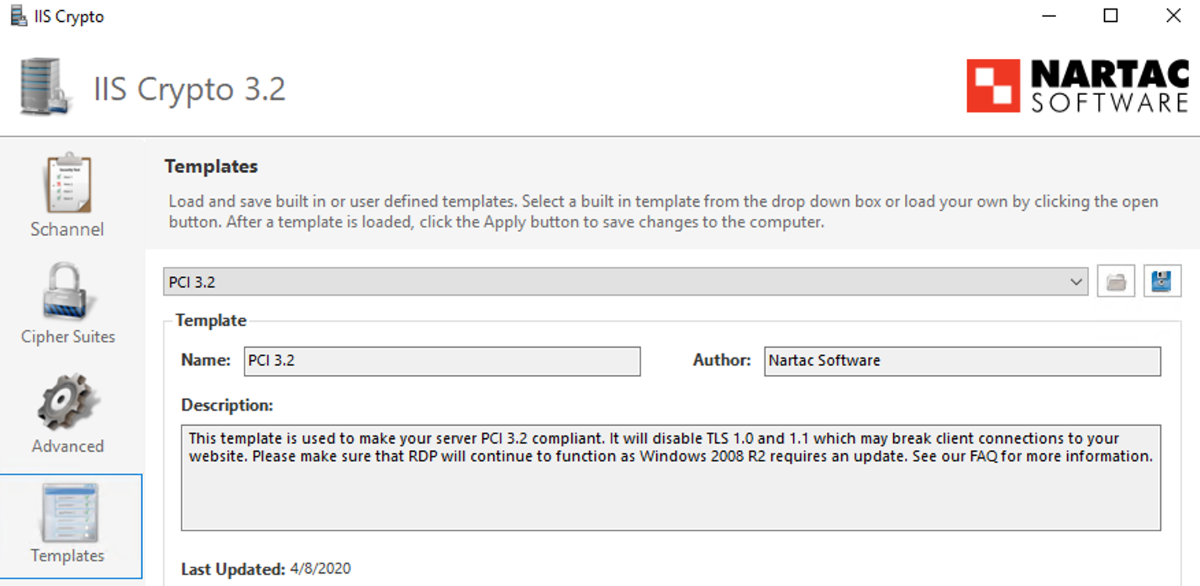
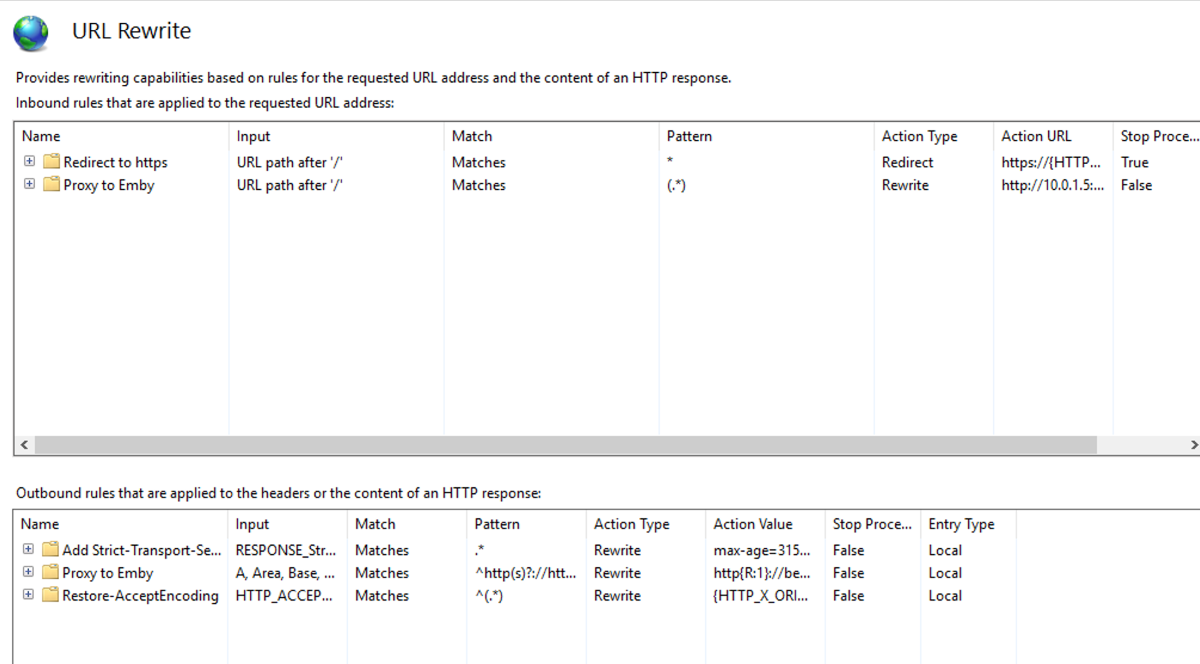
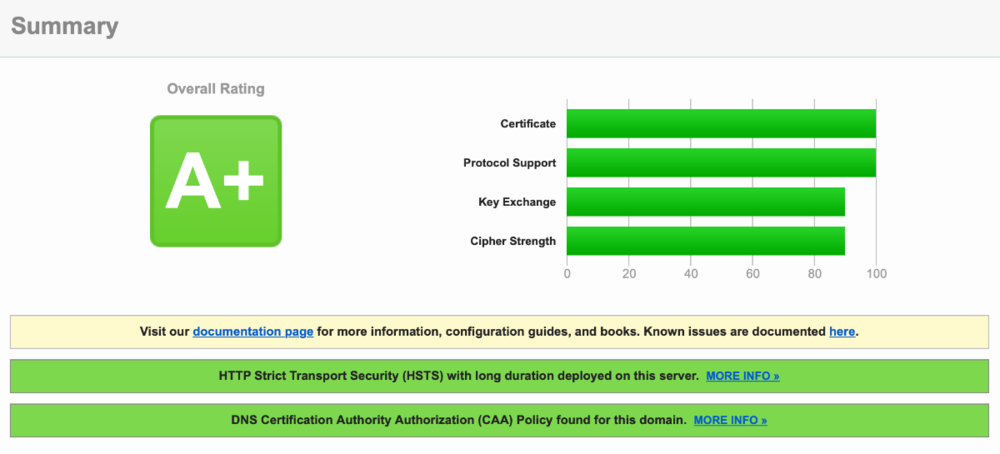
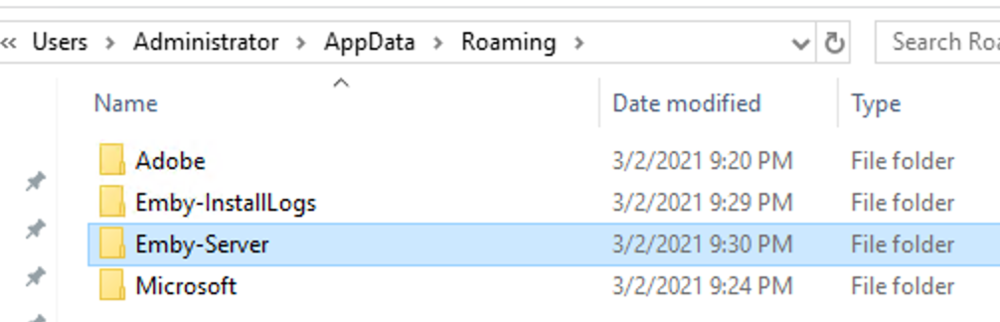
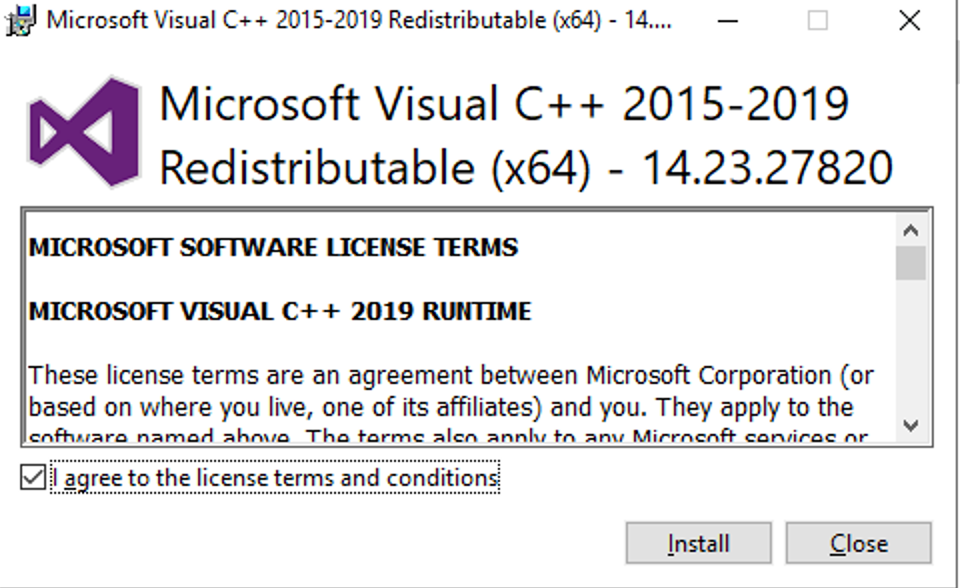
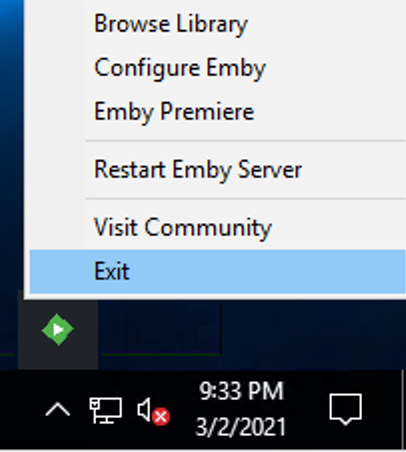
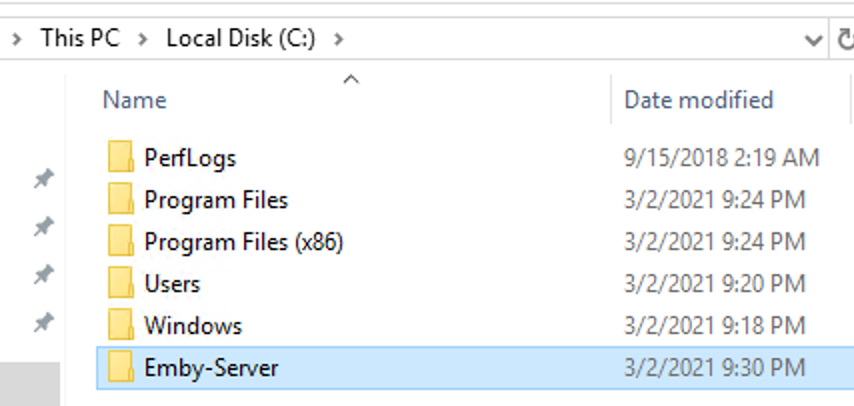
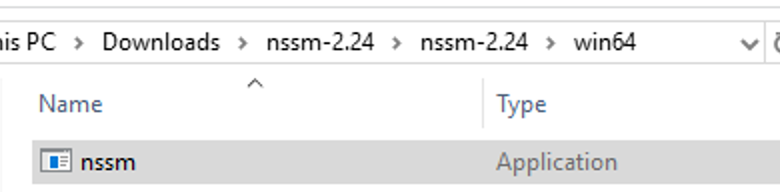
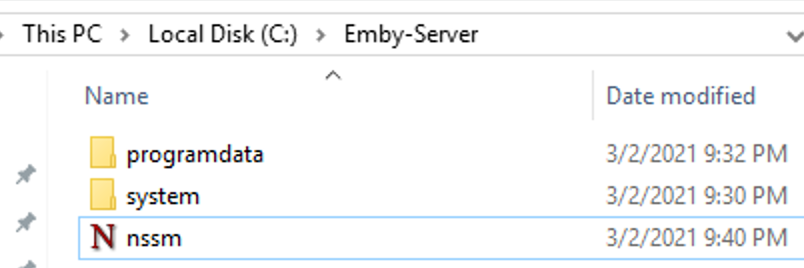
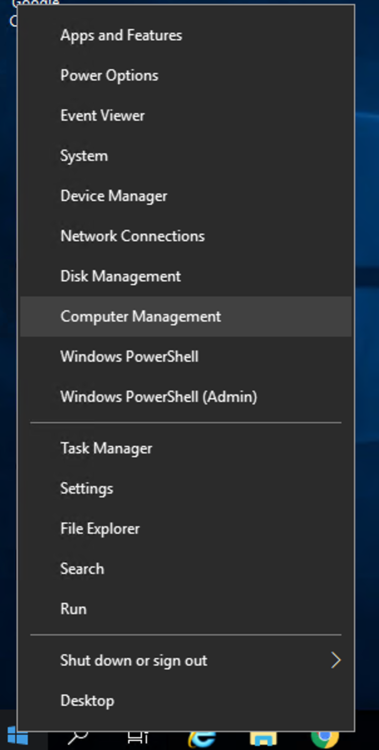
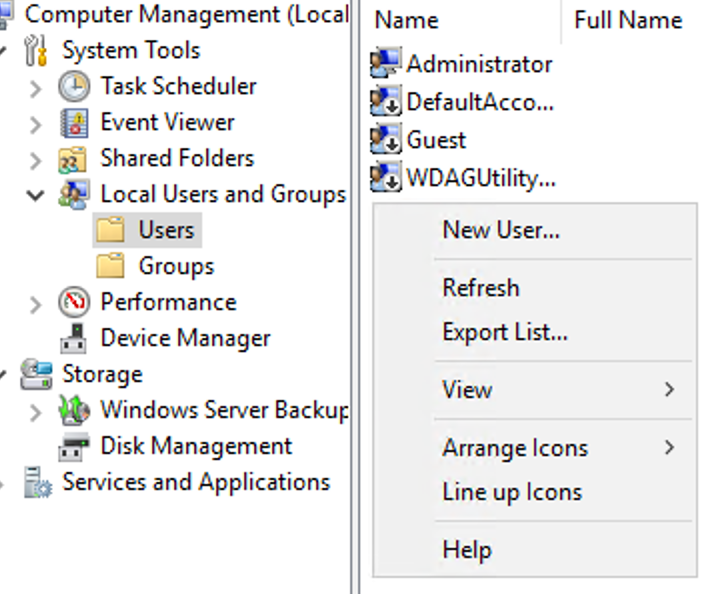
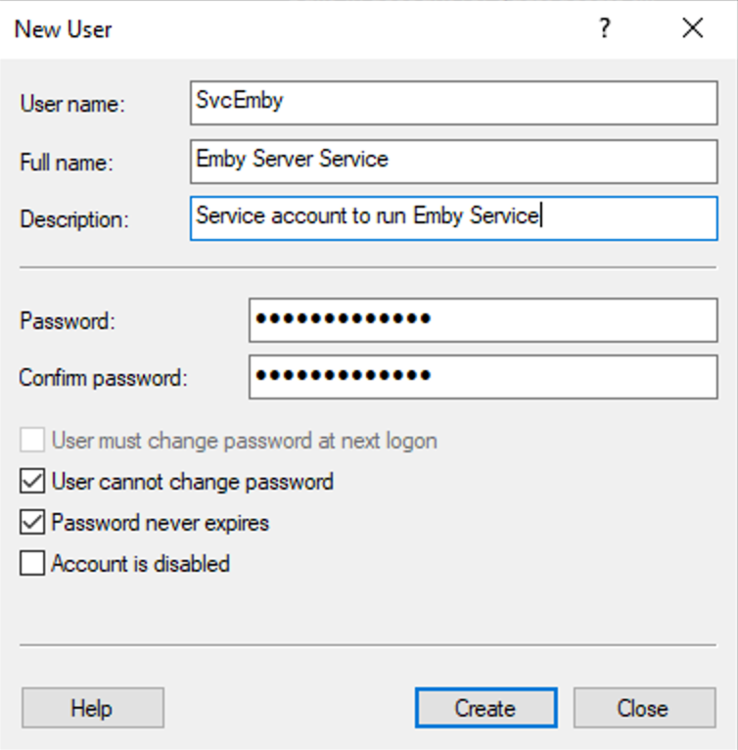
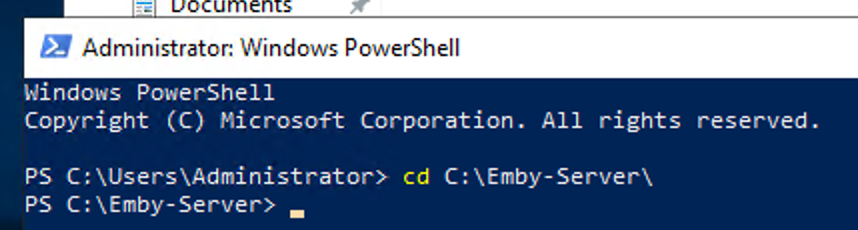
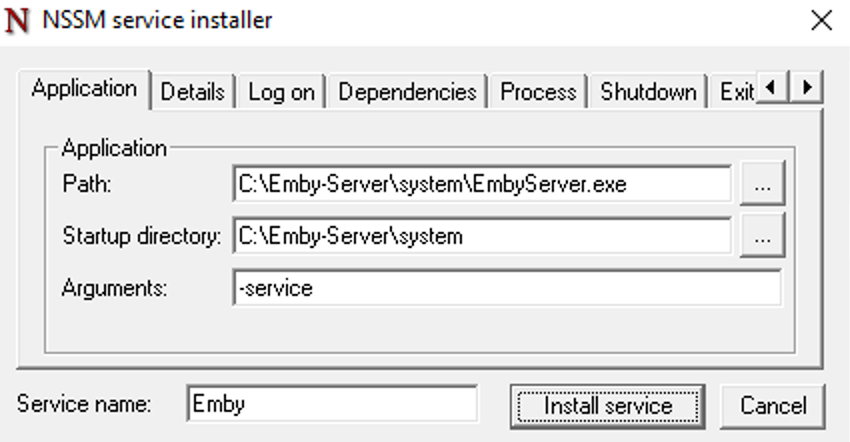
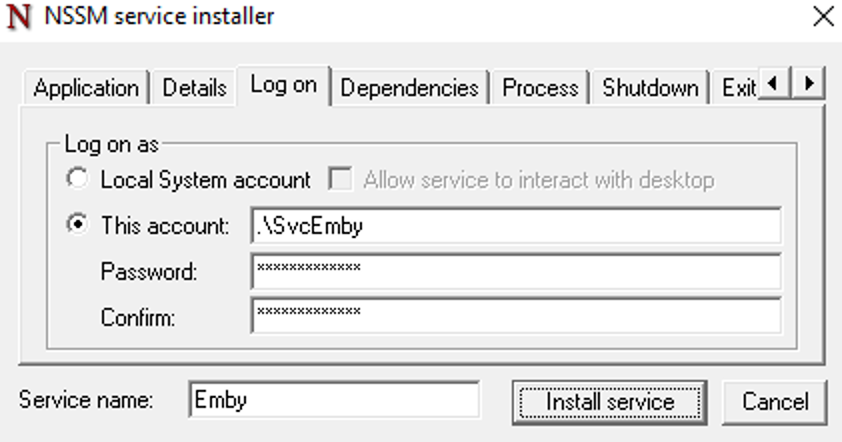
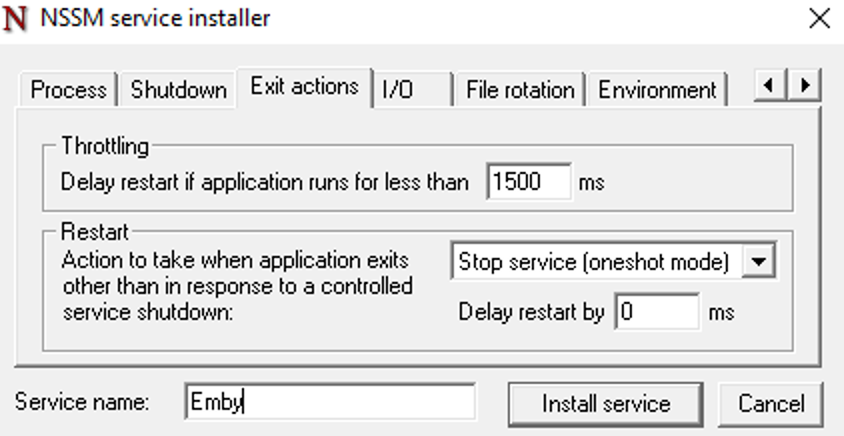
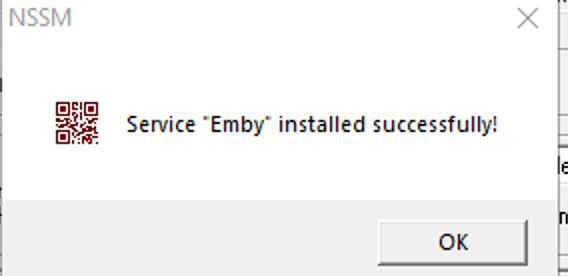
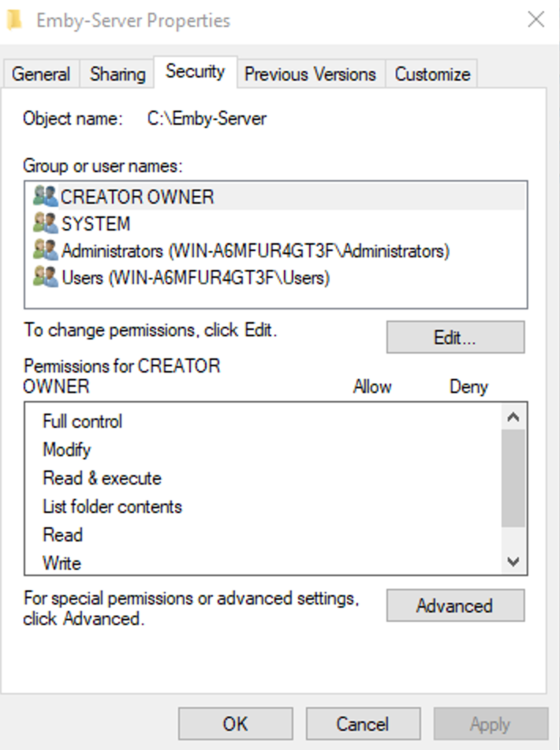
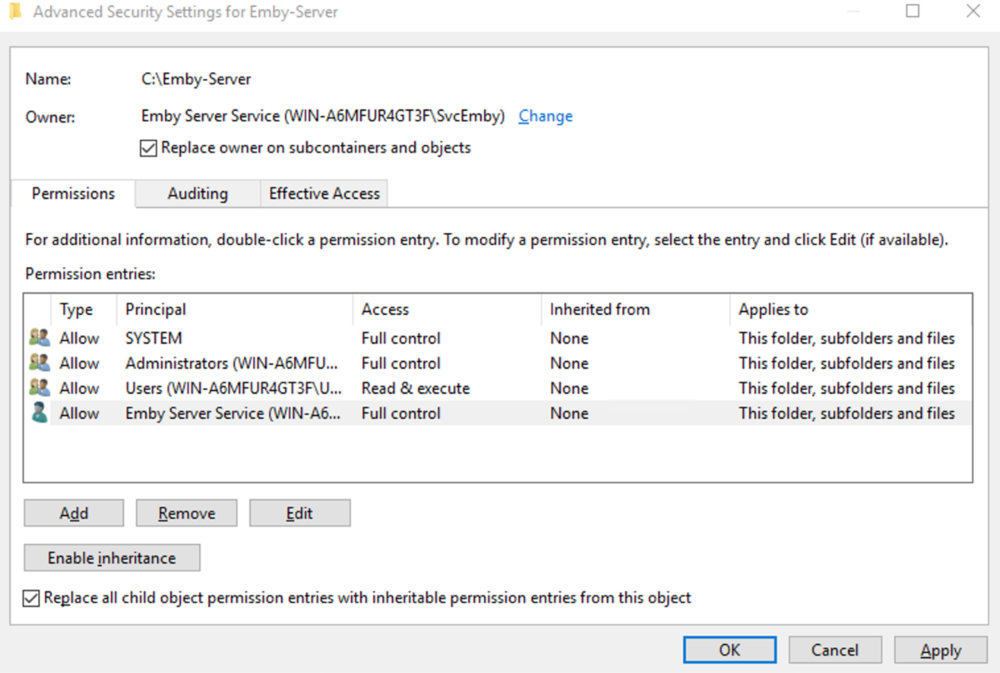
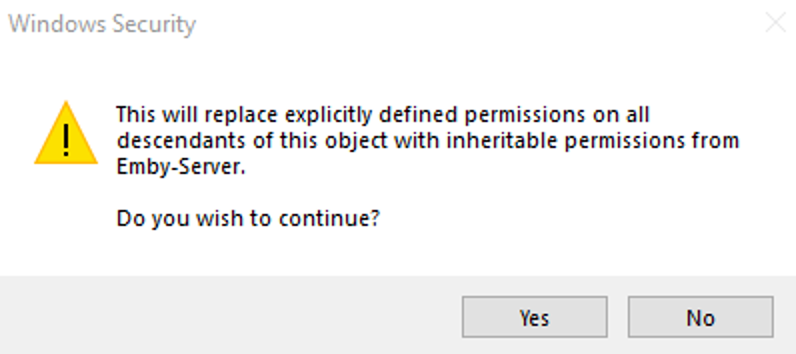
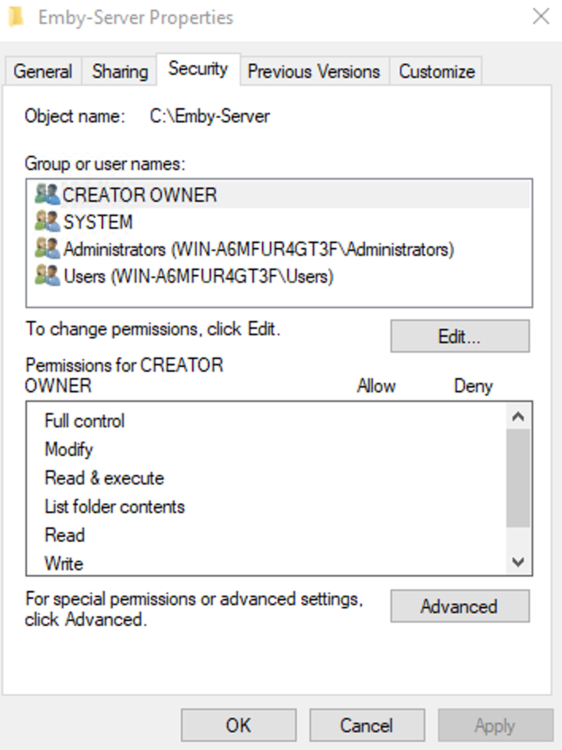
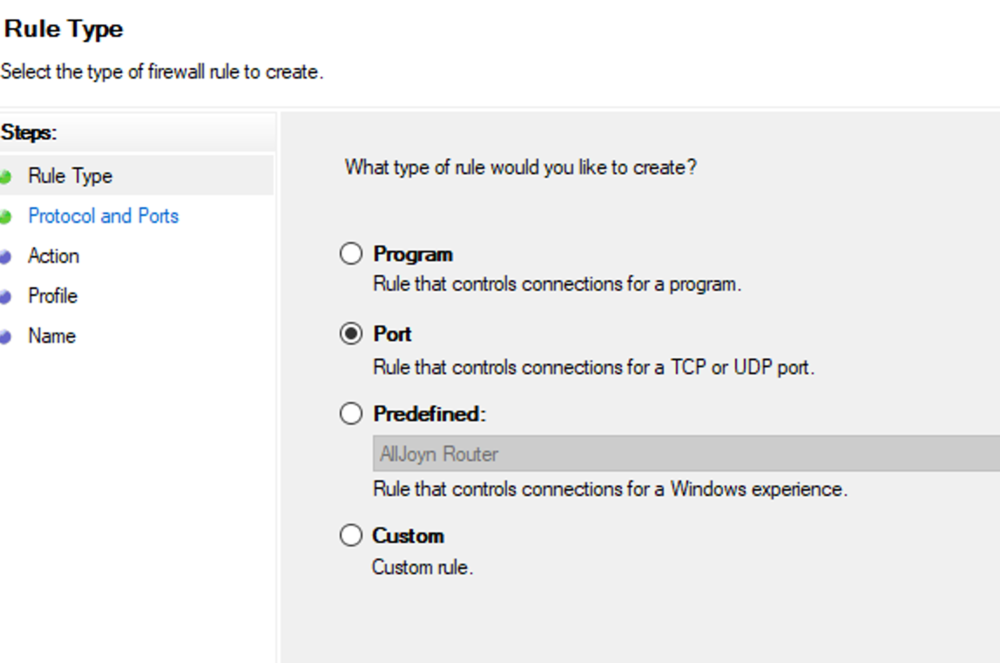
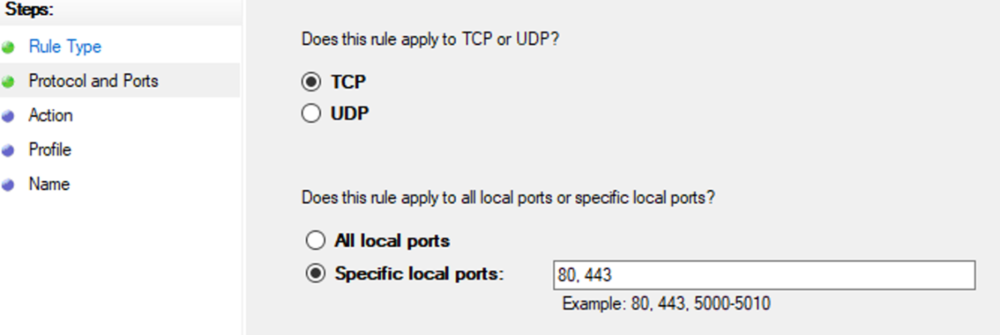
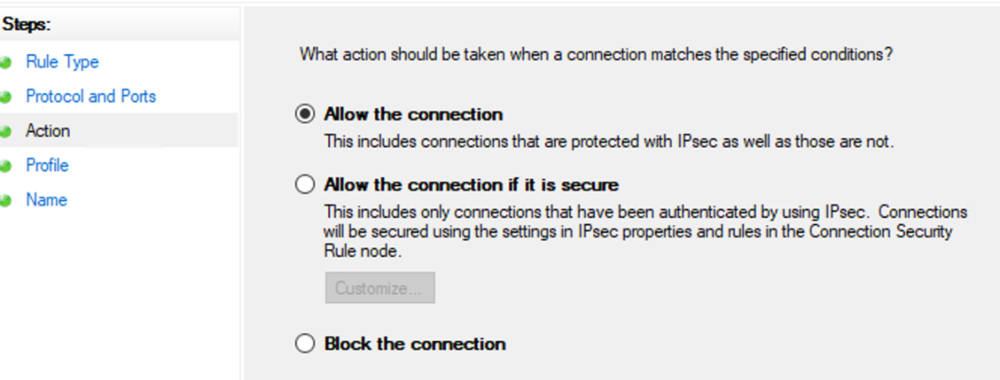
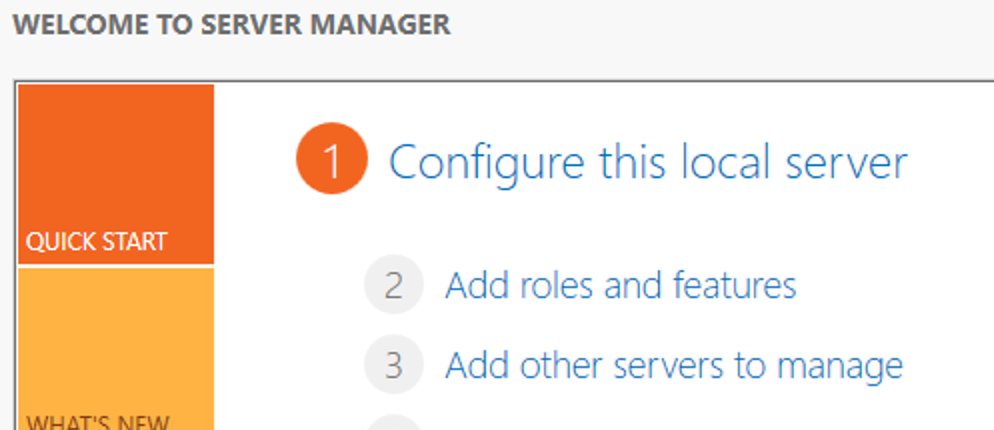
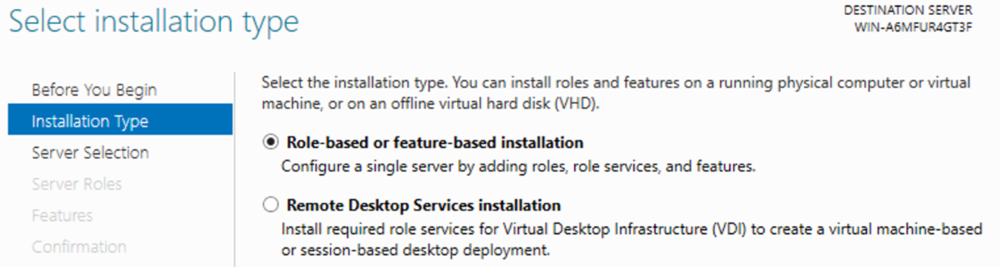
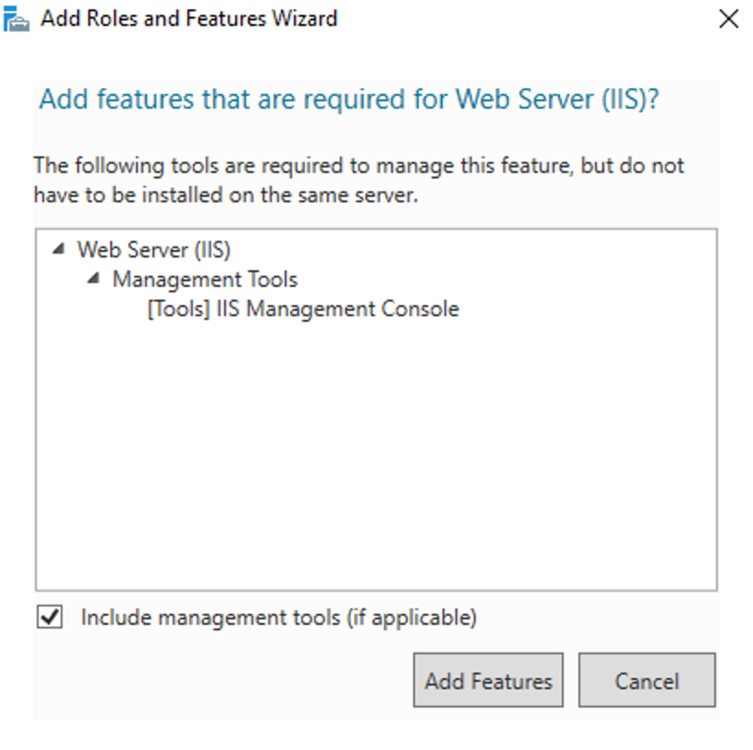
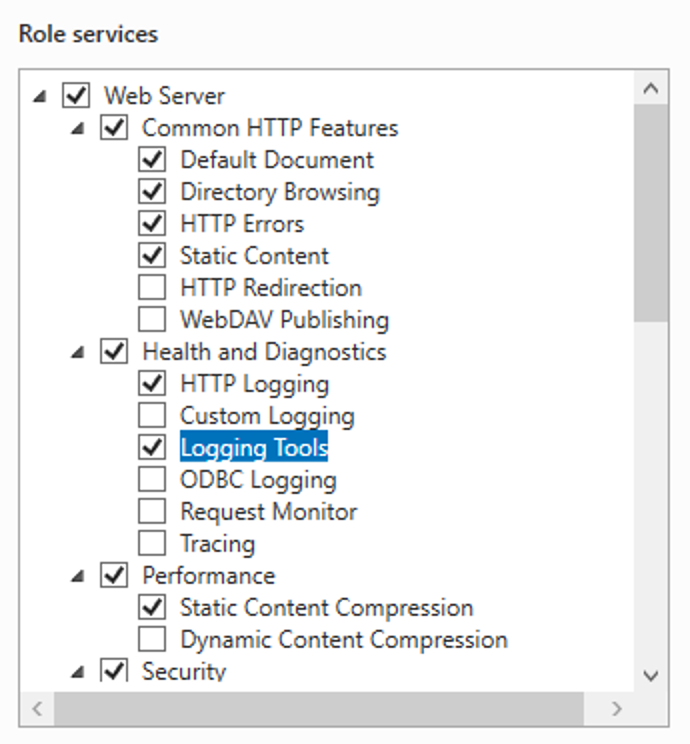
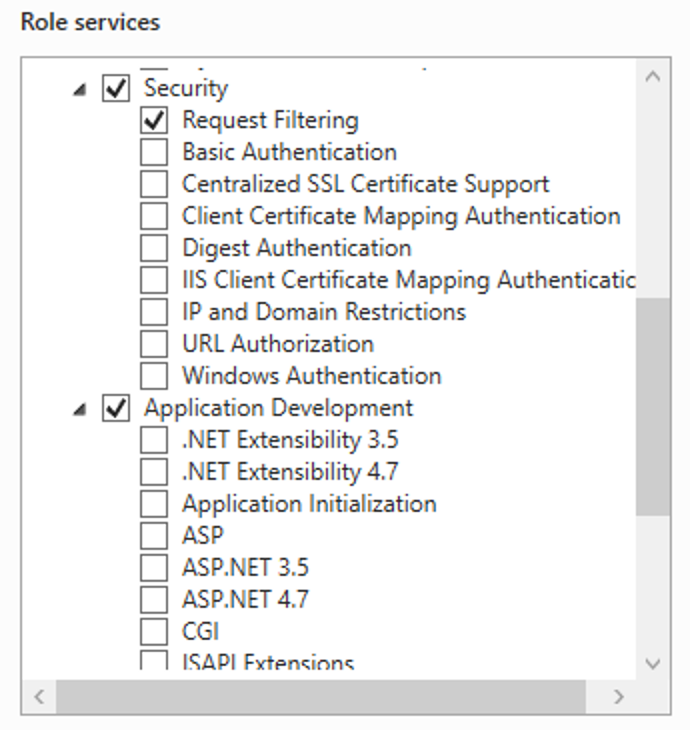
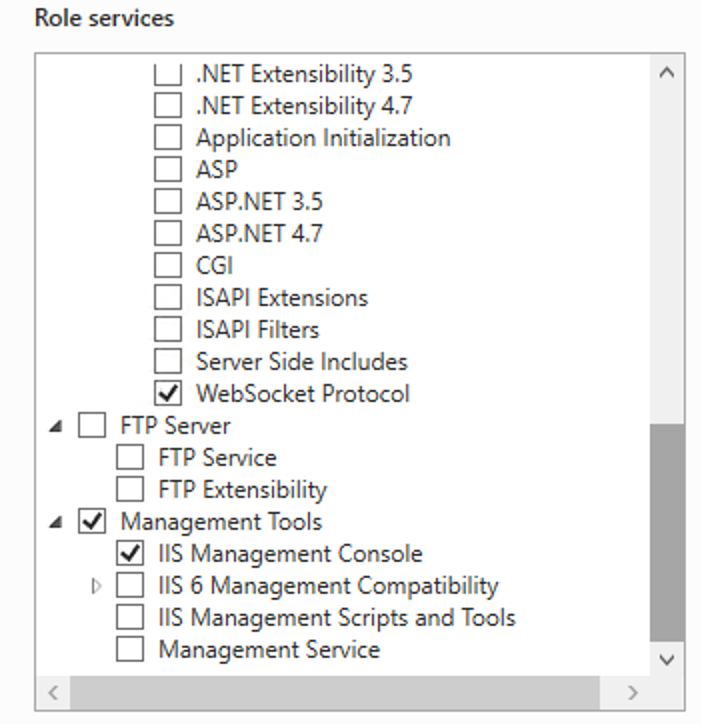
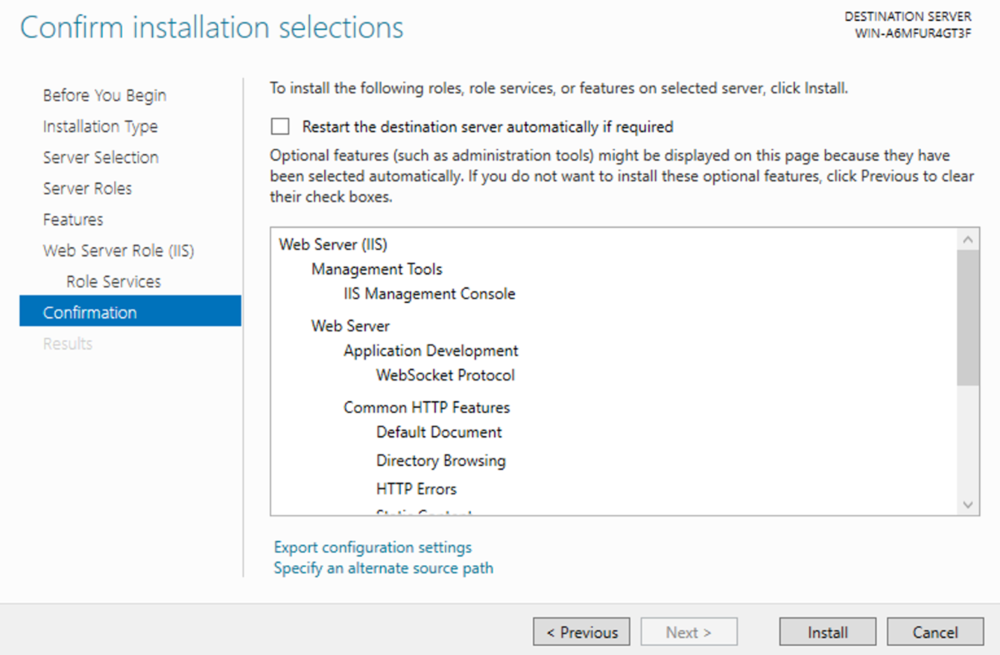
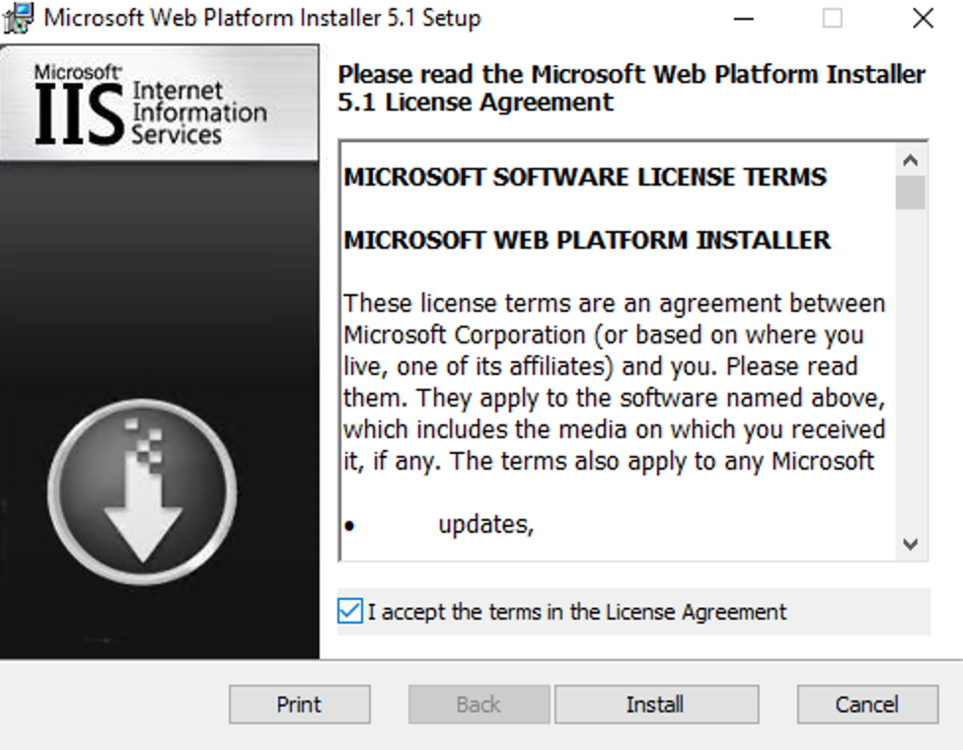
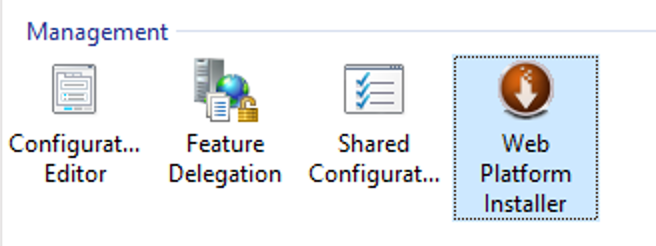
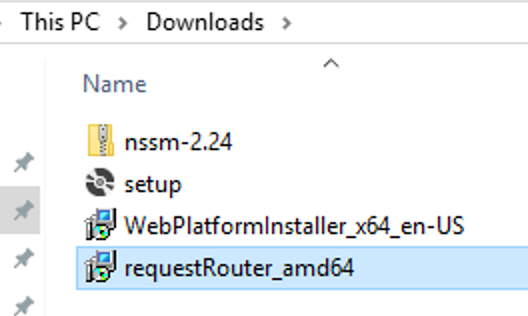
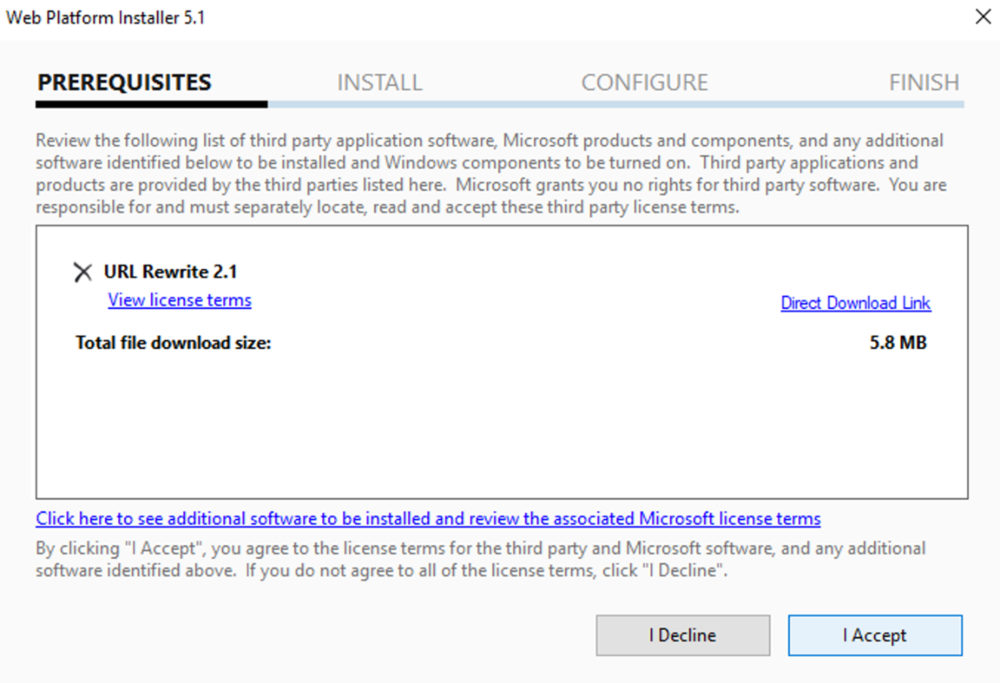
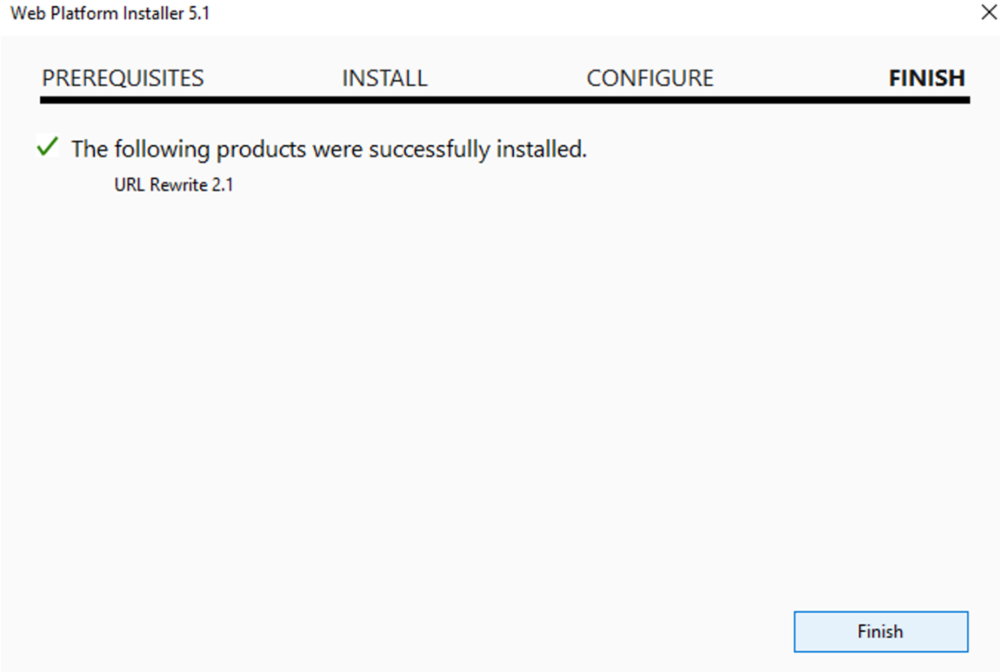
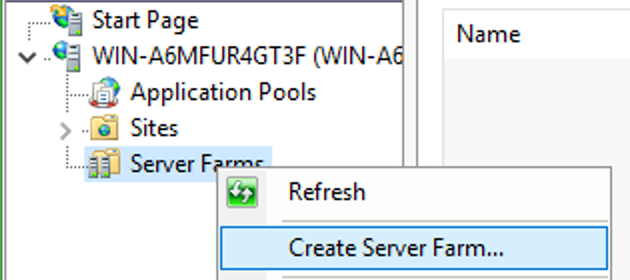
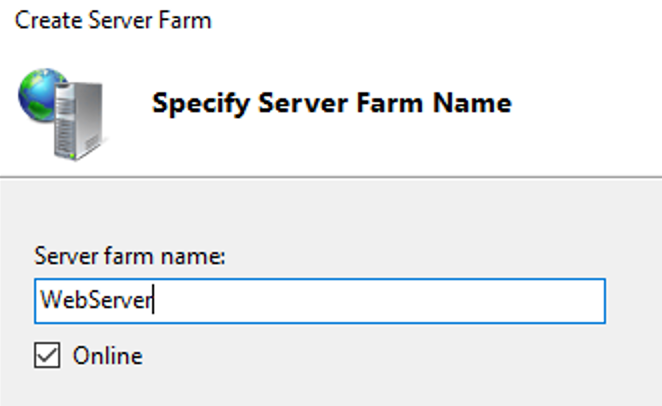
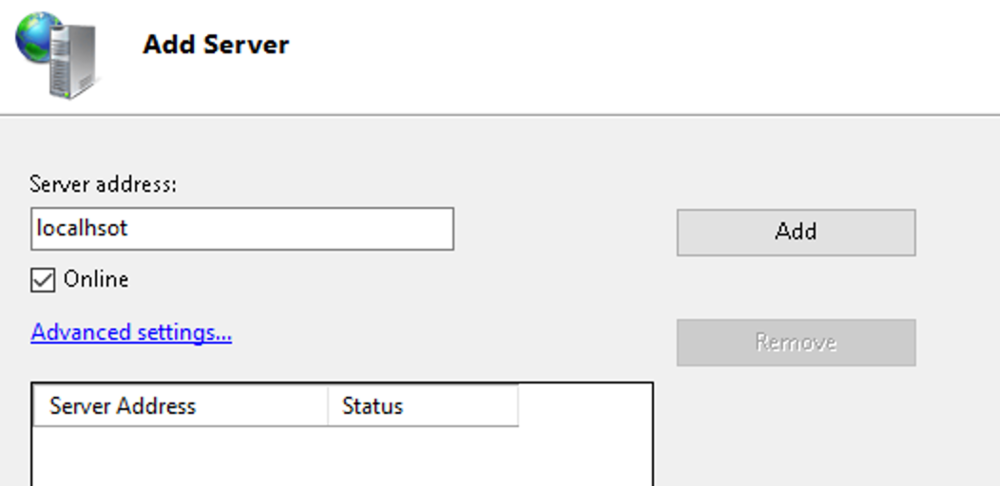
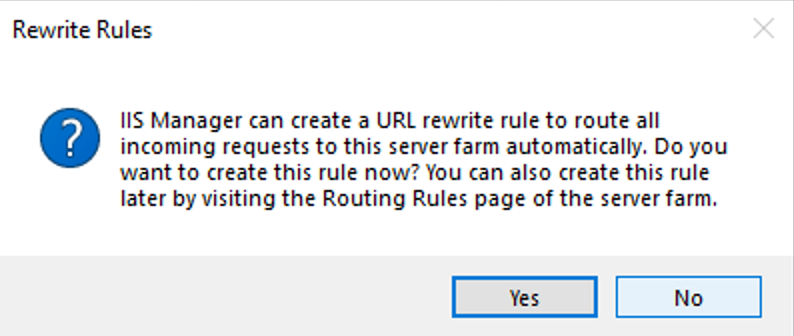
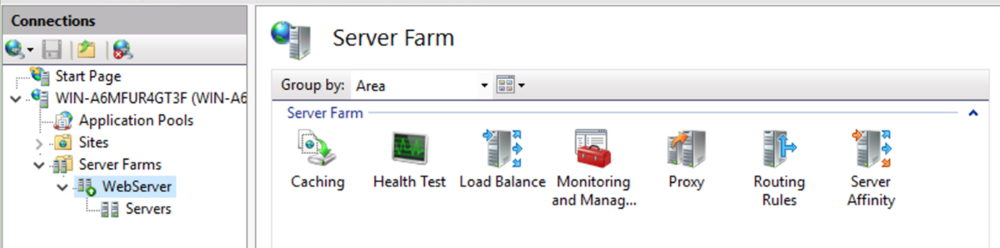
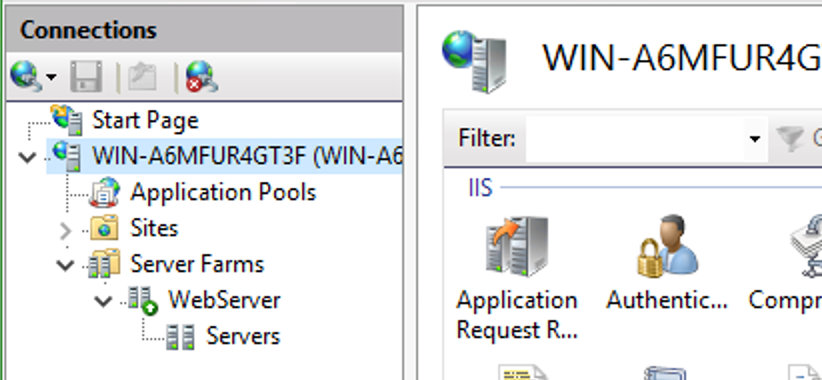
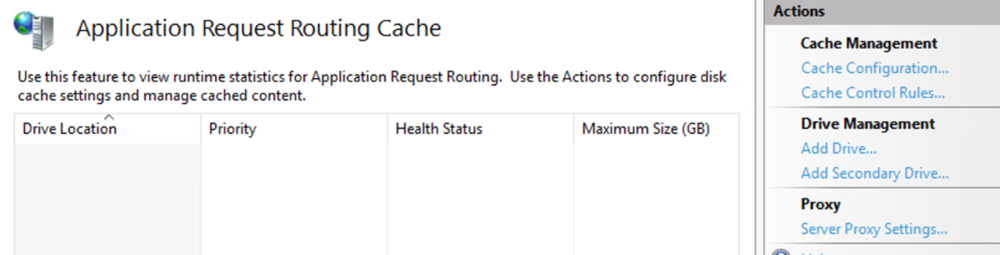
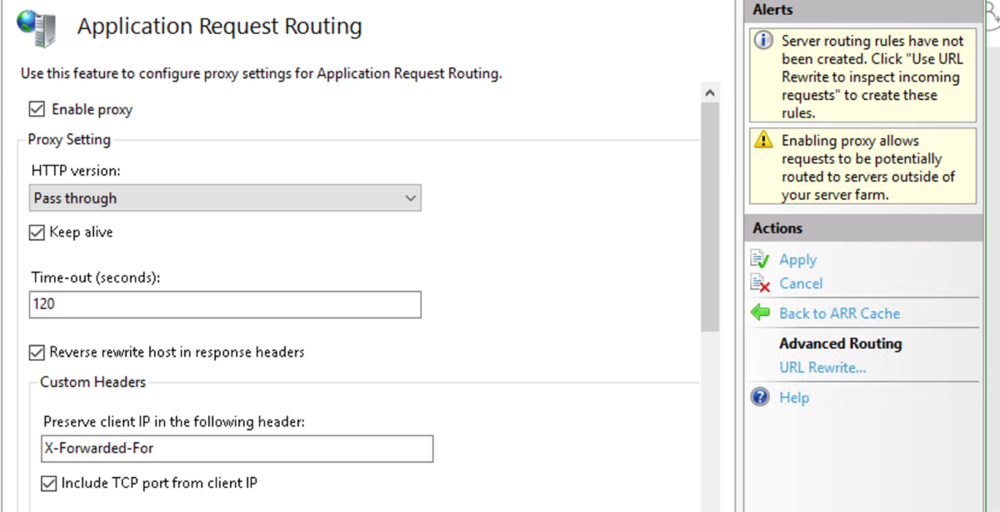
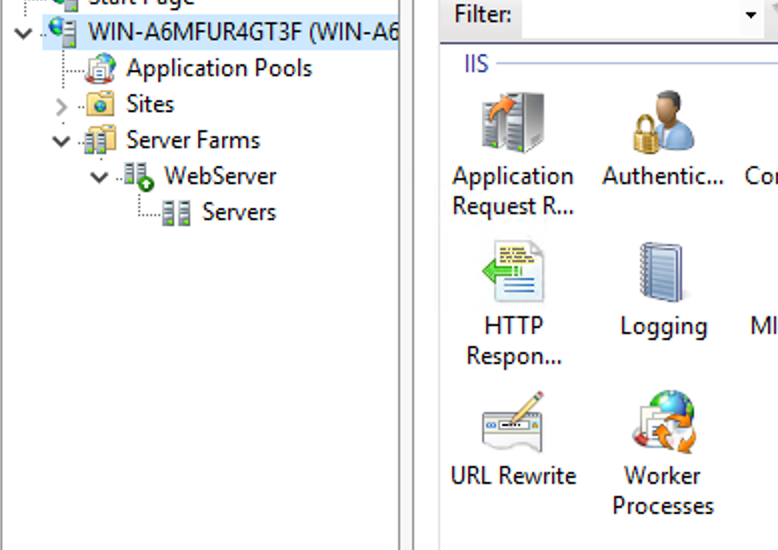
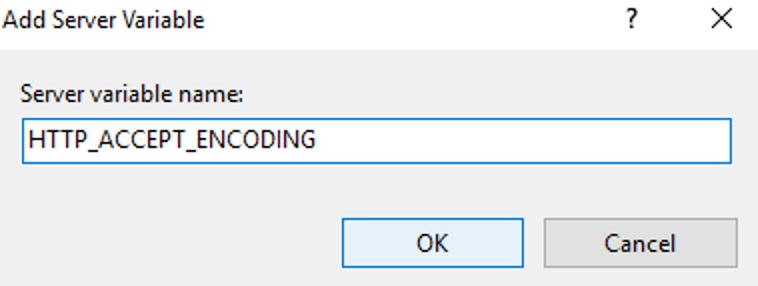
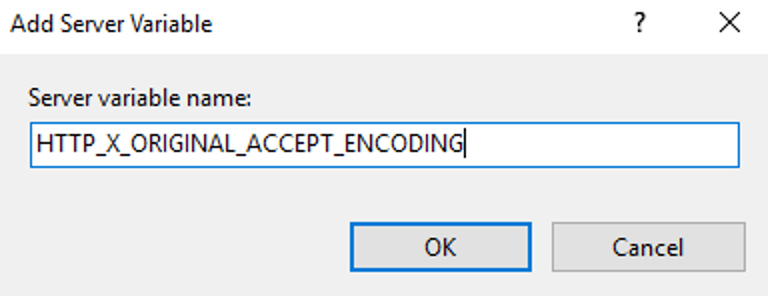
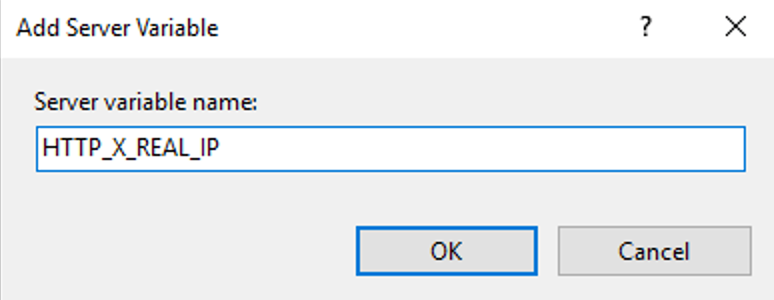
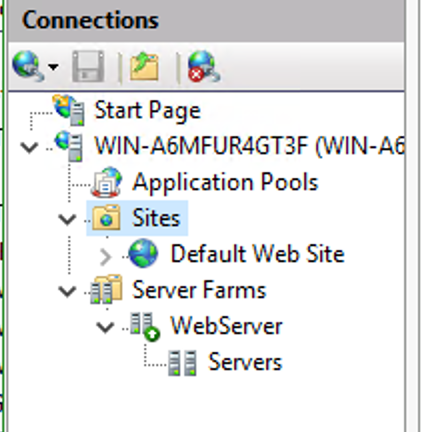
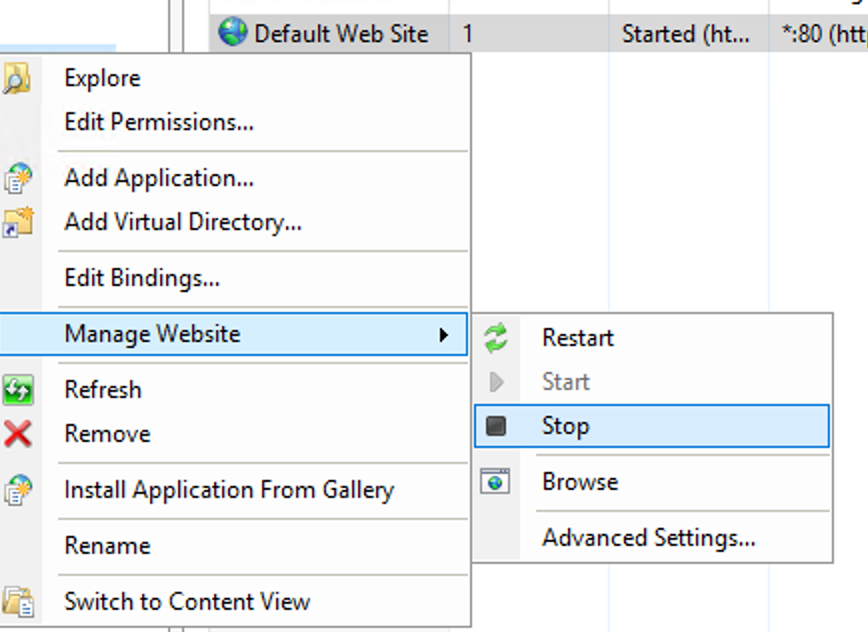
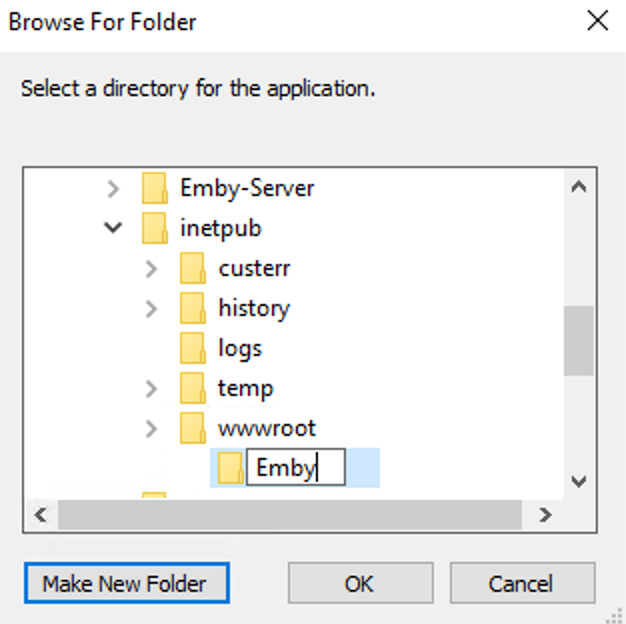
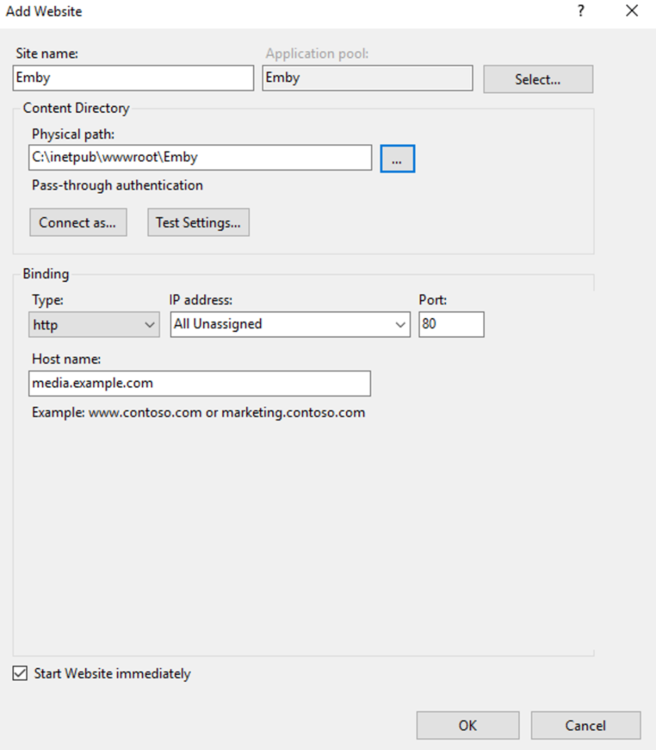
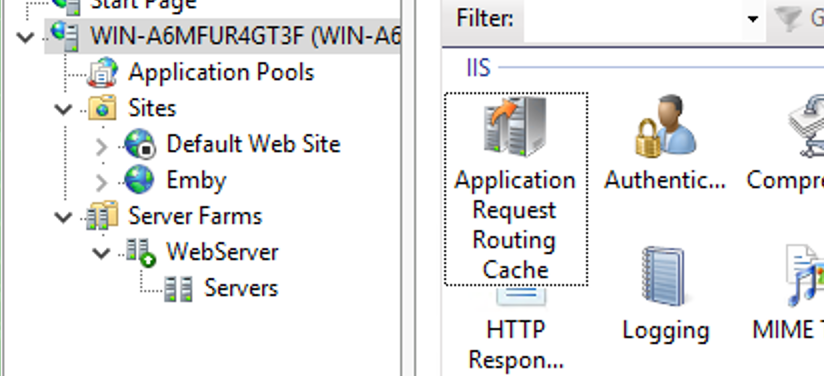
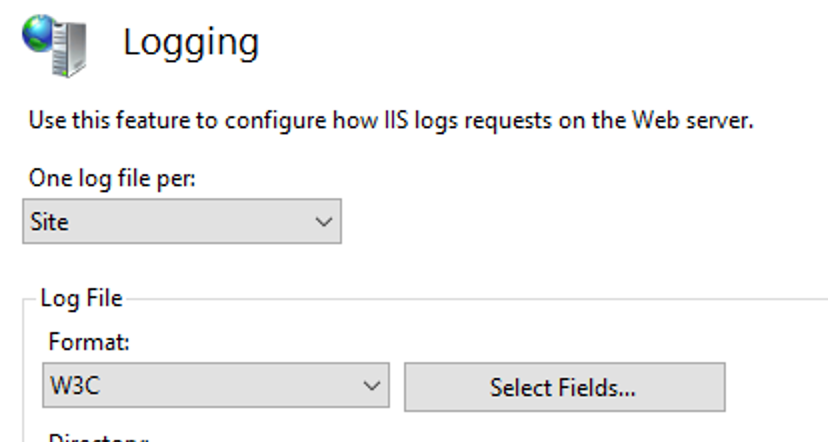
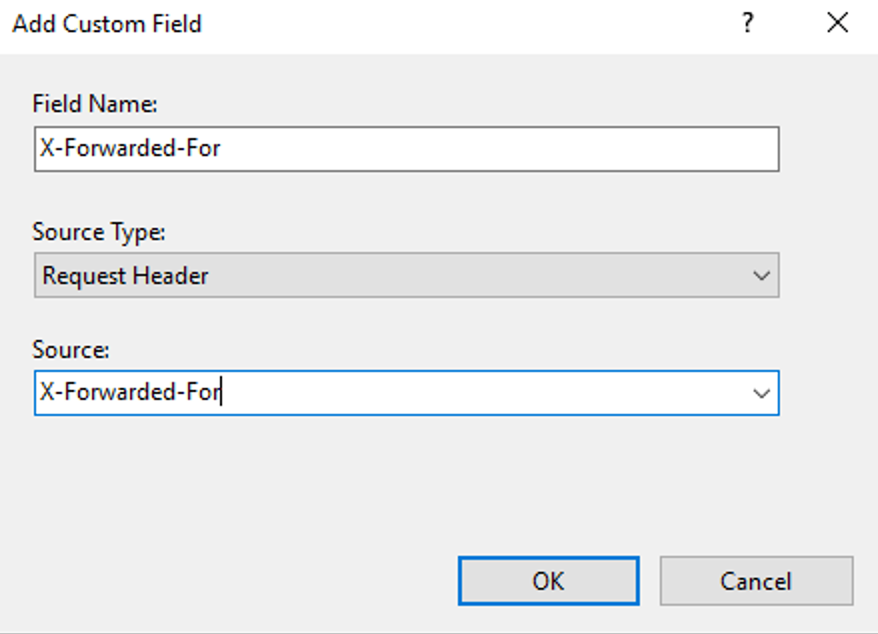
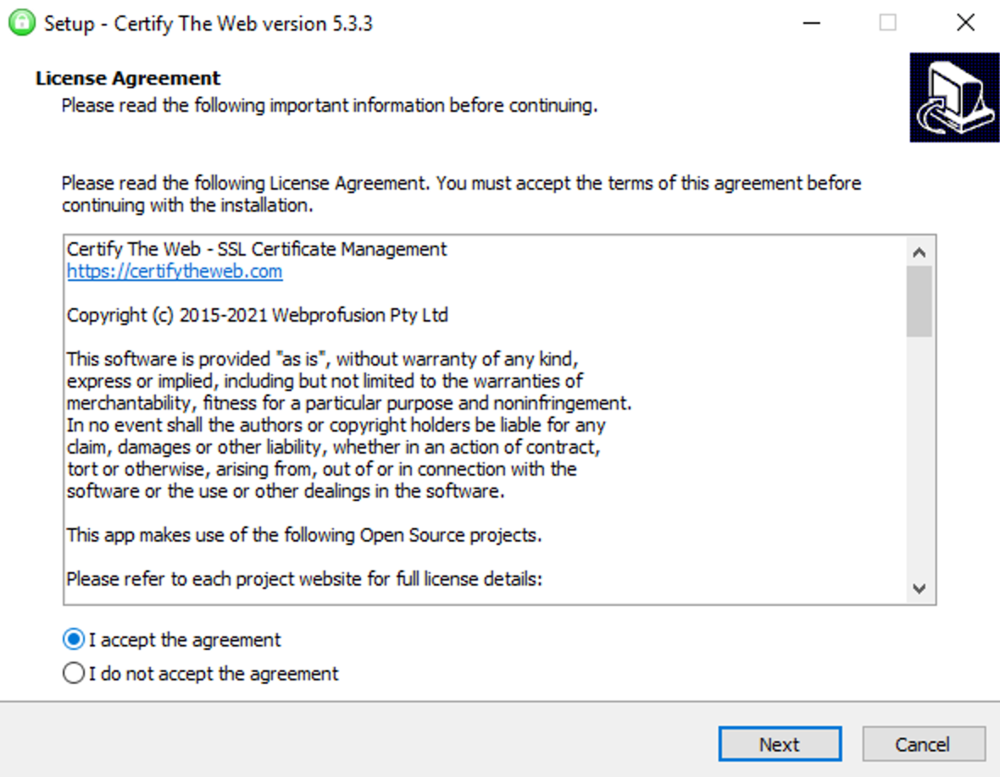
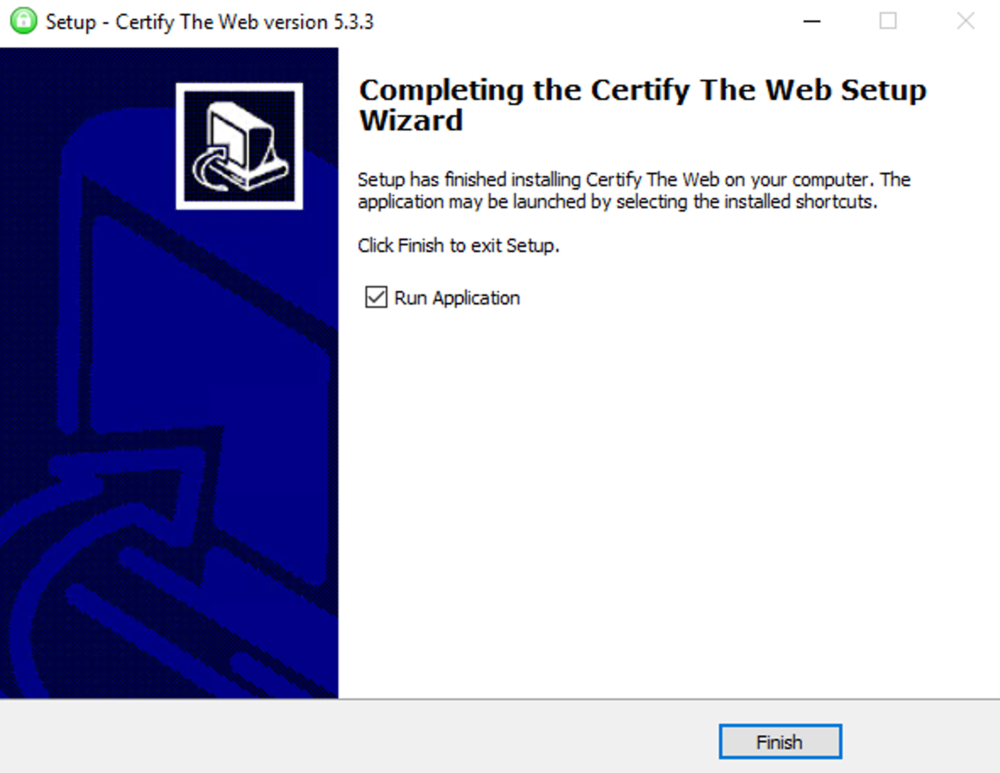
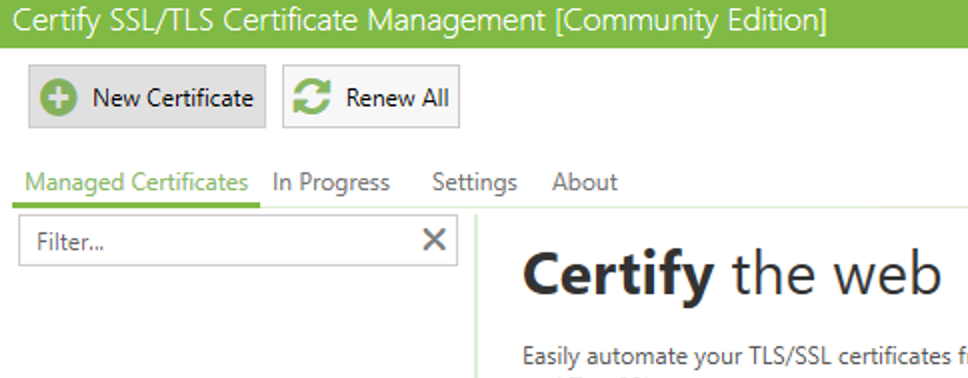
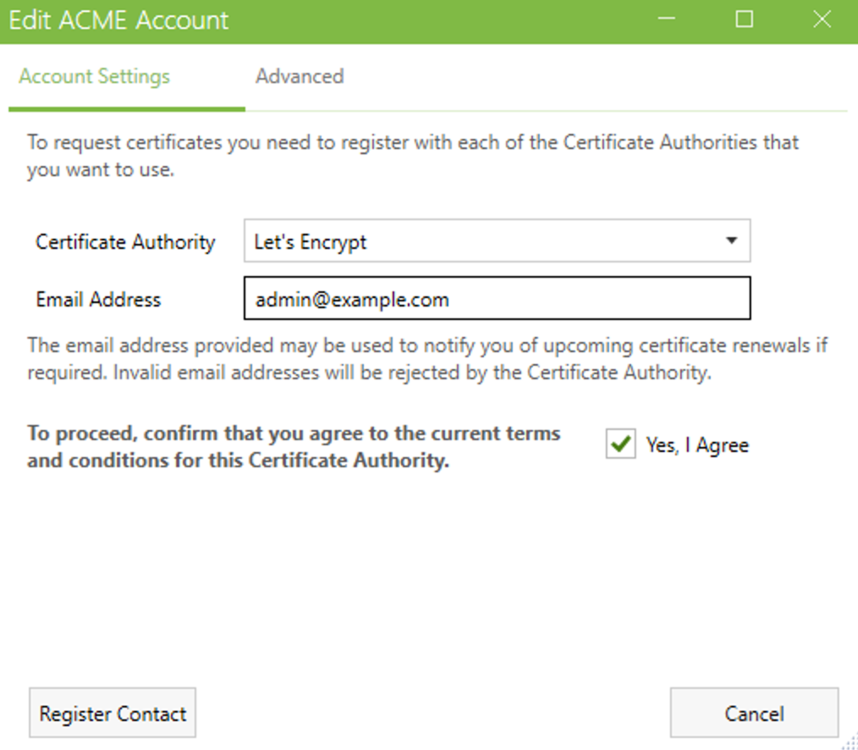
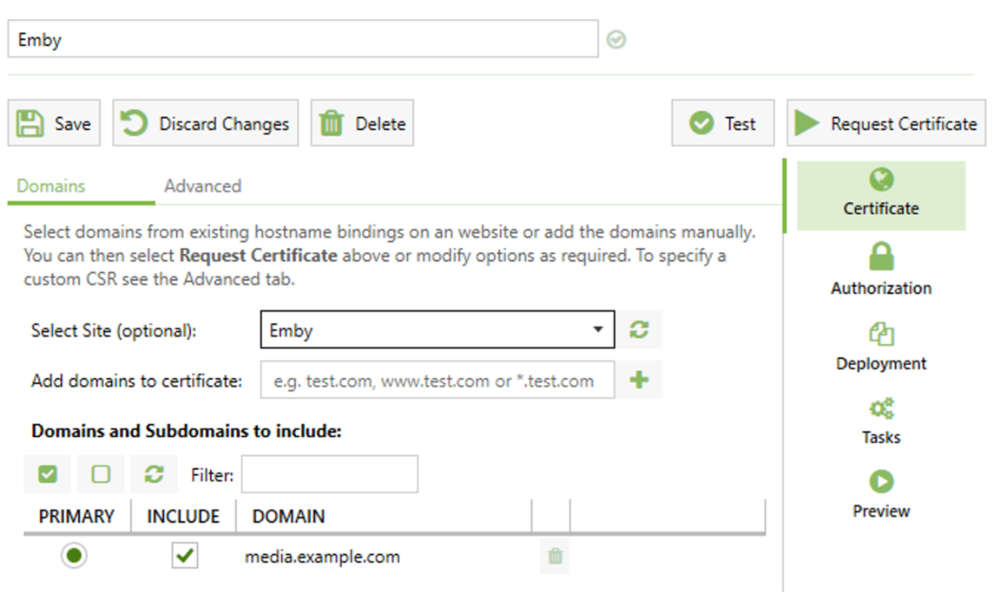
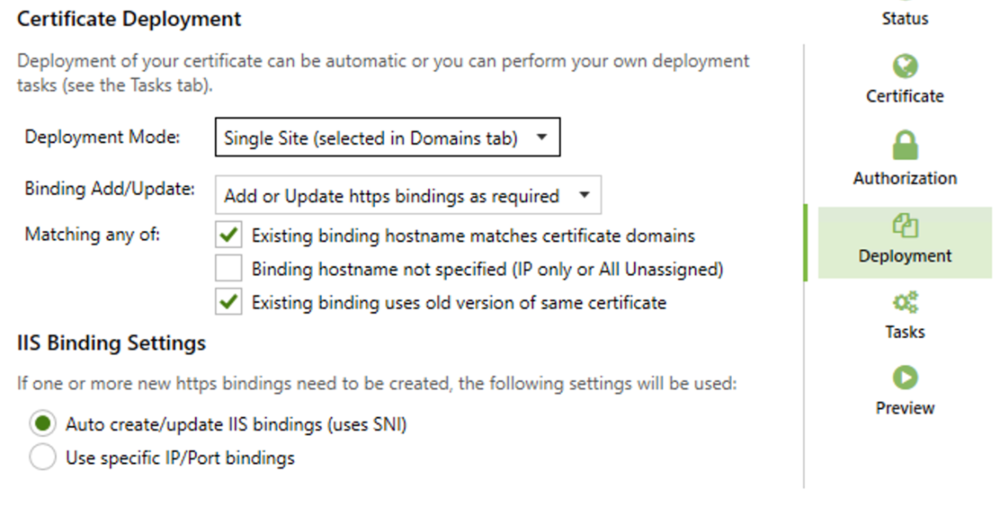
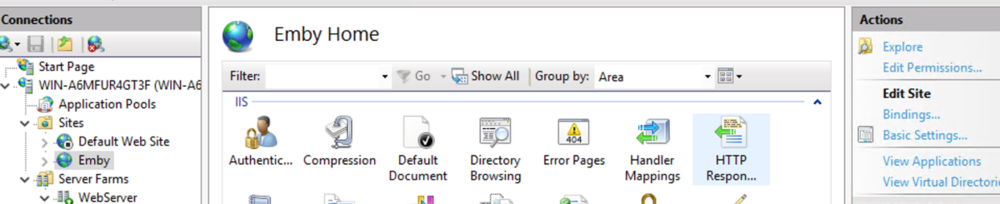
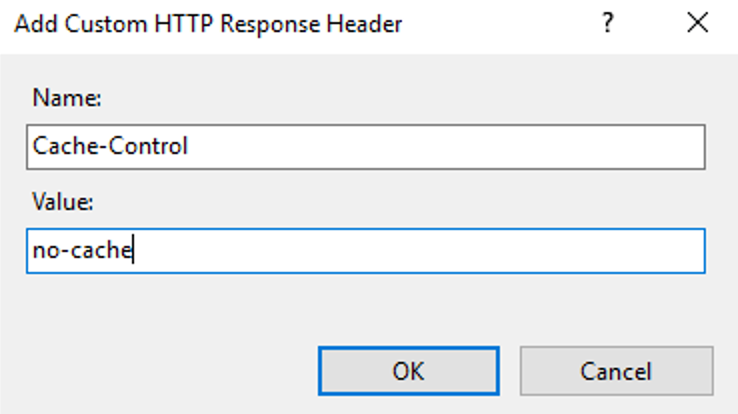
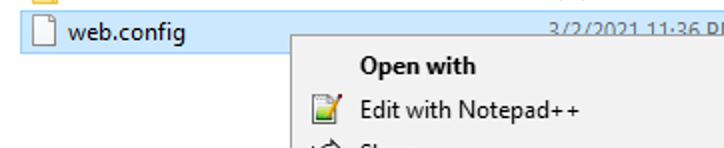
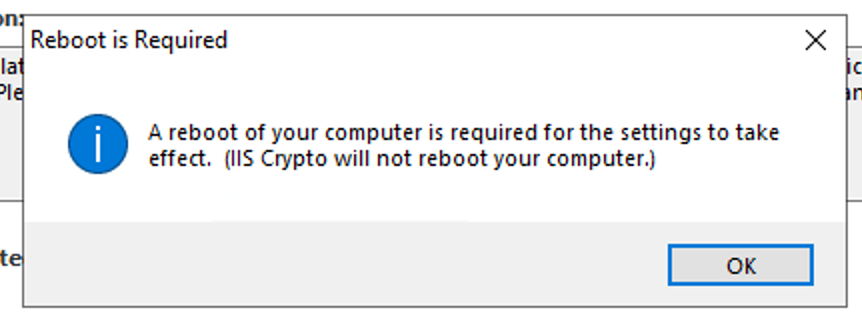
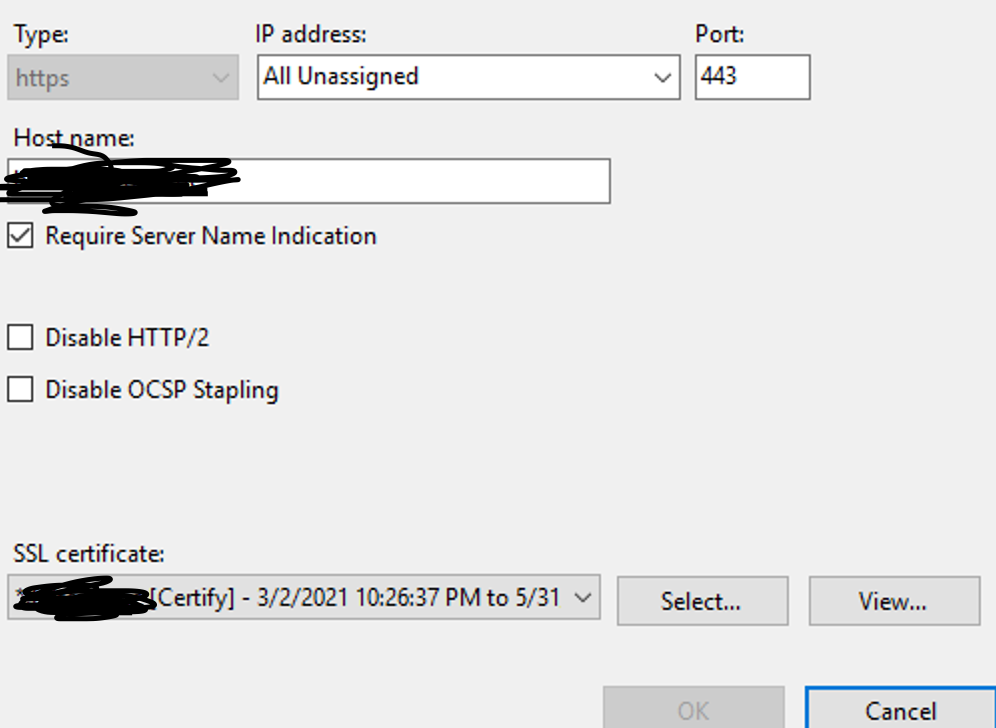
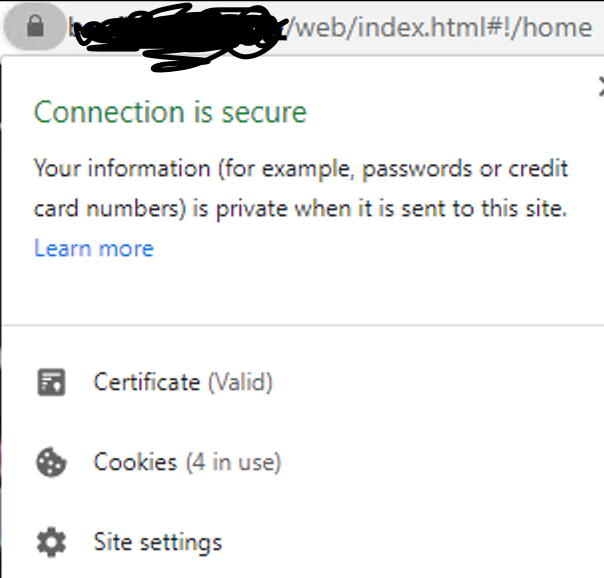
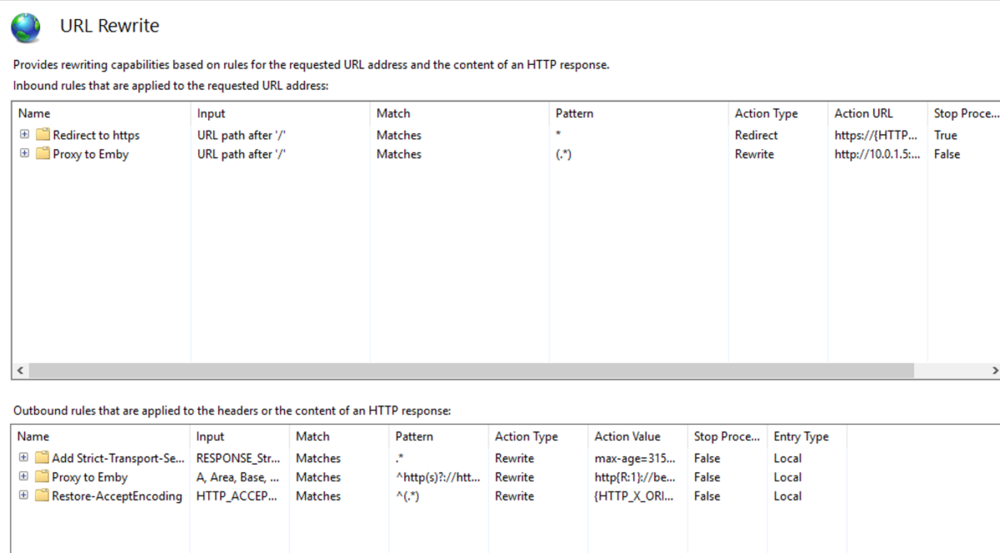
This guide will explain how to setup a Windows Server instance of Emby server with IIS as full transparent reverse proxy with SSL offload and auto-renewing certificates via Lets Encrypt. First, What is IIS? IIS or Internet Information Services is the web server service provided with Windows and Windows server installations. It is industry standard technology and is widely supported and regularly maintained by Microsoft. Second, What is a reverse proxy? A reverse proxy will take requests coming into your server (in this case HTTPS on port 443) and route them to a backend application (in this case Emby Server on port 8096 on the same box or another). Reverse proxies are very useful if you only have 1 public IP and multiple services you would like to run on a single port (443, for example is standard secure web traffic) or multiple servers that need to appear as one. Third, Why do I want a certificate for my site from Lets Encrypt? Well, most sites now days are secure (read they encrypt your traffic to prevent people from seeing your data), browsers these days flag sites that are not using properly signed certificate chains or run on insecure ports. If you use a self signed certificate in Emby, you may have difficulty getting things like the iOS app or Roku app to work properly outside your home. (Not sure about the rest of you, but Emby on the kid’s iPad is a life saver for long car rides). Let’s Encrypt provides free SSL certificates that are signed by certificate authorities that will be recognized on all devices and platforms. I will be using Windows Server 2019 with IIS 10 and AAR 3. All of this should work with Windows Server 2012R2 and Windows Server 2016 as well as Windows 10, however there may be some differences. You can use either stable or beta version of Emby Server, however in this guide we will use the stable version. At the time of writing, this guide will get you a full A+ rating from SSLlabs.com security test. (For comparison purposes, Facebook’s rating is a B.) In this guide we will: Install Emby Server Move Emby Server Installation to a non-user-locked location Setup a service user to run Emby Server as Configure Emby Server to run as a service Configure Windows Firewall Install IIS Install AAR Install IIS Rewrite module Configure AAR Configure IIS as a reverse proxy for Emby Configure SSL cypher suites for the server Install the Certify the Web client. Configure Certify the Web for auto-renewing SSL certificate for your domain Note: To be externally accessible, you will need to configure your route/modem to port forward 80 and 443 to your server. Pre-reqs/Assumptions: A physical server or VM running Windows Server An Internet Connection A DynDNS/No-IP URL (or similar routable dns name pointed at your router’s public IP) You have port forwarded ports 80 and 443 through your router to the machine you will use as a reverse proxy (in this guide we will use the same box for the reverse proxy and Emby server, but these can be run on different hosts). You have installed Notepad++ on the machine you will be setting up. Install Emby Server Download Emby Server Run the Installer Click Run when prompted If prompted by smart screen, click run anyway If prompted to install Visual C++ runtime, click install It will install to default location of %APPDATA%\Emby-Server. Move Emby Server to Non-User Locked Location Ensure that Emby Server is not running (right click icon in system tray if present and click Exit) Navigate to default location of %APPDATA% (%userprofille%\appdata\roaming) Right click the folder and click "cut" Navigate to C:\ (or root of the drive you wish to have Emby run from) Right click in the whitespace and paste. (if prompted to provide administrator permission, approve) Create a Service Account to run Emby as Note: Instructions show how to do this using local users and computers, you can also do this with Active Directory Users and Computers if your server is running that role. Right click on the start button (Windows flag) on the left side of the task bar Click Computer Management Expand Local Users and Groups on the left side Click Users Right click the whitespace and click new user Complete the new user dialog as shown (make sure you save whatever password you use as you will need it later, ProTip: don't re-use passwords) Click create Click close Close the computer management window Setup NSSM NSSM (Non-Sucking Service Manager) is needed to run Emby Server as a service as Emby Server does not include the nessicary components to run as a Windows service by default. Download here: https://nssm.cc/download Double click downloaded zip to open it in windows explorer Navigate to /win64 folder inside zip Copy/extract 64 bit version of the file to C:\Emby-Server Setup Folder Permissions Navigate to C:\ Right click the Emby-Server folder Click Properties Click Security tab Click Advanced Click Disable Inheritance Click Convert to Explicit Select CREATOR OWNER Click Remove Select Users (special) Click Remove Click Add Enter SvcEmby in the dialog Click OK Click Full Control Click OK Click Change next to owner at the top of the box Type SvcEmby in the dialog Click OK Check the Replace owner check box Check the Replace permissions checkbox Verify the dialog window looks similar to this (computer name will be different) Click OK When prompted if you want to replace permissions click Yes Verify security tab looks like this Click OK Setup Emby as a Service using NSSM Right click the start button on the left side of the task bar Click Windows Powershell (Admin) Type: "cd C:\Emby-Server" and press enter Type ".\nssm.exe install Emby" and press enter The install service dialog will launch, fill out as follows: Application Tab Details Tab Logon Tab (note, if you are using active directory it should be: YOURDOMAIN\SvcEmby) Exit Actions Tab Click Install Service Click OK Config ure Windows Firewall Click Start Click Control Panel Click Windows Defender Firewall Click Advanced Settings on the left hand side Click Inbound Rules Click New Rule on the right hand side Click Port Click Next Type 80, 443 in the ports box Click Next Click Next Click Next Name it Web Server Ports Click Finish Install IIS (Internet Information Services) Click Start Click Server Manager Click Add Roles and Features Click next on the Before you Begin page Click Role Based install Click Next Verify you are installing on your local server Click Next Check the box for "Web Server (IIS)" When prompted to install management tools Click Add Features Click Next Under Features, click Next Click Next again to get to role services Check the boxes for all of the following role services Make sure you check the box for web sockets under Application Development, this is needed for various features of Emby to work right. Click Next Click Install Once installation completes, click close Install Web Platform Installer add-on Download from: https://www.microsoft.com/web/downloads/platform.aspx Run the Web Platform Installer add-on installer Click Install Click Finish Install AAR (Advanced Application Routing) Download from: https://www.microsoft.com/en-us/download/details.aspx?id=47333 Run the Request Router installer Click Install Install IIS Re-Write Module Click Start Click Administrative Tools Open Internet Information Services (IIS) Manager Click the name of your server on the left Double Click on the Web Platform Installer In the search box type "url rewrite" Click Add Click Install Click I Agree Click Finish Configure AAR Click Start Click Administrative Tools Open Internet Information Services (IIS) Manager Click the name of your server on the left Right Click Server Farms Click Create Server Farm Name your Server Farm Click Next Enter the IP address of the server or "localhost" Click Add Click Finish Click No in the dialog that pops up Expand your newly created Server Farm Click Proxy Configure settings as shown Click Apply Click your Server Click Application Request Routing Click Server Proxy Settings Configure settings as shown Click Apply Click Your Server Configure IIS Server Variables Click Url Re-Write Click View Server Variables Click Add Type "HTTP_ACCEPT_ENCODING" Click OK Click Add Type "HTTP_X_ORIGINAL_ACCEPT_ENCODING" Click OK Click Add Type "HTTP_X_FORWARDED_FOR" Click OK Click Add Type "HTTP_X_REAL_IP" Click OK Click Your Server Create Emby Site Expand Sites on the left hand side Right Click "Default Web Site" Highlight "Manage Website" Click Stop Right Click the white space in the Sites list Click Add Website Click the "..." button to the right of Physical Path Browse to C:\inetpub\wwwroot Click it Click Make New Folder Call it Emby Click OK Under Binding Fill in with your public host name (see dynamic dns mentioned in pre-reqs) Click OK Configure Logging Click your server Click Logging Click Select Fields Click Add Field Configure as shown Click OK Click OK Click Apply Install and Configure Certify The Web client Download From: https://certifytheweb.com Run the Certify the Web installer Click Next Click Next Click Next Click Install Click Finish Click New Certificate Click on on Contact Prompt Fill in your contact email Click Register Contact Click New Certificate again Select Emby from the sites list Name and domain will populate automatically. Click Deployment Configure as shown Complete certificate verification process Click your site in IIS manager Click Bindings Verify there is an HTTPS binding and that it looks similar to this (with your domain information) Edit Web.Config for Emby Site Click HTTP Response Headers Click Add Configure as show (we are just creating a header to get the web.config to exist, we will paste in a premed one below, so these values dont really matter) Click OK Open an Explorer window and Browse to C:\inetpub\wwwroot\Emby Right click web.config and Edit with Notepad++ Replace existing content with web.config below <?xml version="1.0" encoding="UTF-8"?> <configuration> <system.webServer> <rewrite> <rules> <clear></clear> <rule name="Redirect to https" enabled="true" patternSyntax="Wildcard" stopProcessing="true"> <match url="*" negate="false" /> <conditions logicalGrouping="MatchAny"> <add input="{HTTPS}" pattern="off" /> </conditions> <action type="Redirect" url="https://{HTTP_HOST}{REQUEST_URI}" redirectType="Found" /> </rule> <rule name="Proxy to Emby" stopProcessing="false"> <match url="(.*)" /> <serverVariables> <set name="HTTP_X_ORIGINAL_ACCEPT_ENCODING" value="{HTTP_ACCEPT_ENCODING}" /> <set name="HTTP_ACCEPT_ENCODING" value="" /> <set name="HTTP_X_REAL_IP" value="{REMOTE_ADDR}" /> </serverVariables> <action type="Rewrite" url="http://localhost:8096/{R:1}" logRewrittenUrl="true" /> <conditions> <add input="/{R:1}" pattern=".well-known" negate="true" /> </conditions> </rule> </rules> <outboundRules> <rule name="Add Strict-Transport-Security when HTTPS" enabled="true"> <match serverVariable="RESPONSE_Strict_Transport_Security" pattern=".*" /> <conditions> <add input="{HTTPS}" pattern="on" /> </conditions> <action type="Rewrite" value="max-age=31536000; includeSubDomains; preload" /> </rule> <rule name="Proxy to Emby" preCondition="ResponseIsHtml1" enabled="true"> <match filterByTags="A, Area, Base, Form, Frame, Head, IFrame, Img, Input, Link, Script" pattern="^http(s)?://http://localhost:8096/(.*)" /> <action type="Rewrite" value="http{R:1}://media.example.com/{R:2}" /> </rule> <rule name="Restore-AcceptEncoding" preCondition="NeedsRestoringAcceptEncoding"> <match serverVariable="HTTP_ACCEPT_ENCODING" pattern="^(.*)" /> <action type="Rewrite" value="{HTTP_X_ORIGINAL_ACCEPT_ENCODING}" /> </rule> <preConditions> <preCondition name="ResponseIsHtml1"> <add input="{RESPONSE_CONTENT_TYPE}" pattern="^text/(.+)" /> </preCondition> <preCondition name="NeedsRestoringAcceptEncoding"> <add input="{HTTP_X_ORIGINAL_ACCEPT_ENCODING}" pattern=".+" /> </preCondition> </preConditions> </outboundRules> </rewrite> <caching enabled="false" enableKernelCache="false" /> <httpProtocol> <customHeaders> <add name="X-Frame-Options" value="SAMEORIGIN" /> <add name="X-Xss-Protection" value="1; mode=block" /> <add name="X-Content-Type-Options" value="nosniff" /> <add name="Referrer-Policy" value="same-origin" /> <add name="Feature-Policy" value="sync-xhr 'self'" /> <add name="Cache-Control" value="no-cache" /> </customHeaders> </httpProtocol> </system.webServer> </configuration> Save changes (if prompted to restart Notepad++ in admin mode allow it and then try saving again) IIS will now be properly configured as a reverse proxy for Emby. Under IIS Manager > Rewrite you should now see the following rules: Configure Server Cyphers Download here: https://www.nartac.com/Products/IISCrypto/Download (GUI version) Run the IISCrypto too Click Templates In the template drop down box, select PCI 3.2 This will disable IIS from being able to serve via SSL 2.0, 3.0; TLS 1.0 and TLS 1.1. This will leave just the industry standard TLS 1.2. Click Apply Click OK. Reboot your server. Emby Internal Settings Navigate to your server via the localhost:8096 address Click the gear in the top right corner Click Network from the list of tabs on the right Configure as shown (use your hostname in the external domain box) Conclusion Upon rebooting your computer will start IIS services and Emby server as a service. Traffic coming in on port 80 (if someone just types your url without HTTPS in their browser's address bar) will be automatically redirected to port 443 and the HTTPS:// version of your host name. Your certificate will auto-renew every so often and re-bind to the site in IIS without any interaction on your part. This allows for a server that you can for the most part setup, and forget about and just manage your Emby installation via its web ui. There are a lot of ways to set up Emby server depending on your environment and other factors. For my environment this made the most sense and since large portions of this took quite a bit of digging and research to get working just right, I figured Id make someone else's life a little easier if they were trying to do something similar. These instructions can be adapted for Windows Server 2012 R2, Windows Server 2016, Windows 8 and Windows 10. In the end browsing to your domain should look like this in the browser Additional Information for Updating When Updating your Emby installation. Simply stop the service for Emby, install like you normally would, then just cut the system folder inside the %appdata%\emby-server folder and paste it into the C:\Emby-Server folder. When prompted replace all files, then start the service again once the copy completes. Additional Information about Connecting with Emby Apps When connecting to your Emby installation remotely with Emby apps remember to prefix your domain name with https:// and use 443 for the port number. <Edit> Additional Information about changing Emby Server Title: For those users who wish to change their page title in browser (as discussed here), here is additional Web.Config information that will let you do just that! Using IIS Re-Write rules to change the page title means, you don't have to edit files to reset it every time you upgrade your Emby Server! Add these 3 rules at the bottom of the rules list, replace whole <preConditions> block too.: NOTE: Make sure you replace ALL 4 instances of NAME_OF_YOUR_SERVER with what you want your server to display in the tab bar. <rule name="RewriteTitle" preCondition="ResponseIsHtml1" enabled="true"> <match filterByTags="None" pattern="<title>(.*)</title>" /> <action type="Rewrite" value="<title>NAME_OF_YOUR_SERVER</title>" /> </rule> <rule name="RewriteAppHeaderJs" preCondition="ResponseIsJS" enabled="true"> <match filterByTags="None" pattern="document.title="Emby"" /> <action type="Rewrite" value="document.title="NAME_OF_YOUR_SERVER"" /> </rule> <rule name="RewriteAppHeaderJs2" preCondition="ResponseIsJS" enabled="true"> <match filterByTags="None" pattern="title.Name||"Emby":"Emby"" /> <action type="Rewrite" value="title.Name||"NAME_OF_YOUR_SERVER":"NAME_OF_YOUR_SERVER"" /> </rule> <preConditions> <preCondition name="ResponseIsHtml1"> <add input="{RESPONSE_CONTENT_TYPE}" pattern="^text/(.+)" /> </preCondition> <preCondition name="ResponseIsJS"> <add input="{RESPONSE_CONTENT_TYPE}" pattern="application/javascript|text/javascript" /> </preCondition> <preCondition name="NeedsRestoringAcceptEncoding"> <add input="{HTTP_X_ORIGINAL_ACCEPT_ENCODING}" pattern=".+" /> </preCondition> </preConditions> </Edit>


 1 point
 -
Hello, Perhaps I am not the first one to ask this question but it will be very cool if this feature could be implemented. I have 2 servers one at home and the other at work. ( and soon a third one...) So I have a movies library called movies on each server. I would like to see all the movies from a single 'virtual server location' when I use the app (ios or android ) where I will see only one movies library containing movies informations from the movie library at work and the movie library at home. It's an aggregation of movies informations from the movie library at work and the movie library at home. In fact when a user have multiple servers it will be perfect if another choice in the server list called "all servers" for example appears automatically with a merge of media informations from librairies with the same name on different servers.1 point
-
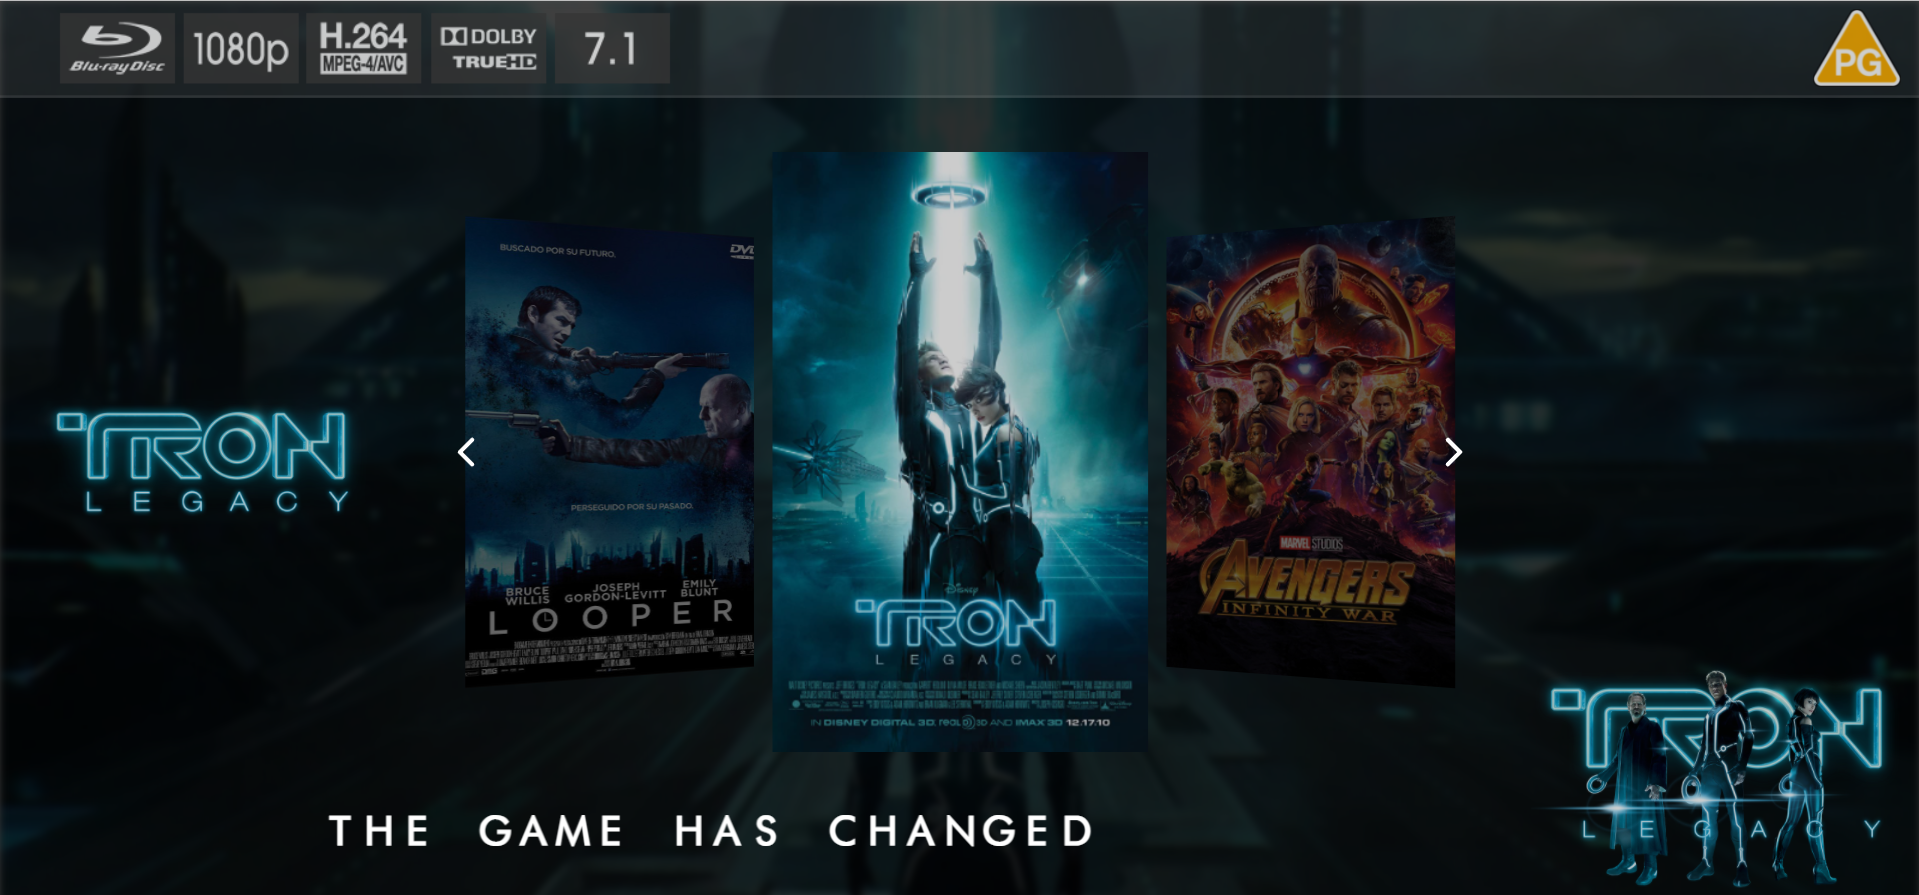
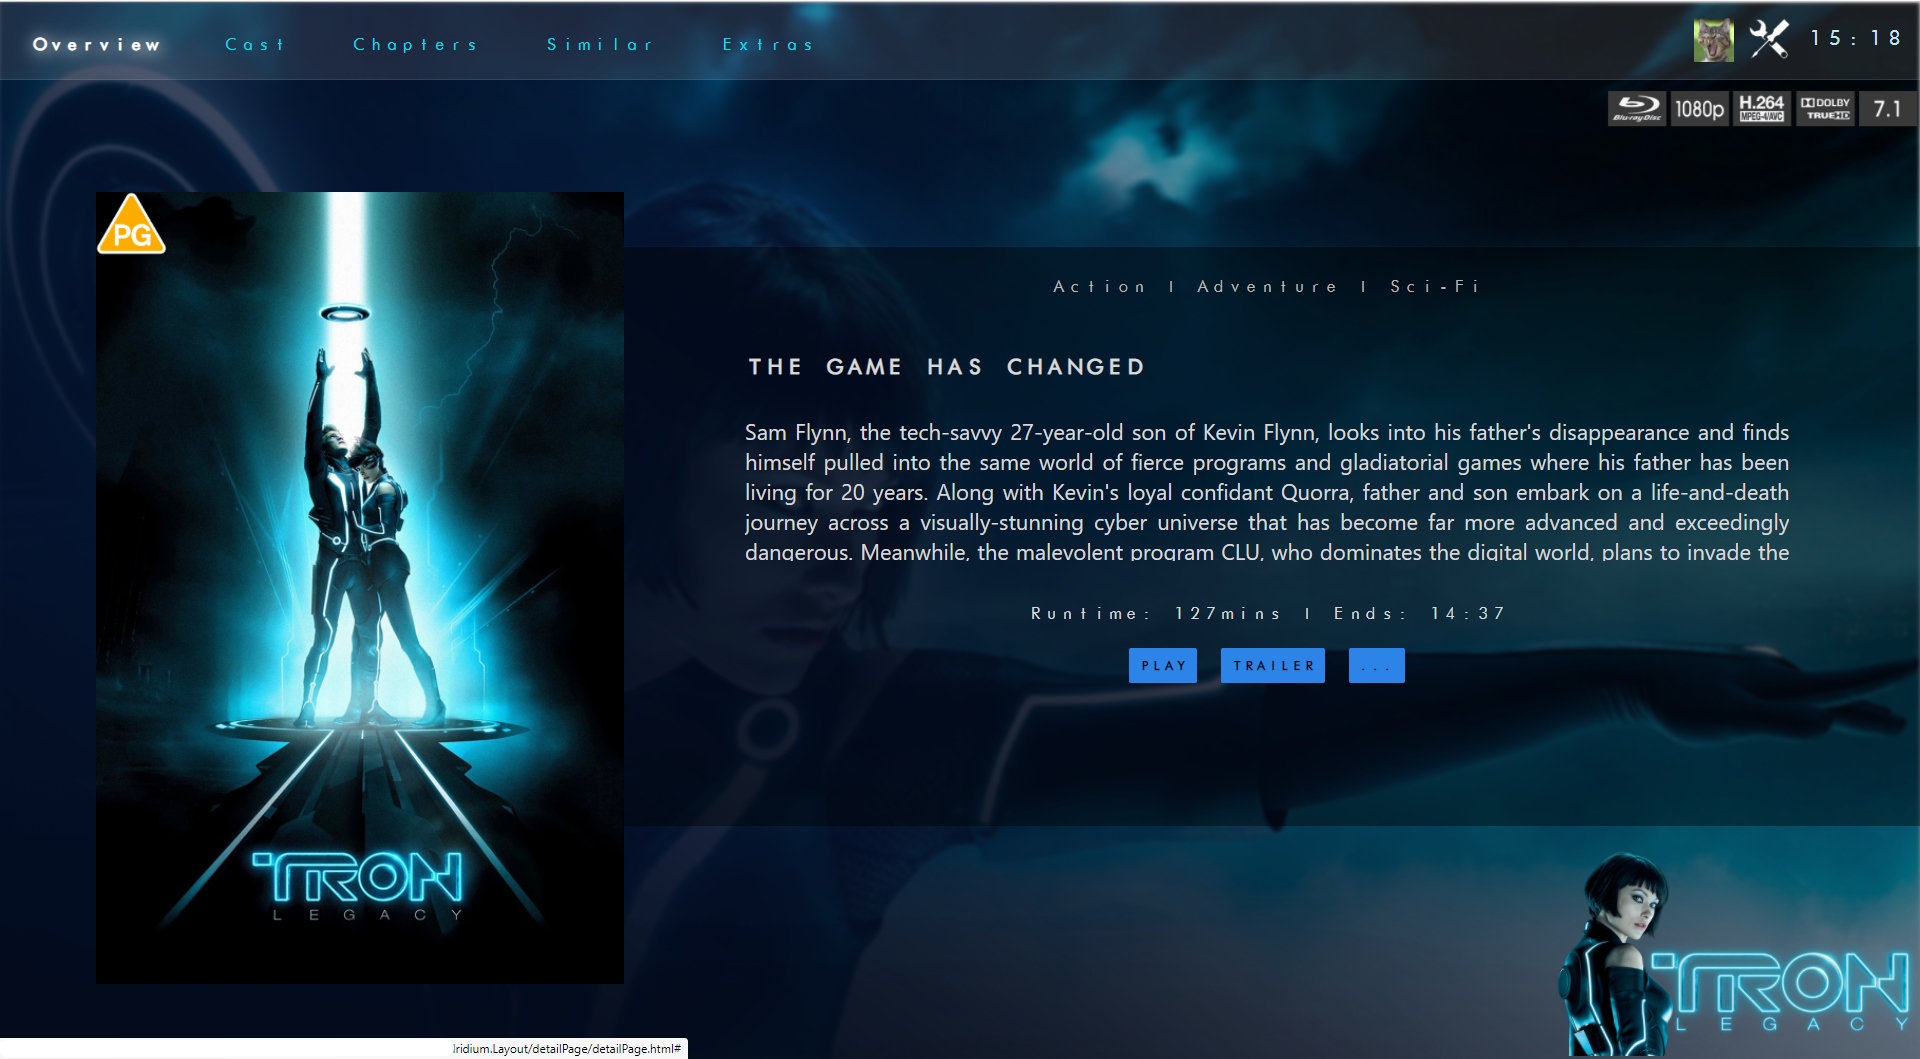
@chef @Cheesegeezer Another amazing production is about to be brought to you from devs - Cheesegeezer - I have started a new theme to bring to the masses. I am a long way off completion however we can continue to update you on the progress. The layouts are about 80% complete and once completed we can start to work on the code behind. We are interested in a closed group of testers when the time comes. I would just like to say that this was originally designed for Emby WMC back in 2014 and was just release there when M$ ditched support for WMC and the project died. @shaefurr did an amazing job with the concept artwork for me to work with back then, and this theme pays homage to him. So with out further ado... here's some of the layouts that are now coded. IRIDIUM - One theme to conquer all LOGON SCREEN HOME PAGE FIRST VIEW TYPE - COVERFLOW COVERFLOW 2 BANNER VIEW FINAL DETAILS PAGE LIST VIEW THUMB VIEW


 1 point
 -
I don't have the 'Storage' Permission - I'm using beta .63 with the latest hotfix. I only have ''Files and media' the same as the screen grab above. Also to note - all the other apps that do have SMB access also have 'Files and media' only - I've not seen a 'Storage' permission for any app.1 point
-
It opens and forwards the port on your router to your PC.1 point
-
Just installed Hot Fix 9.0.0 and still no go for me. Frostbyte, I wonder if yours is working because you are running the server on your NAS?1 point
-
Yes, just submitted them to Eric. @ebr Submitted in-app logs (user=Master), which should contain 3 playback attempts using File Access, but dropped to HTTP. Thoughts?1 point
-
1 flac and 1 mp3 sent1 point
-
Chicken and egg type thing. You used to see this a lot with the premium channels like HBO, SHOWTIME, STARZ, STARZ ENCORE, Cinemax and The Movie Channel where the network wants a bigger cut because the cable company wouldn't be what it is without them and of course the cable company uses the same argument that these networks would be nothing with them so they need to drop their prices or get replaced. It hurts both sides as they bleed more and more customers to OTA and media servers like Emby where you can have it your way with no fees. Maybe one day things will end up like it used to be where TV was free or you had a basic service fee for delivery (cable) and they made the money off advertisements because they actually had something of quality being broadcast that drew in users.1 point
-
Not really, at least nothing I think affected me Release Notes for DSM | Synology Inc.1 point
-
@PapaMok now that explains it perfectly!1 point
-
Hello, I was able to solve the problem, something was wrong with my Shield Pro. A factory reset helped.1 point
-
Hello.. When you are playing the movie, press the remote control button (down arrow) and you will get an option below that says Info and Chapter, choose info and it tells you what time the movie ends. Cheers1 point
-
Ah yeah, that's one of the reason at first why I had everything in the movie folders. But then I saw that it "lag" when loading on the GUI and was seeing the drives spinning everytime someone just want to browse. Thanks for the help, I'll get on deleting those oversized bif file.1 point
-
I did this again Luke and now have one folder so for now all good. Seems a little unpredictable but doesn’t bother me in terms of functionality. Love Emby!1 point
-
Have you guys also sent logs? Maybe he can compare yours with mine1 point
-
As you promised indeed it's fixed. I can see the devices and I managed to do hw transcoding on one f my movies. I will do more testing as it seems it fails after few tries. Stay tuned.1 point
-
I installed the .20 beta on shield. Deleted a test library and added that back in. It picked up everything correctly. Do make sure @PapaMok that you Try this. In the shield go to settings>apps>see all apps>show system apps and drill down to Emby server. Open it and drill down to permissions and set files and media to “allow.”1 point
-
Hi, I can confirm that the problem seems to be incompatibility between ember and Win 11. The app is crashing during the initial configuration routine. 7 will need to make changes for it to install correctly on Win 11. The app itself needs to be updated to support some recent changes in the emby server. I will also try to reach out to @7illusionsas well.1 point
-
Yea, these petty squabbles are really annoying. Unfortunately it's become a bit of a norm.1 point
-
Docker hub `eodcrafter/iptv`, it allows sharing whatever your provider allows. No, it does not do any remuxing, ect, it's just a Banned Word Proxy......1 point
-
This is something Luke has been addressing in the server code with each release getting better and better.1 point
-
I could do that too. I’ll keep you posted.1 point
-
Okay, well you said that the functionality being discussed (managing and ordering 1000s of channels) wasn't related to OTA vs M3U but, I would say it is. OTA users don't really have a requirement of managing 1000s of channels.1 point
-
Offline, you run locally.1 point
-
Did you give the "System internal user" emby read/write permissions to your shares? This is new in DSM 71 point
-
Thanks, just updated my DS1821+ and everything went smoothly as usual with Synology1 point
-
thx both for replay, I'm quite sure that is a sort of virus inside the nas. SO I have done the following step (I hope could help in case some other has the similar problem) . I re istall the TOS OS in the NAS to cleanup the system, in the new TOS I download again the Emby server APP, started it ,BUT after start when I tryed to open it to configure the emby server , the app goes in stopped, i tryed several time restarting the tos , reistall it again , but nothing change. Following some post present in this forum, I suppose there was something in the TOS related to previos istallation of emby that also if I reistall the TOS it remain configured. I tryed therefore to connect to the NAs in SSH, following the post were was indicate to rename the library file to restart the emby scanning, this not working for me , I not reach this part, but It help me to understand how move me in ssh command . So I decided to clean all the emby directory, I delete it totally, after re istall the Emby APP, and it WORKS. the configuration page is reachable. Logically you have to re create all your collection, fix all the movies automatically not recognized but after that at the moment the system running fine. I HAVE NOT TEST YET IN THE SAME SITUATION BEFORE BECAUSE TO MAKE ALL THIS THINGS I MOVED THE NAS DIRECTLY IN THE HOUSE WERE AT THE MOMENT I 'M, SO TO HAVE THE REAL TEST I HAVE TO MOVE IT AGAIN IN REMOTE TO TEST IF THE PROBLEM NOW IS SOLVED. I will do and update the result here. regards \Gianni1 point
-
Yep, the "Various Artists" are actually what I mean with compilation support. I already started an implementation but will not be added before stable version is released. Lots of code rewrite pending and even more testing is required. The warning message is just a hint. Actually, I never used "Various Artists" as an Albumartist in my setup, therefore this most likely a mislabeling on Emby server (for my content only). Will also be changed when I add (full) support for compilations.1 point
-
This is still broken in the 6.2.6 beta. Show Simplified Menu as the selected option for Disc playback will completely crash Kodi after Multi-select source.1 point
-
Hi @FrostByte I don't use Hotfix..1 point
-
I can confirm this is alright now, thanks The syncing issue is still there though. It seems to be related to "Various Artists" album, or albums with differences between album artist and song artist. (I noticed some "WARNING: EMBY.core.music: Possible Artist/Albumartist inconsistency" in the logs, but I have no idea if that's an unexpected behavior)1 point
-
The latest stable release is 4.6.7.0 and that's as far as my support can go.1 point
-
Unfortunately no, that is controlled by core Emby. It seems to vary device by device. AndroidTV is what I use primarily and the notification window is HUGE. Apparently some client devices aren't bad. I know the guys working on the IntroSkip plugin ( @chef) have noticed that as well and I believe have asked for it to be changed. But until it is, all you can do is turn off the notification in the configuration. It's probably too early to get it into the plugin catalog (right @ebr?) Once it is it will be easier for people to use. And last but not least, you are very welcome1 point
-
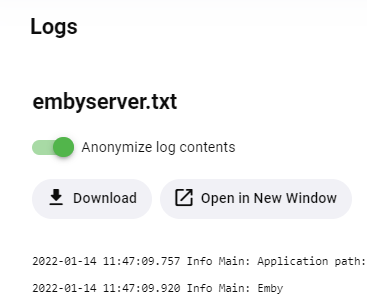
Log file sanitization is being added for the upcoming 4.7 server release. They'll be anonymized when you download them from the server web interface. You can participate with this starting with the next beta server release. It may take time for us to spot everything that needs to be marked for anonymization. Thanks.1 point
-
Make sure to run a library scan after changing image files.1 point
-
perhaps at the very least, the How to Report a Problem post should be updated to suggest this and the things that may need anonymising?1 point
-
@pir8radio has a set of guides that are perfect together or can be used separately for both nginx reverse proxy and for Cloudflare. The use of them together can be a bit tricky or need a little tuning but he has made it dead easy to setup by following his guides. The Cloudflare guide has all the latest settings that stream perfectly without glitches or buffering that can happen if you don't get the settings correct. Here is the complementary settings for NGINX used alone or in combination with Cloudflare:1 point
-
Well, one question is what does "on" mean when there could be several subtitle tracks that are all different from the different episodes. However, this is exactly what the above feature request is requesting and there is discussion about that there so you can lend your support in that topic. Thanks.1 point
-
This would be wonderful.1 point
-
Sorry, still working on it. Hopefully soon.1 point
-
This is the greatest windows tutorial I have seen in a long time. Usually us window server admins are forgotten and majority of tutorials for apps like emby are in linux. THANK YOU1 point
-
Thank you so much1 point
-
I hope they incorporate it soon because listening to Pink Floyd's Dark Side of the Moon with gaps is sacrilege.1 point