Leaderboard


Popular Content
Showing content with the highest reputation on 03/03/21 in Posts
-
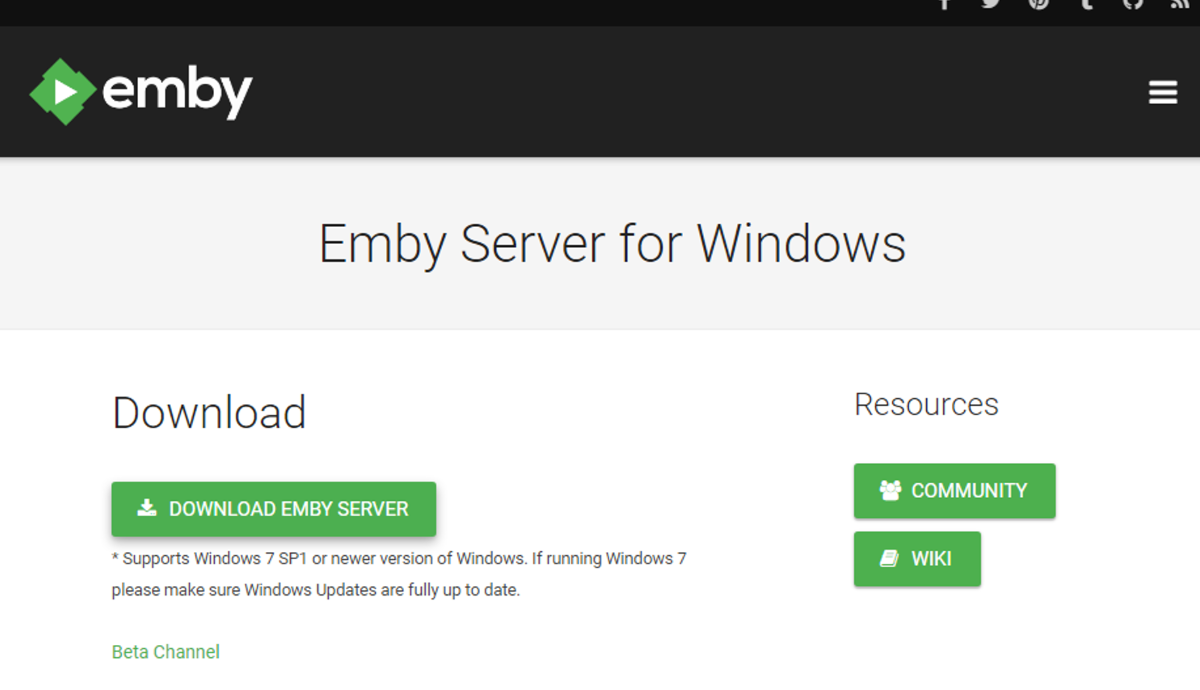
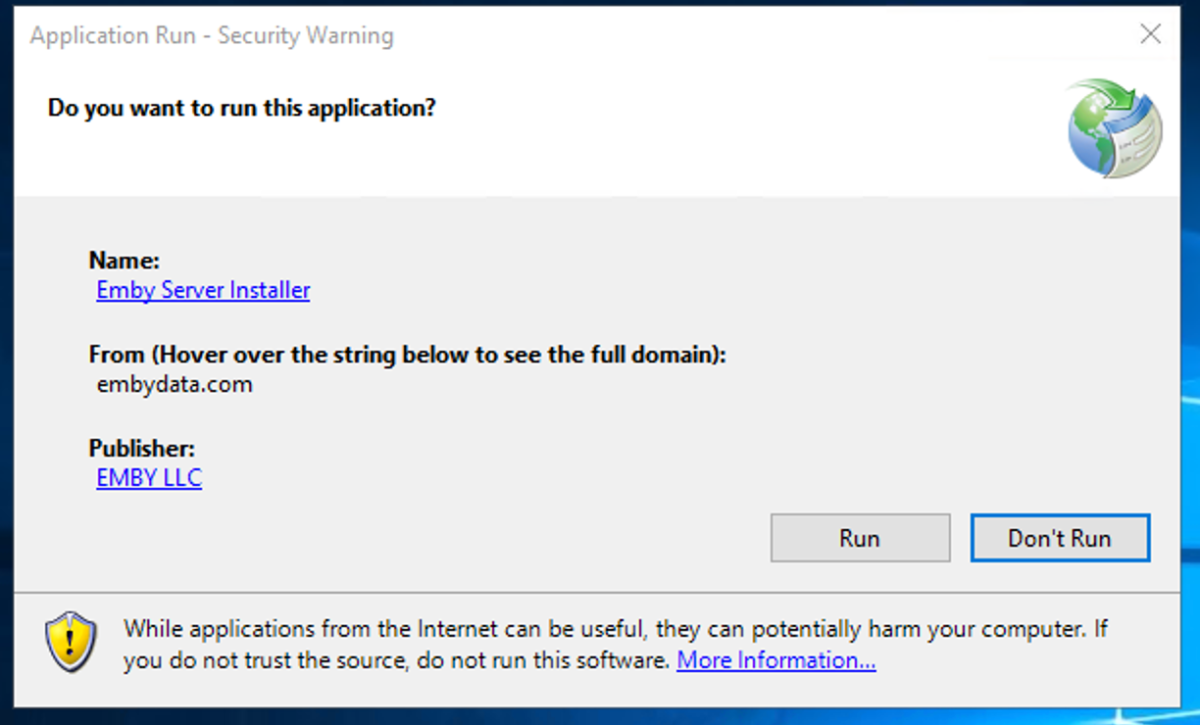
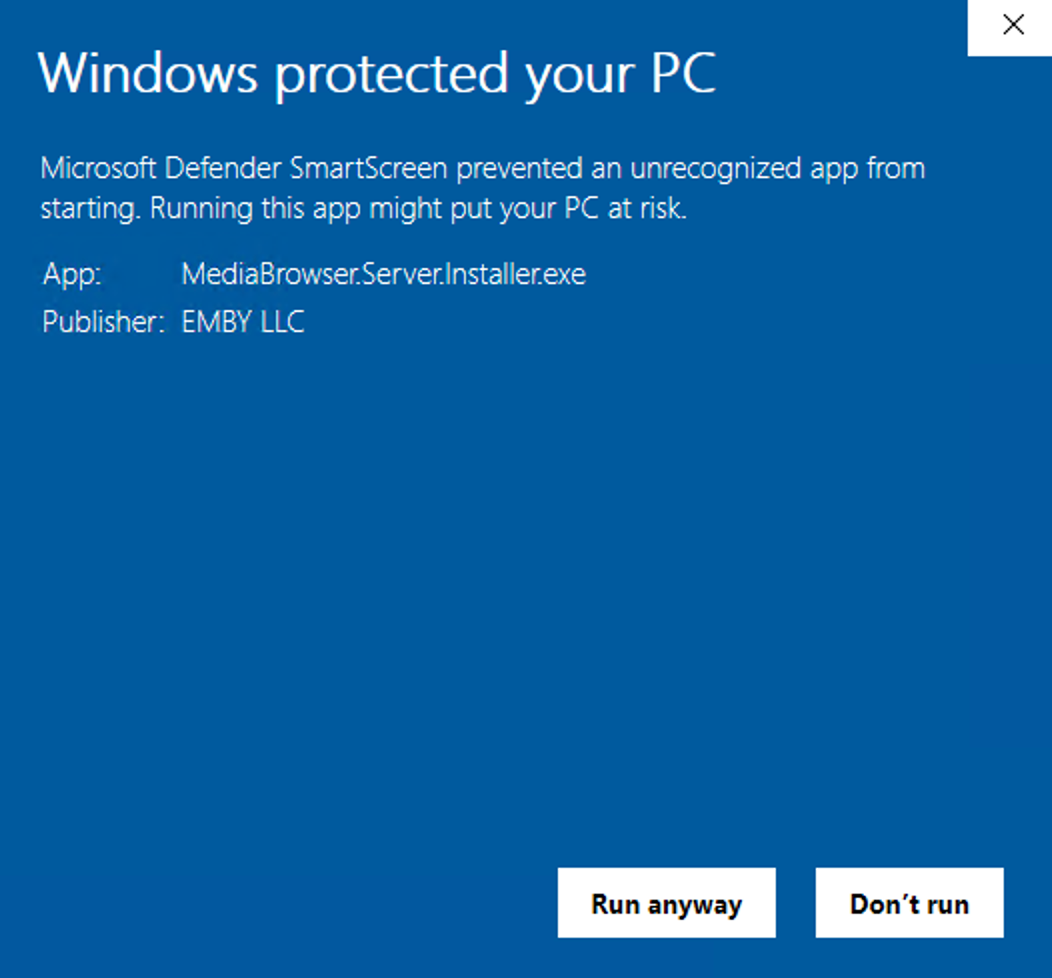
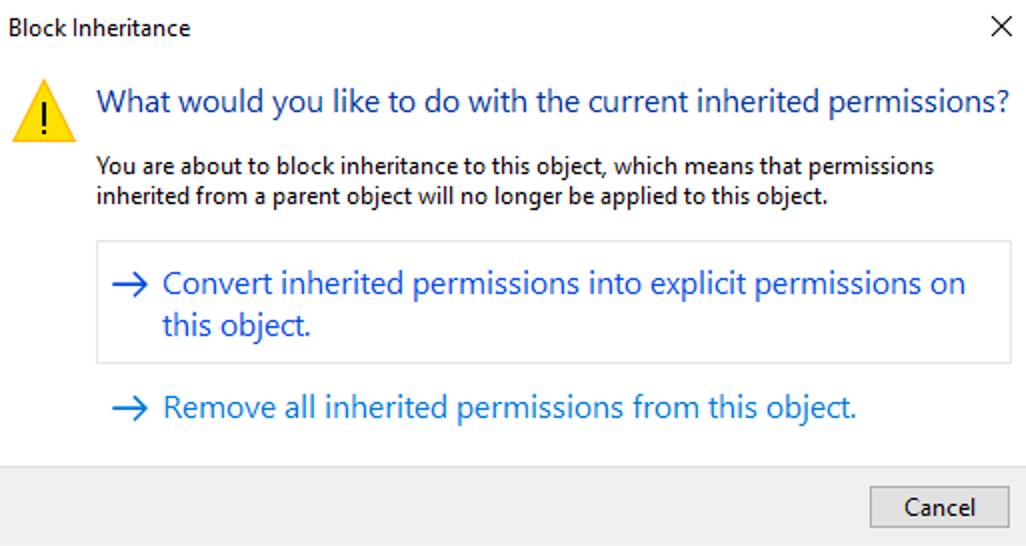
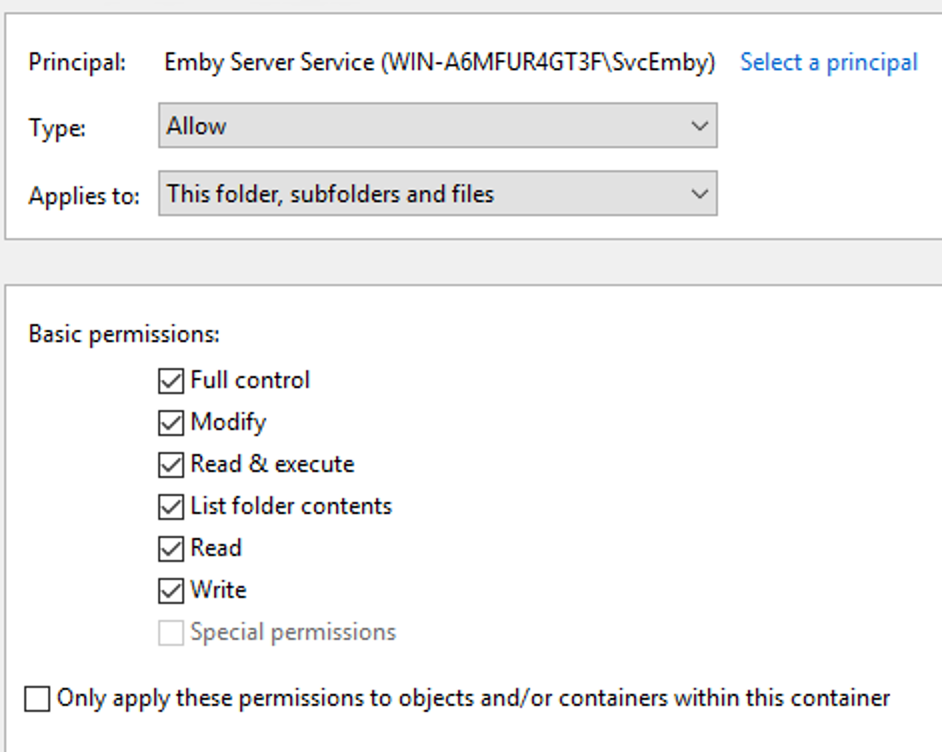
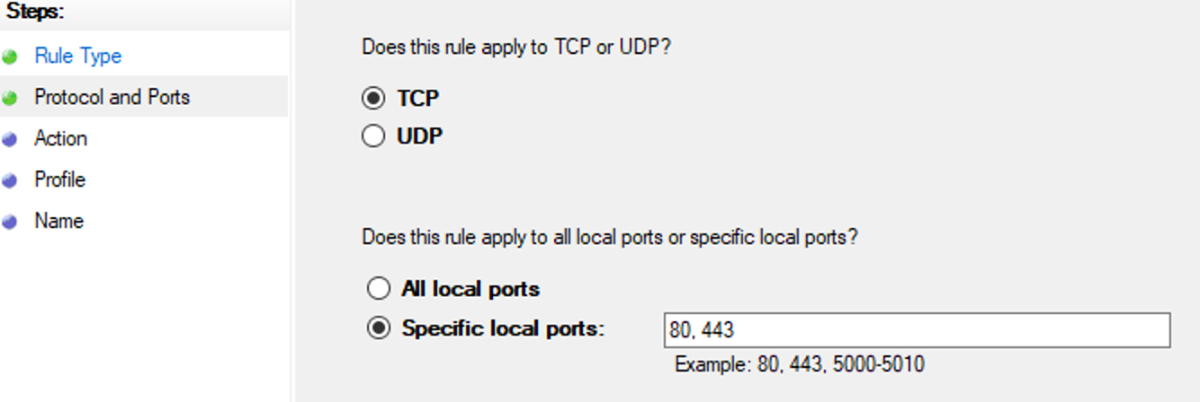
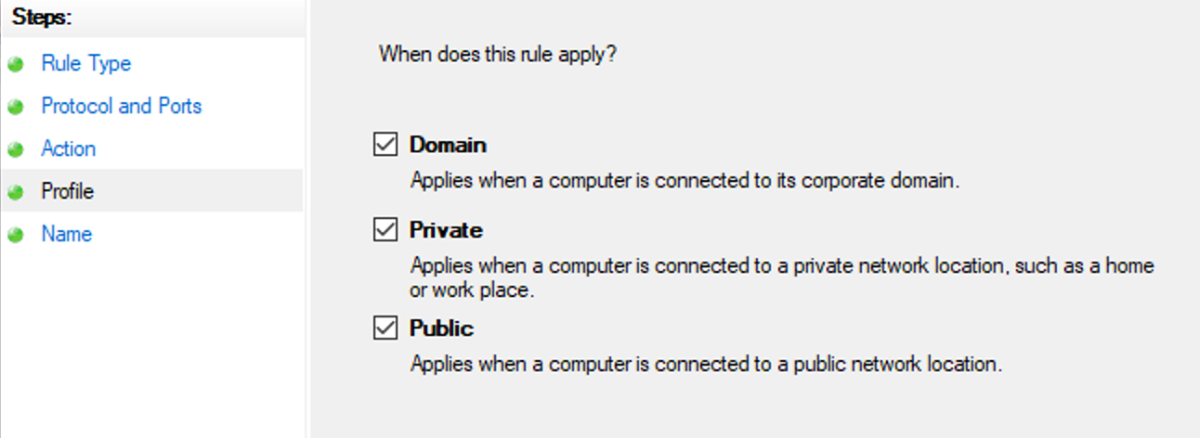
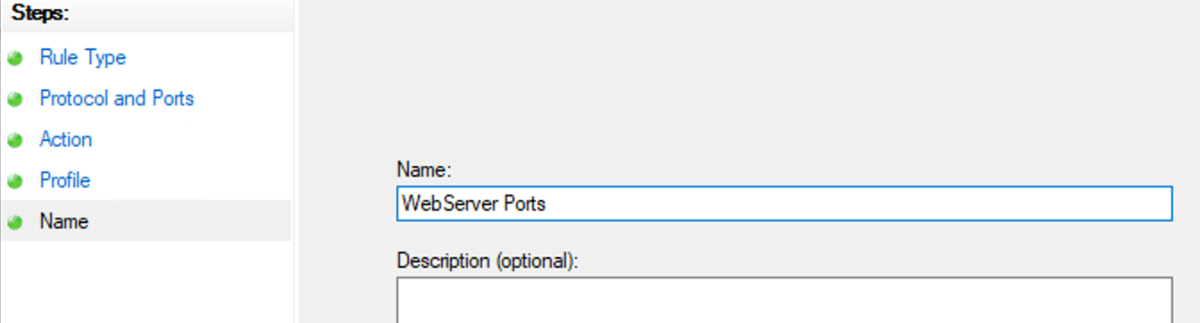
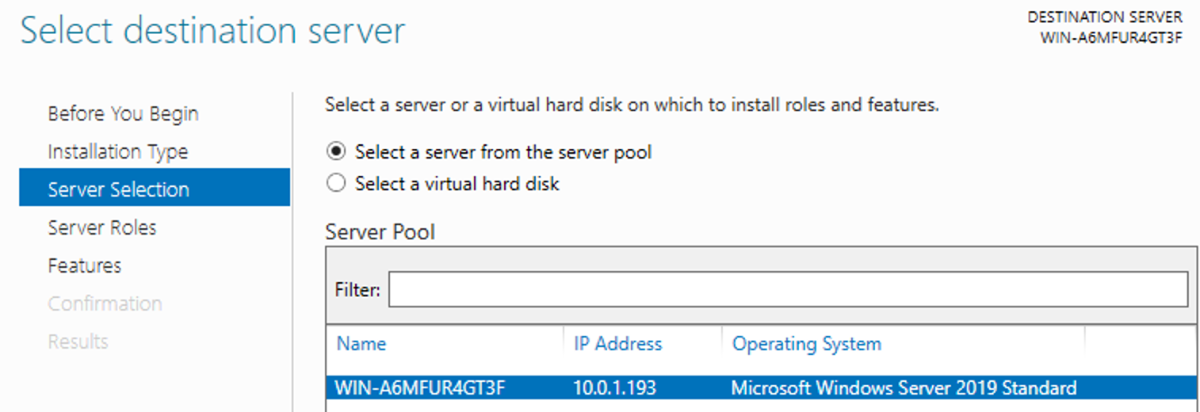
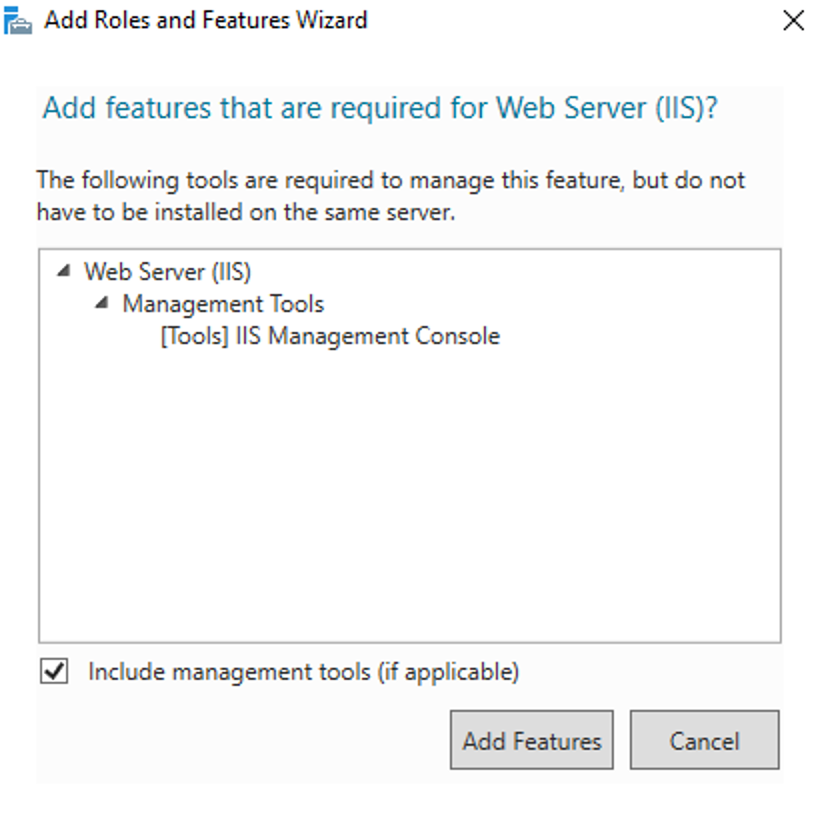
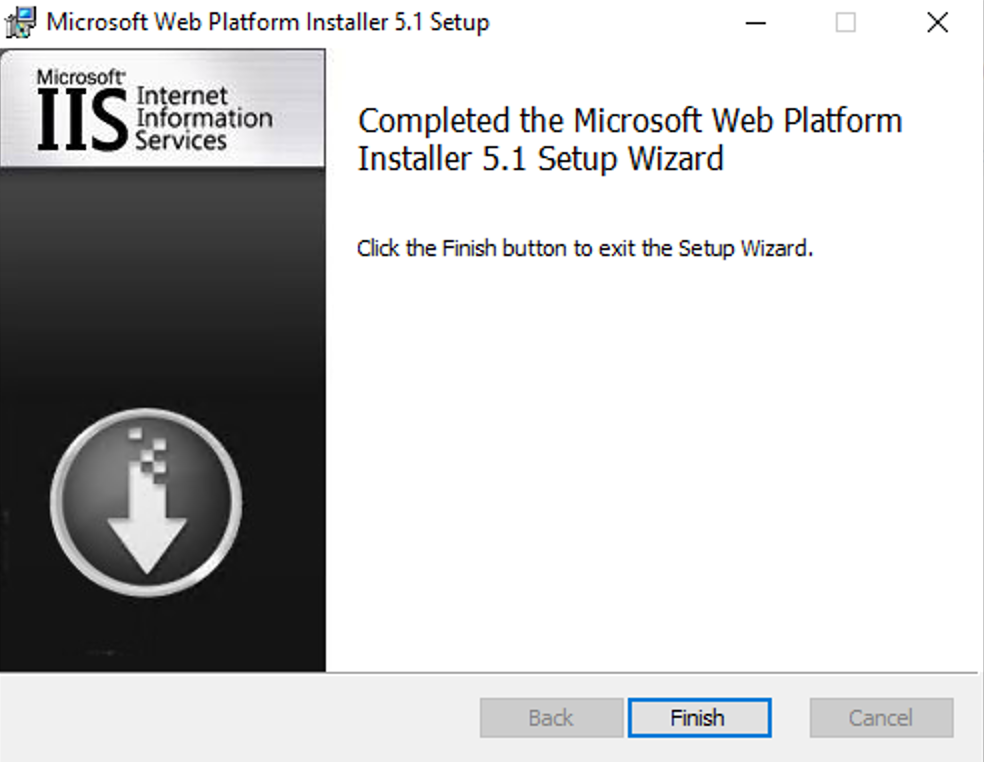
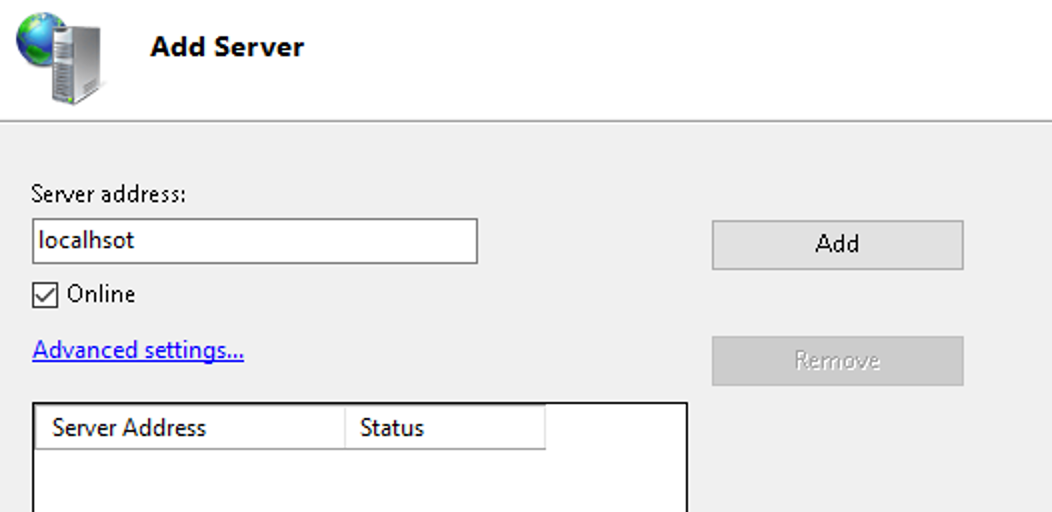
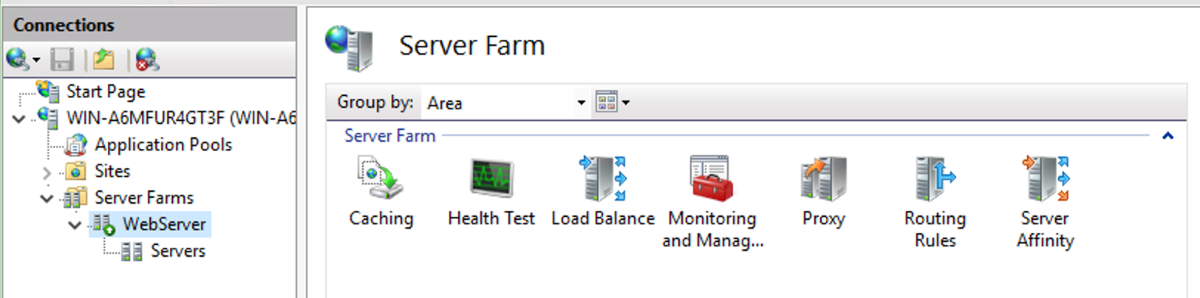
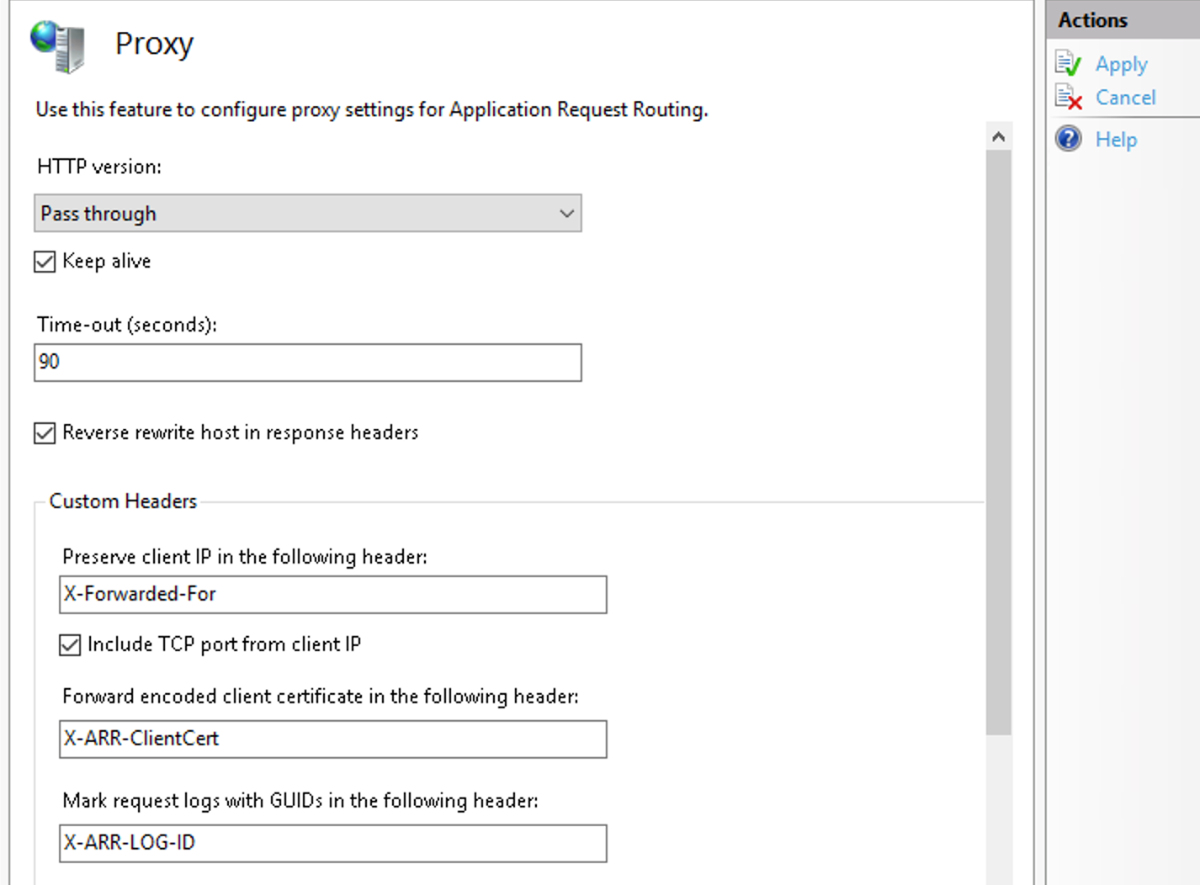
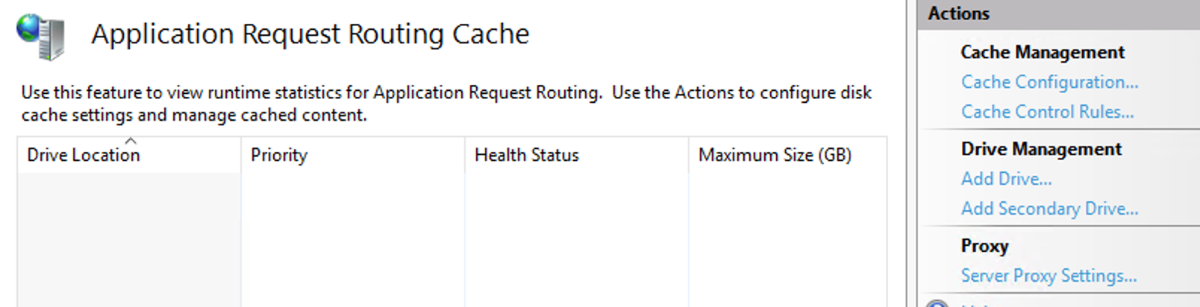
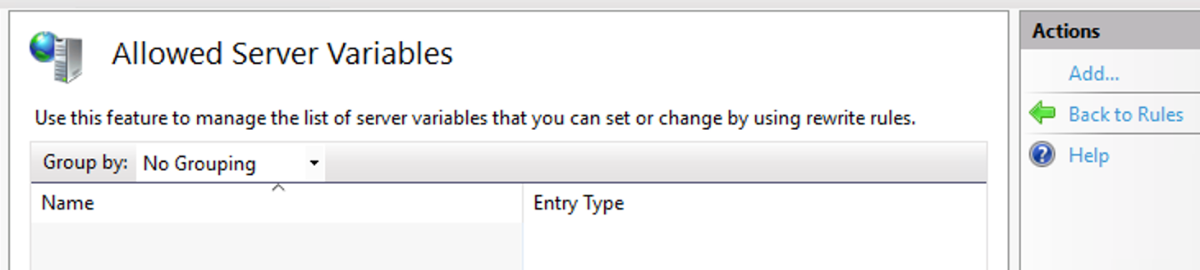
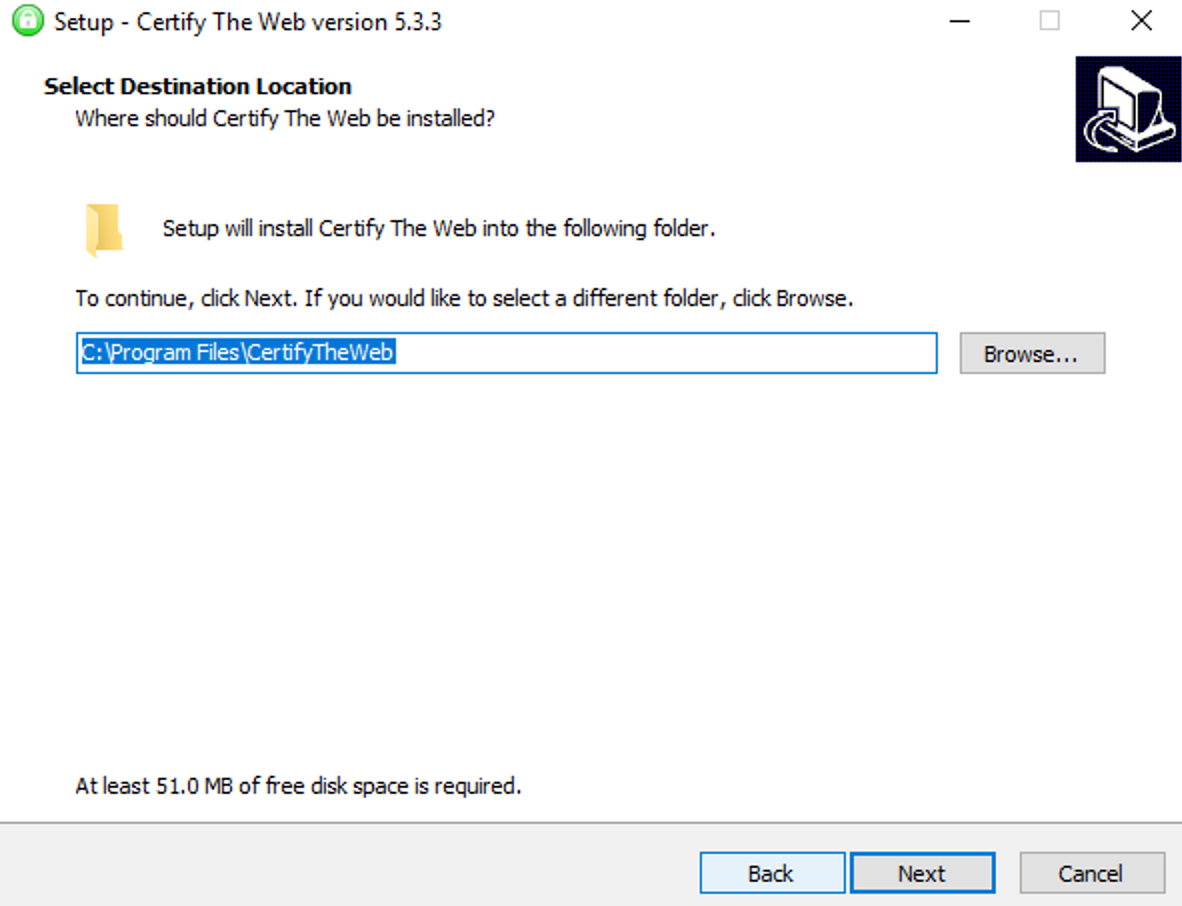
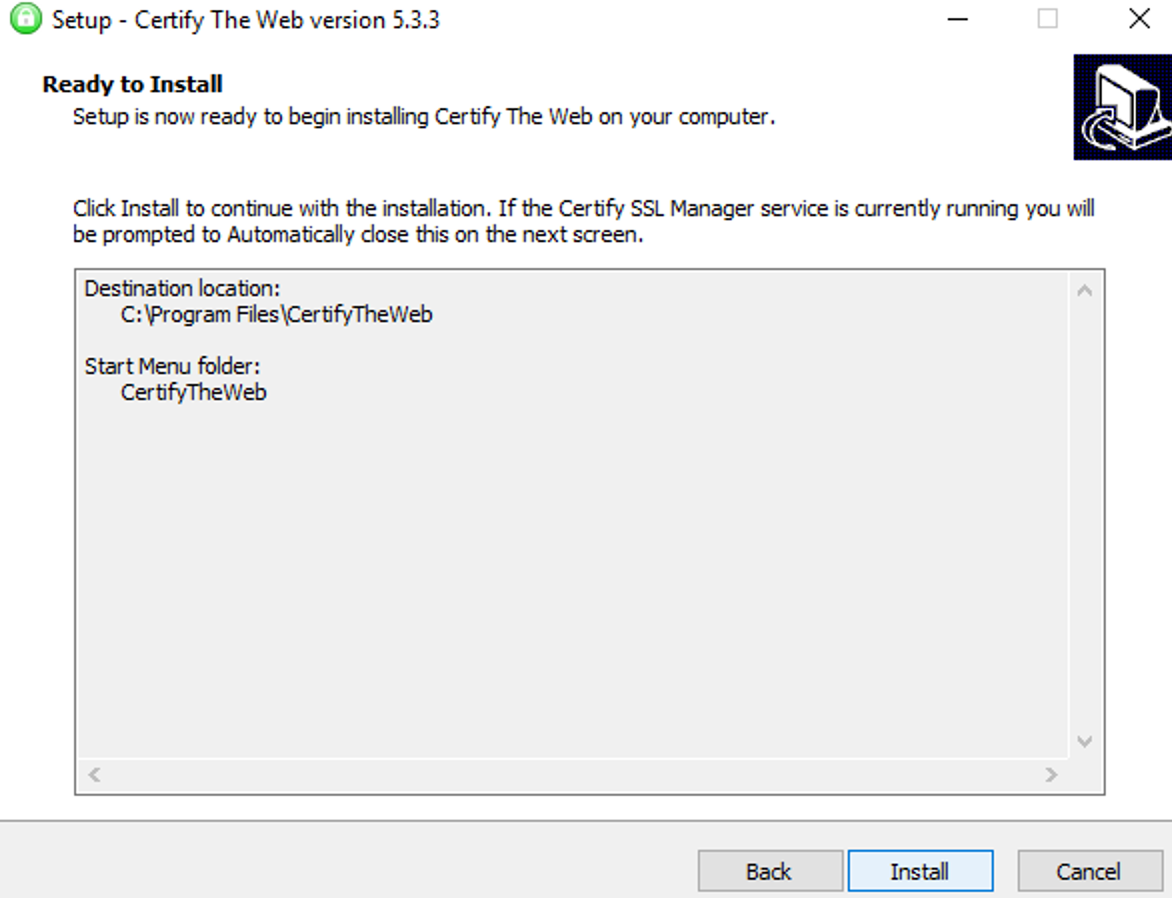
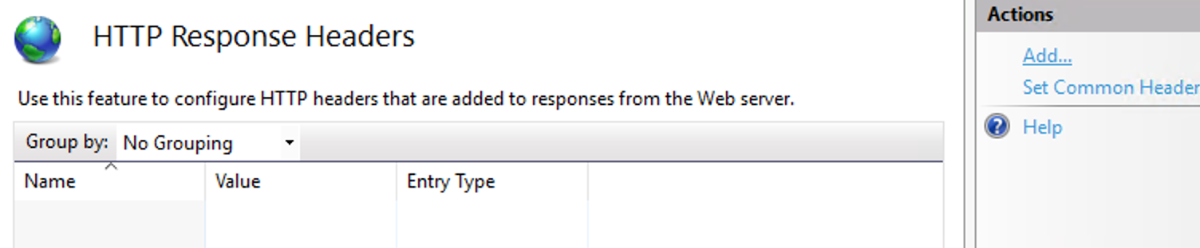
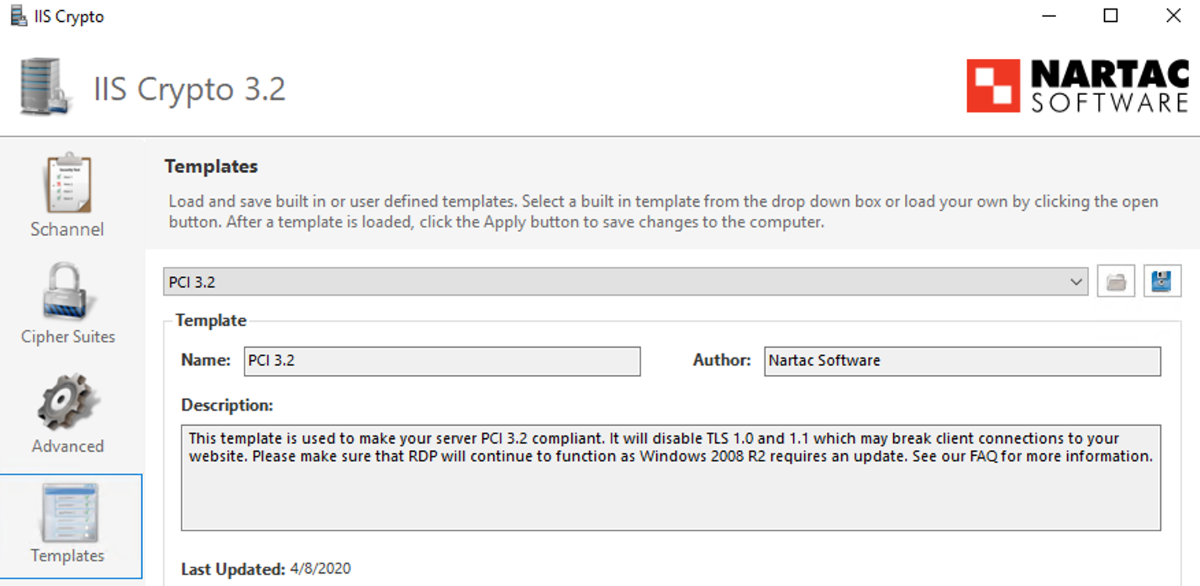
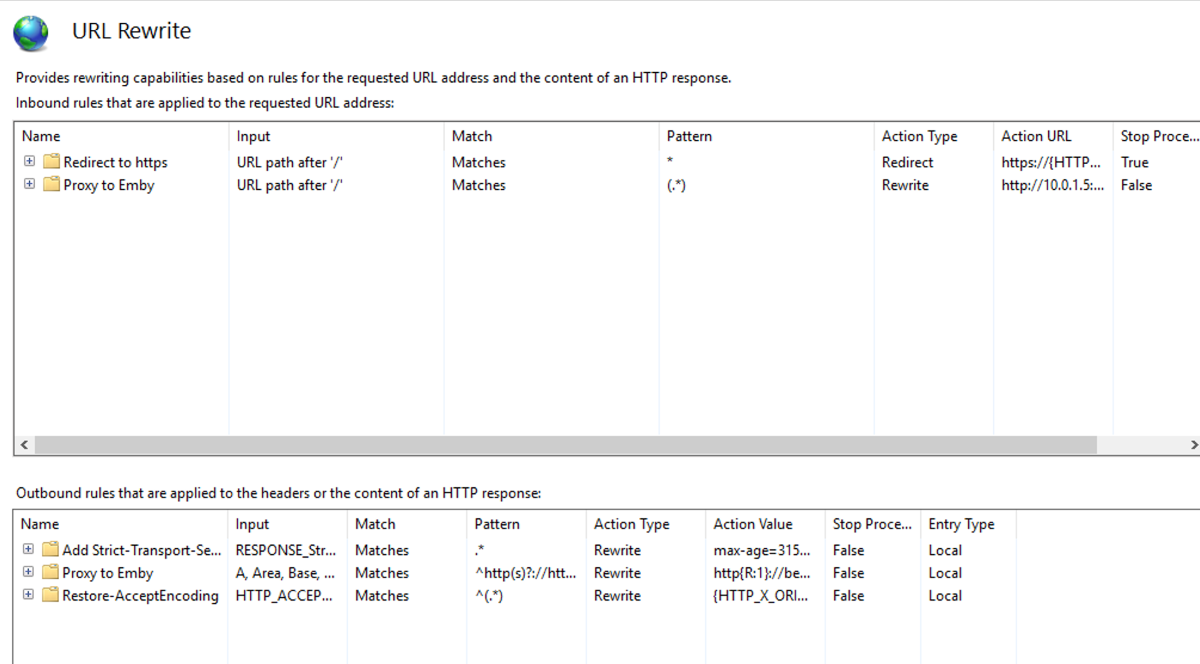
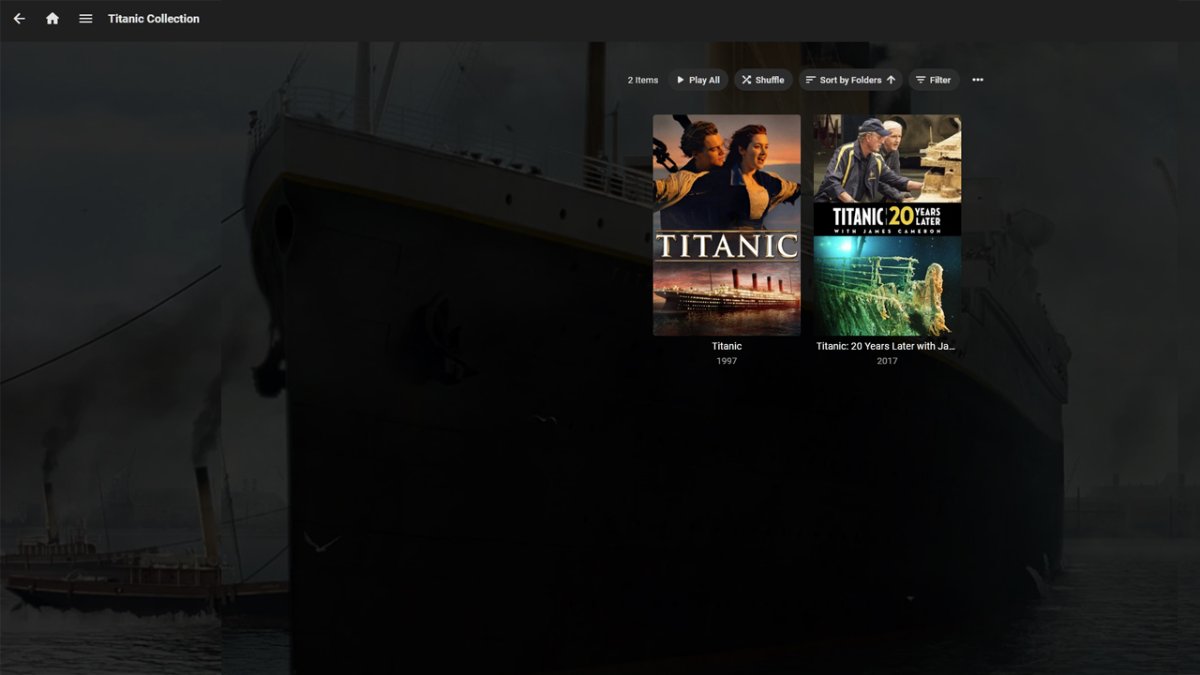
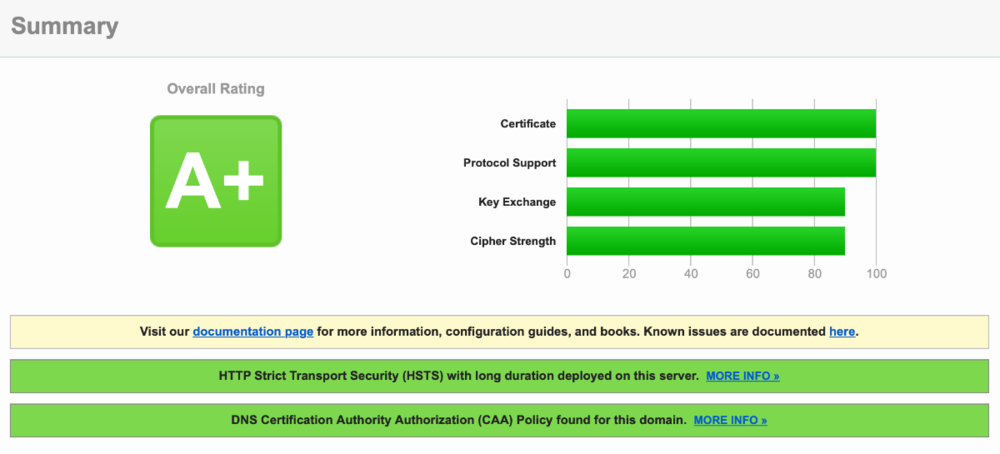
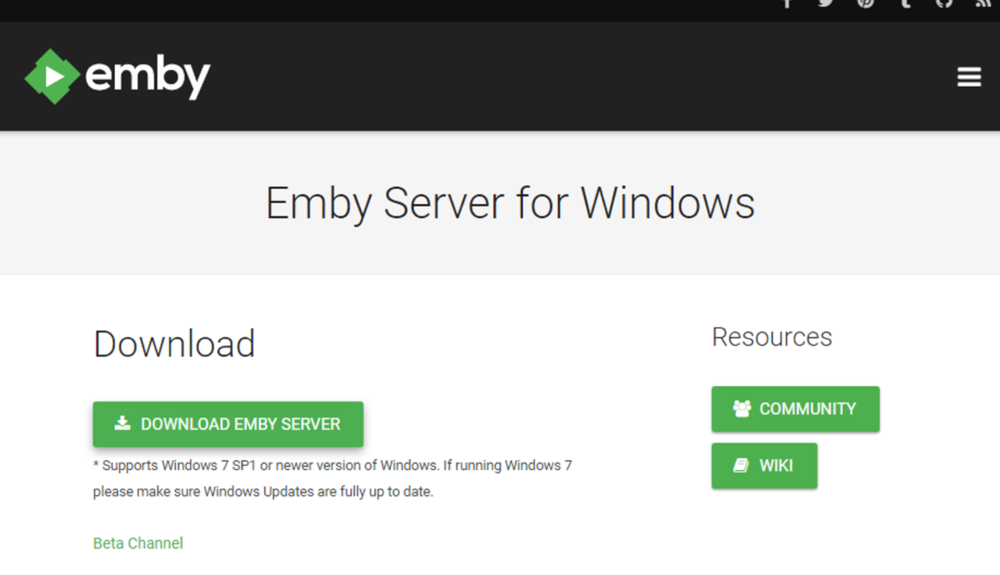
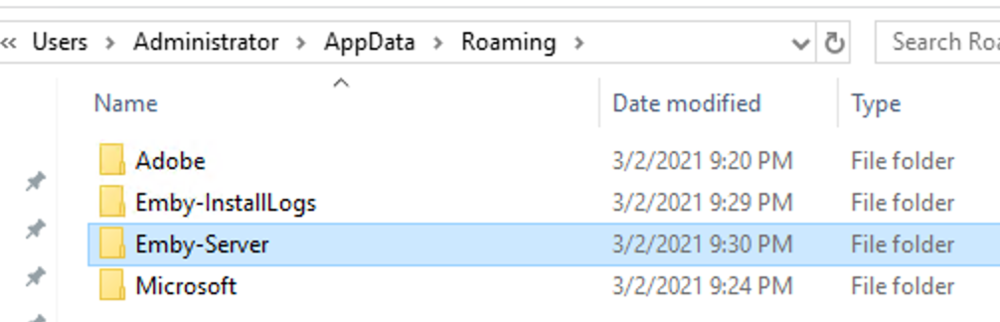
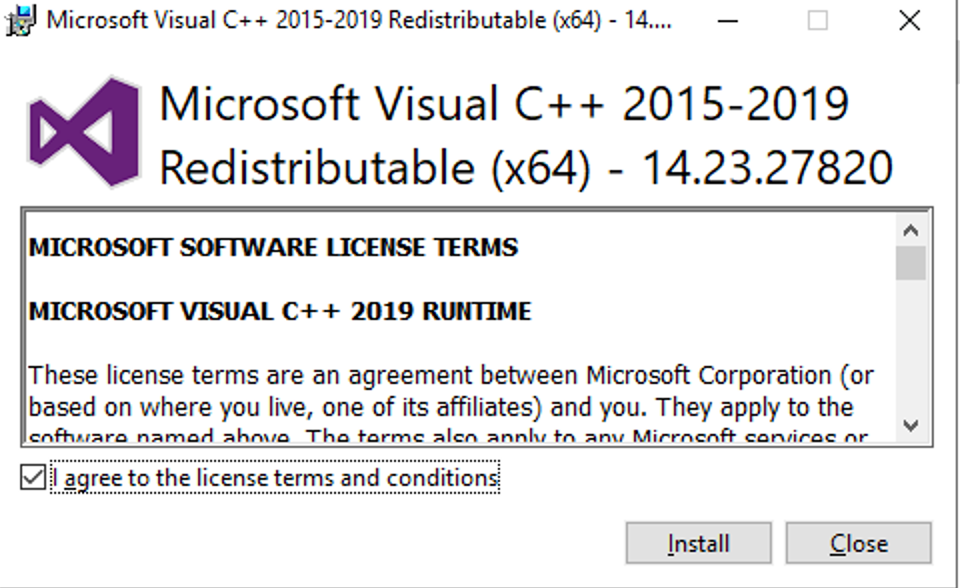
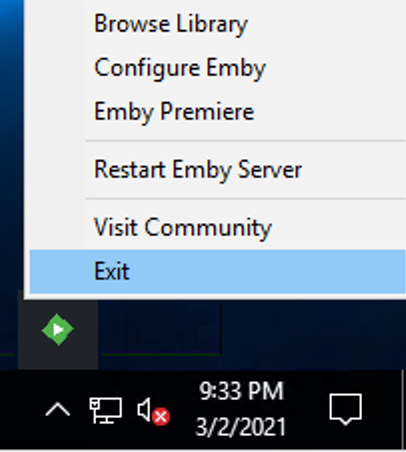
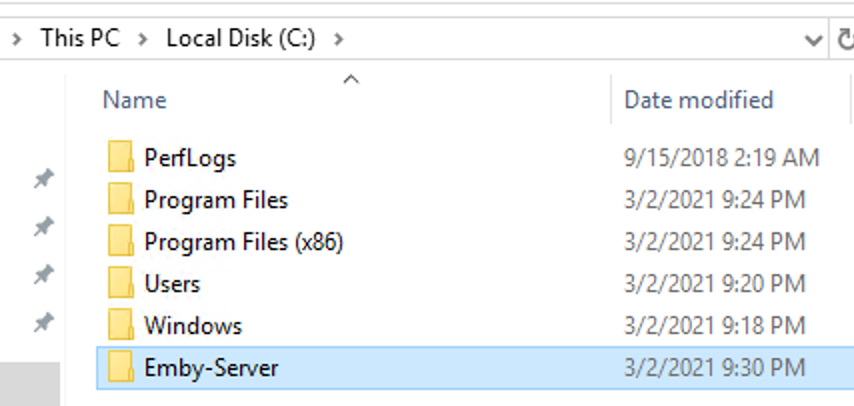
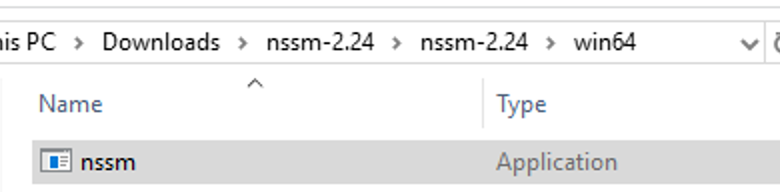
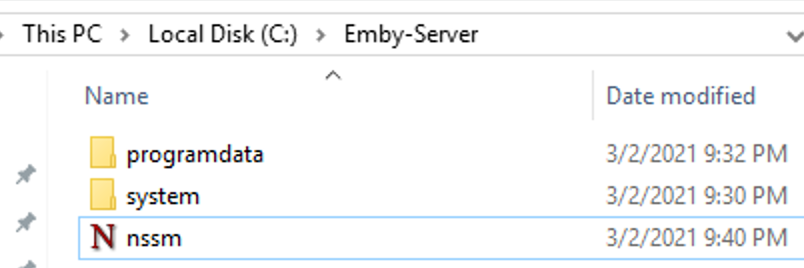
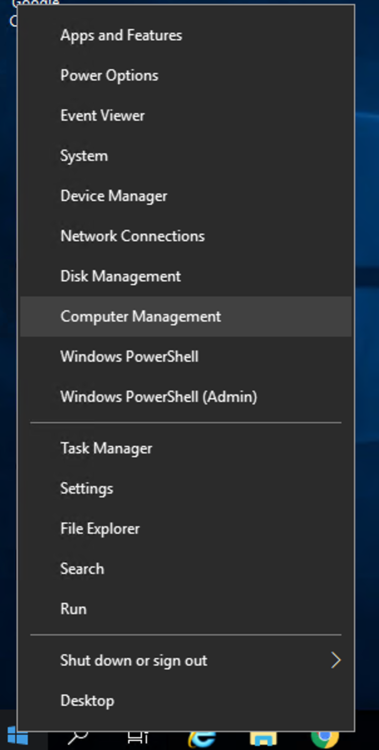
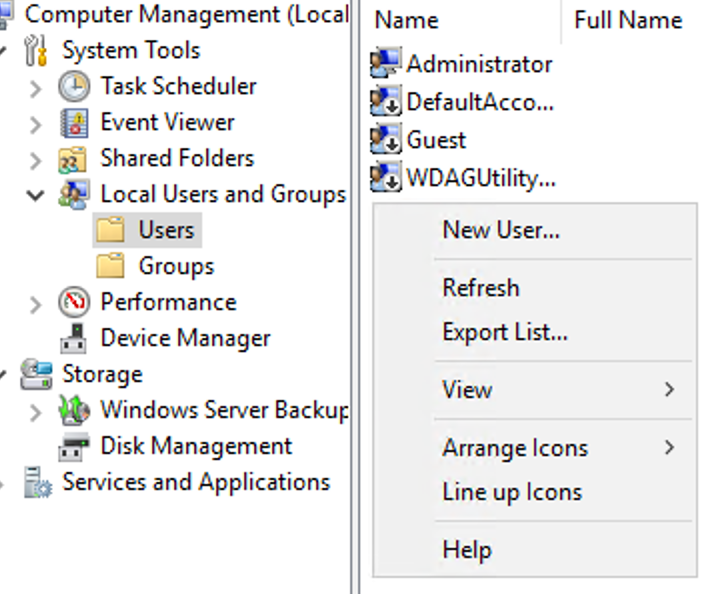
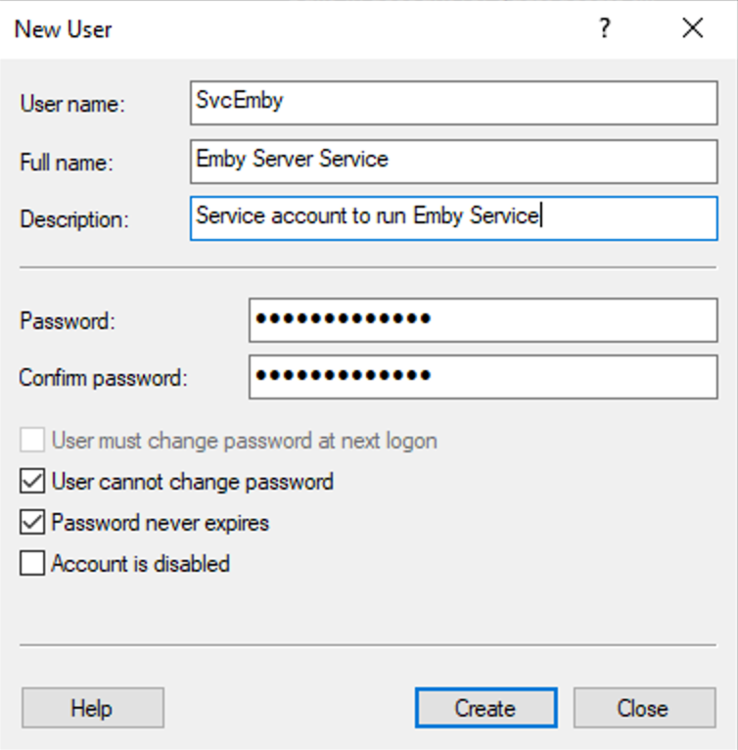
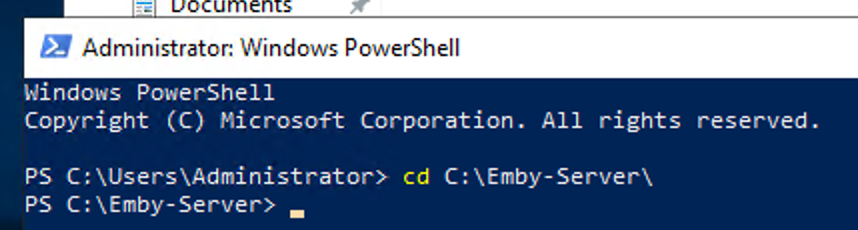
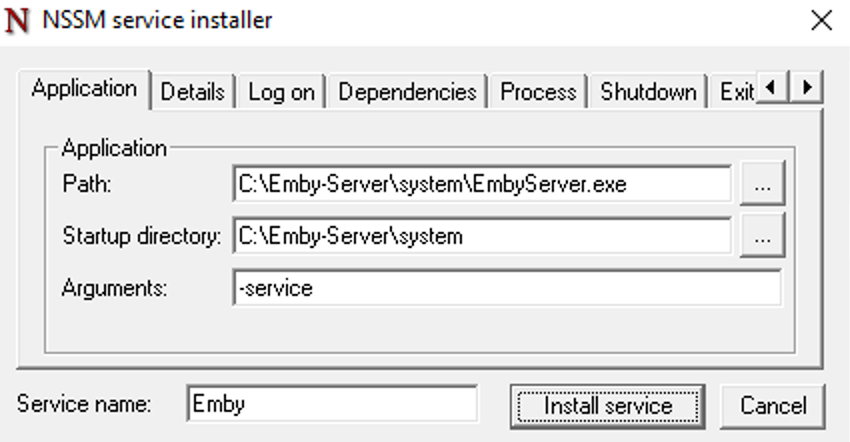
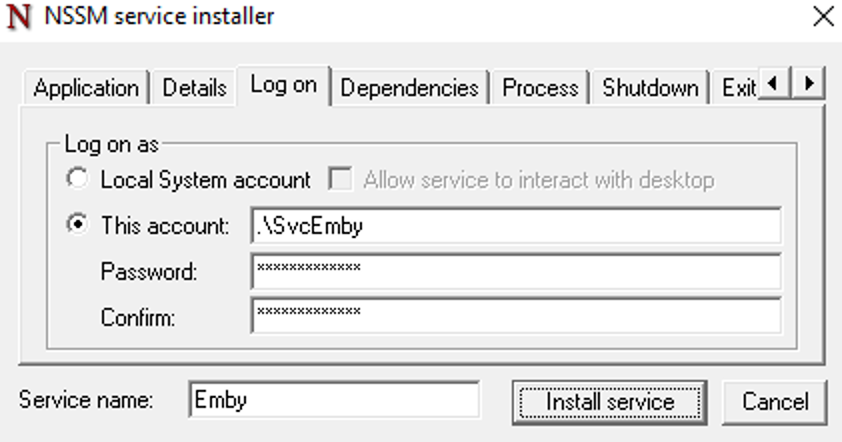
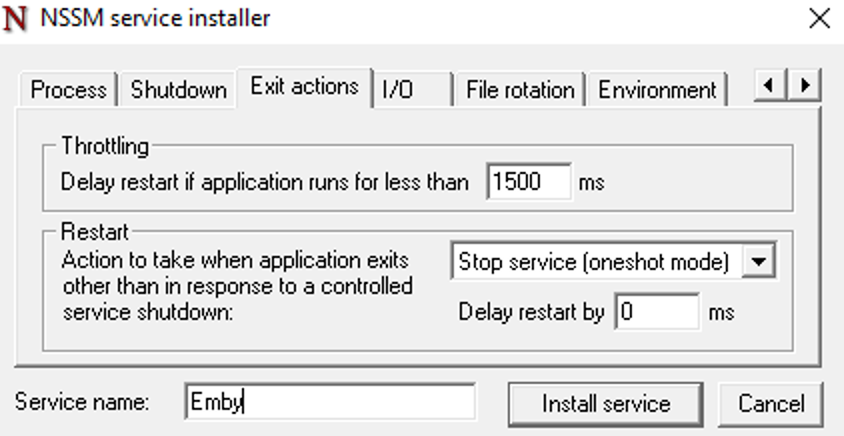
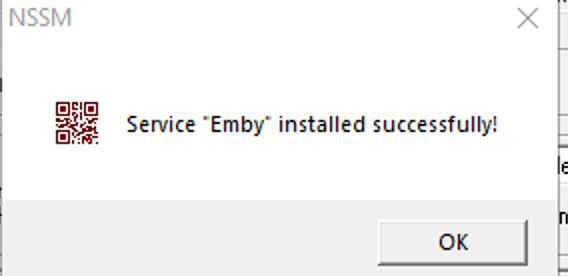
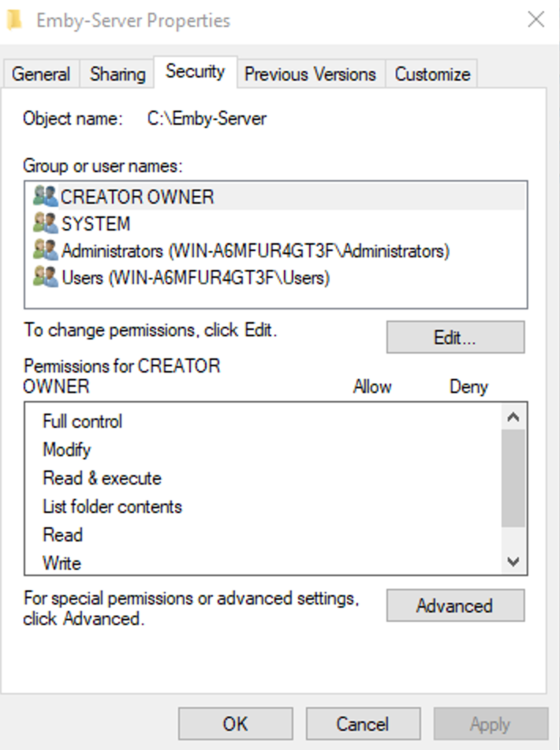
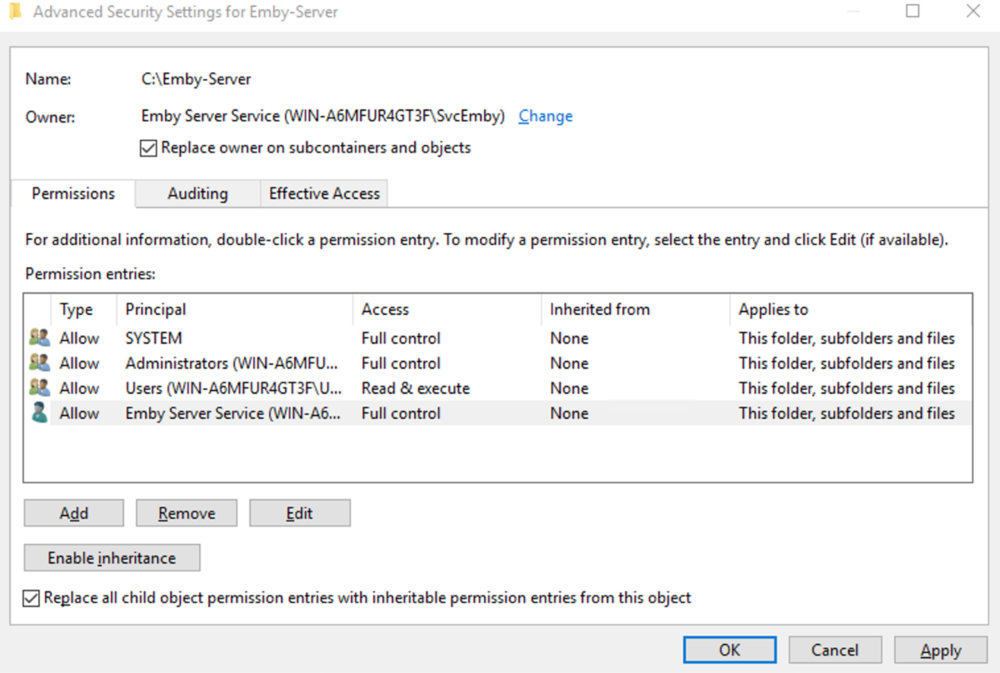
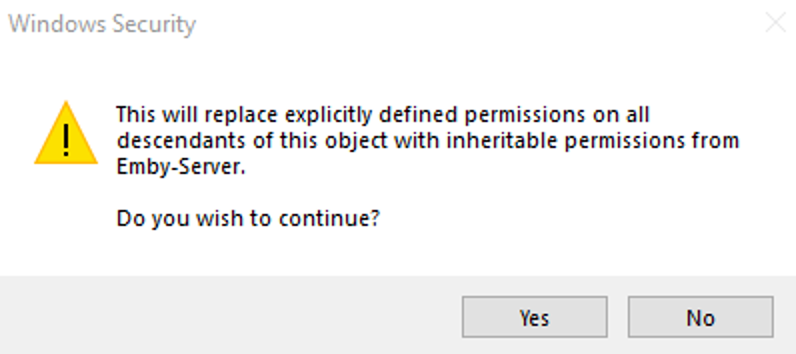
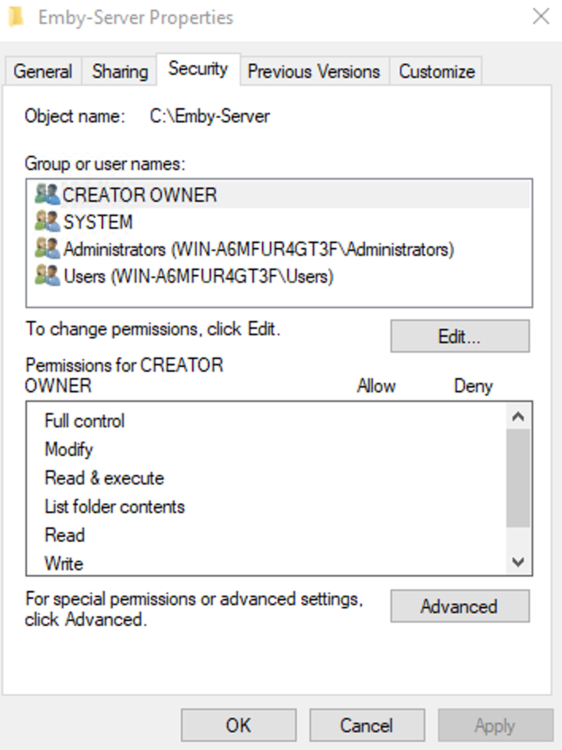
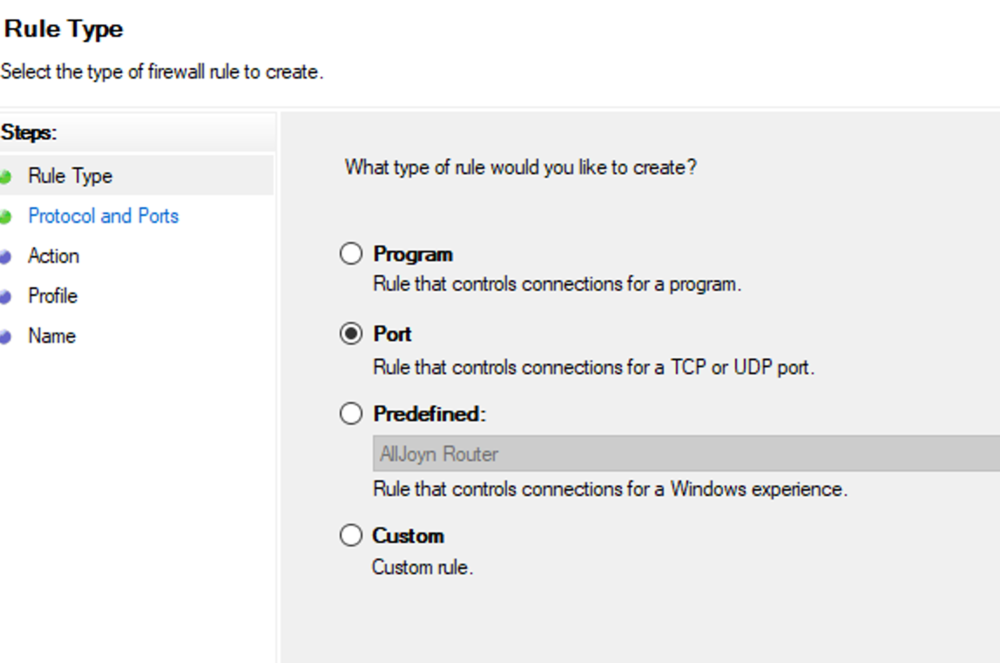
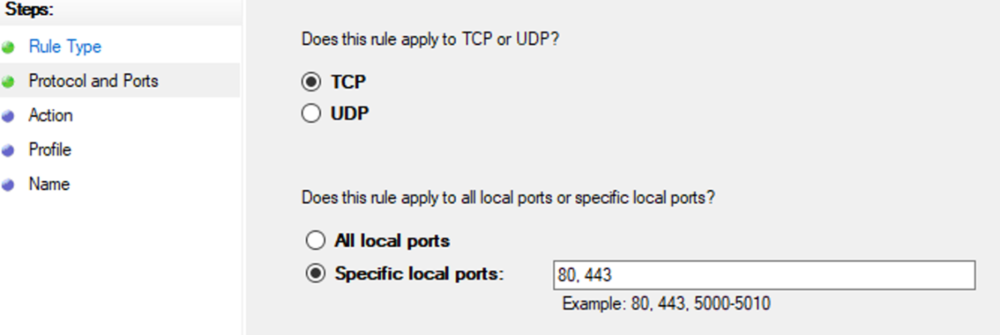
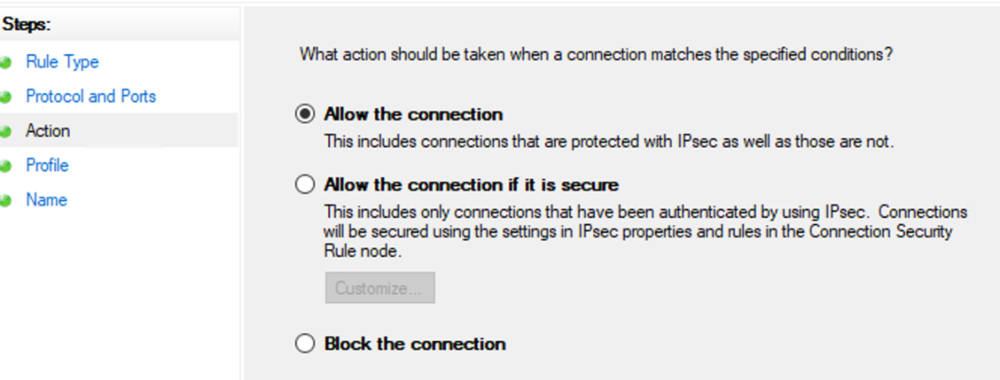
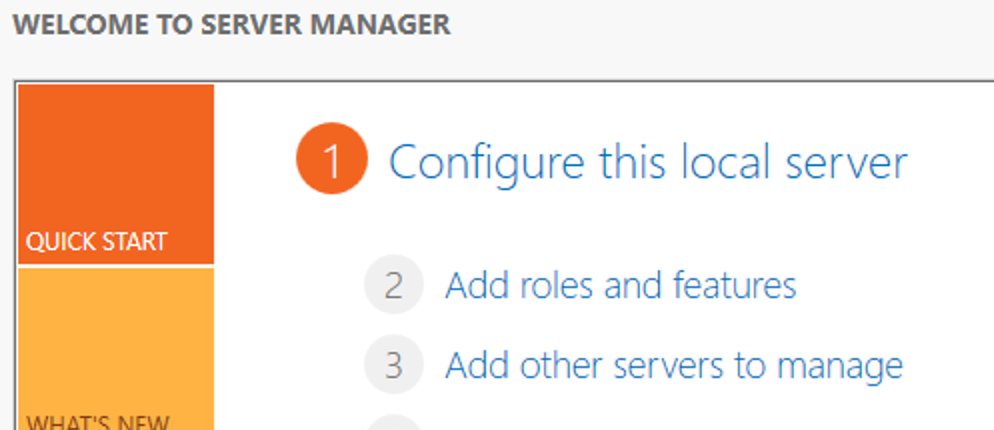
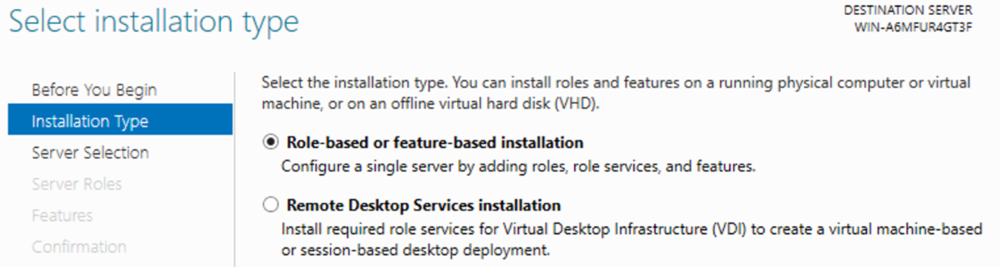
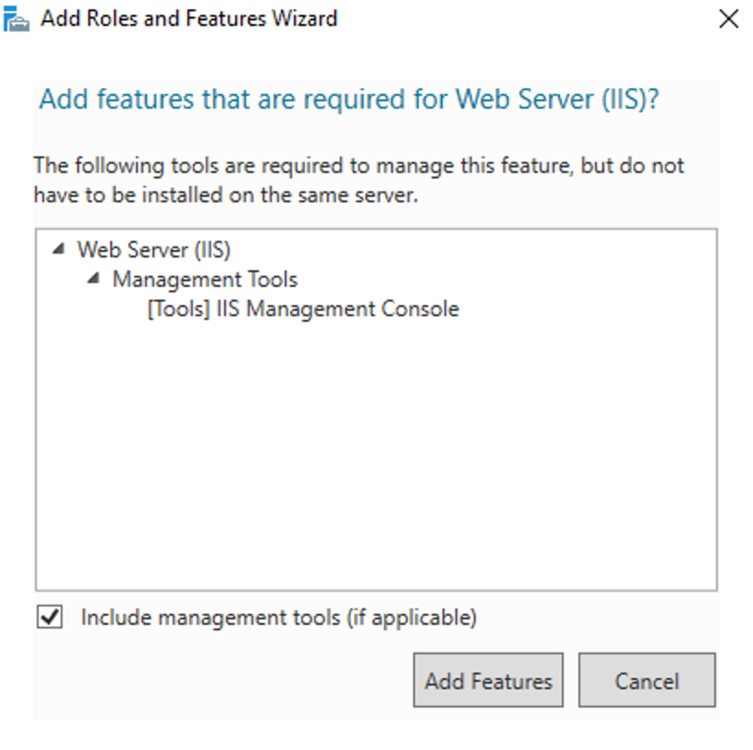
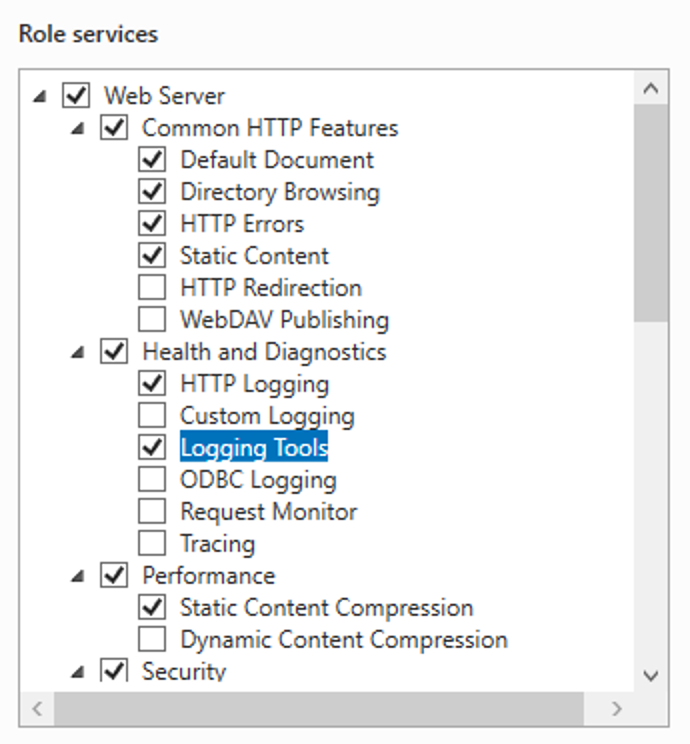
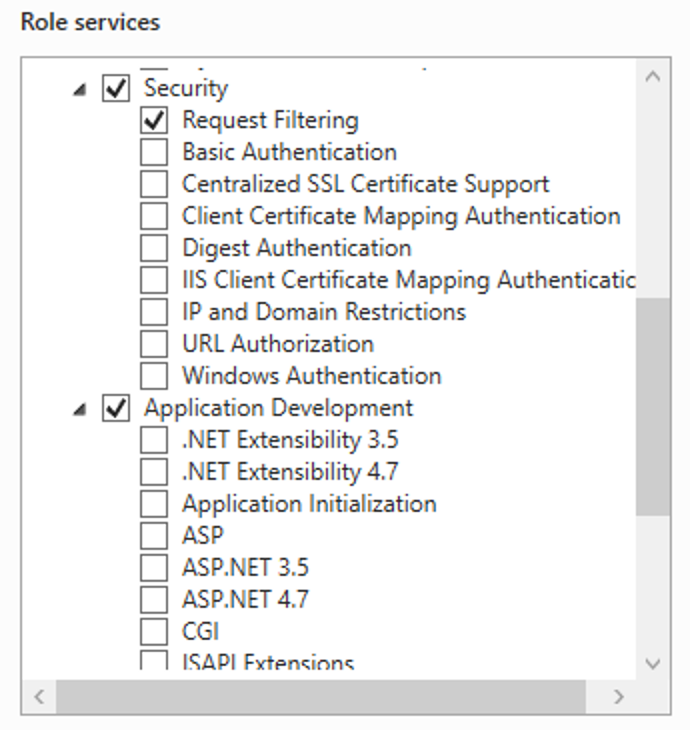
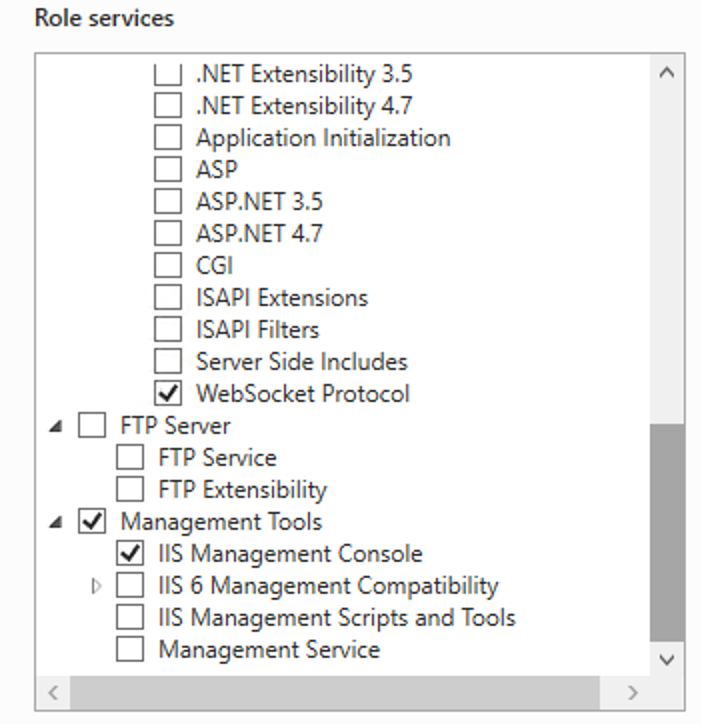
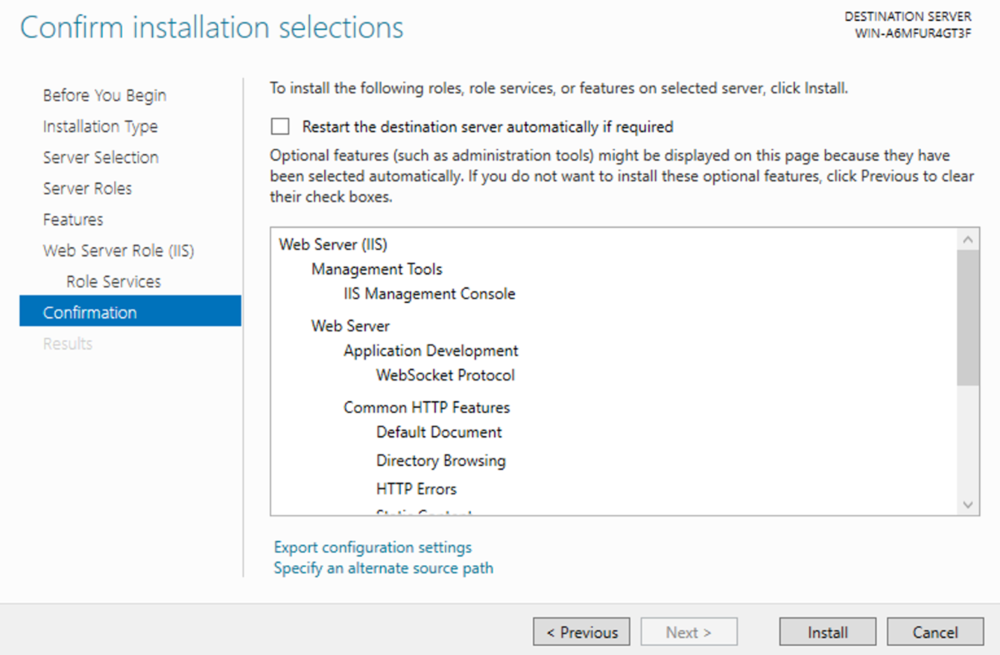
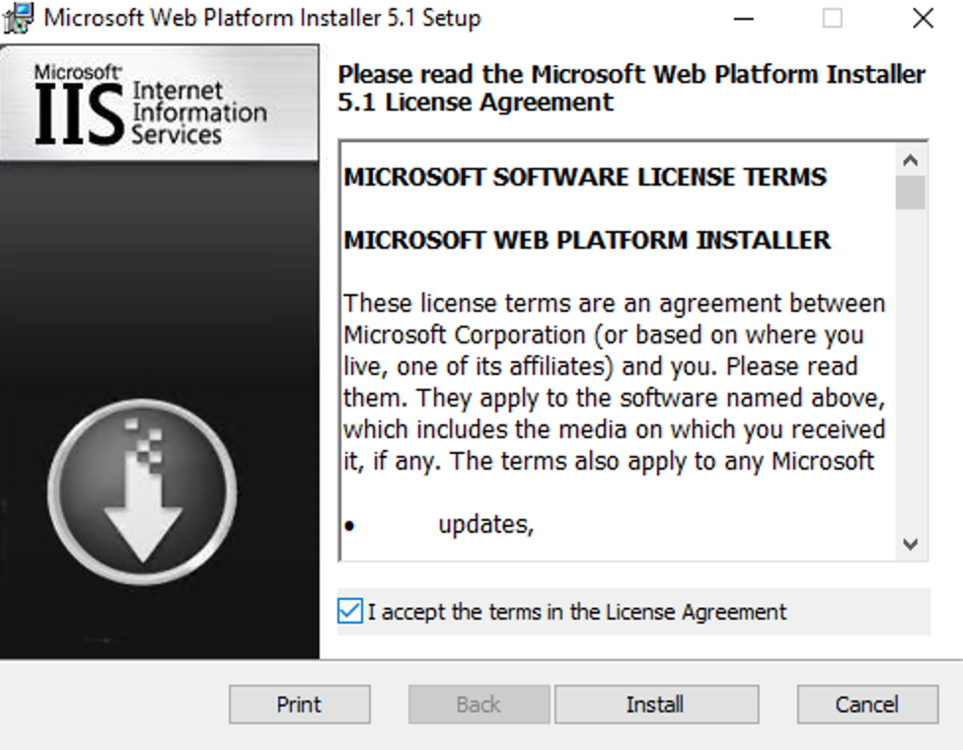
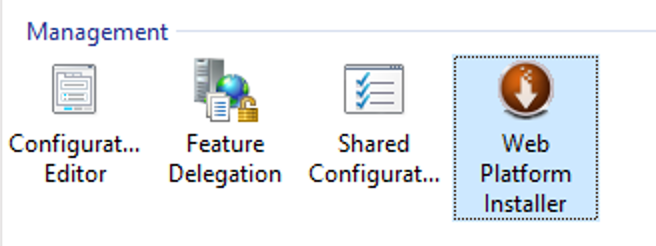
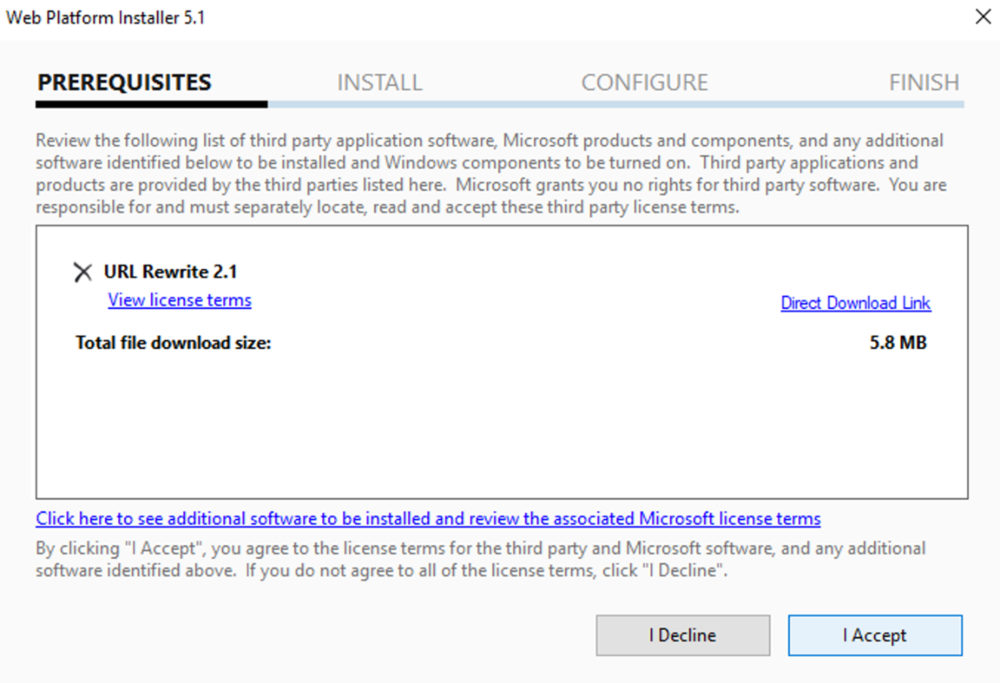
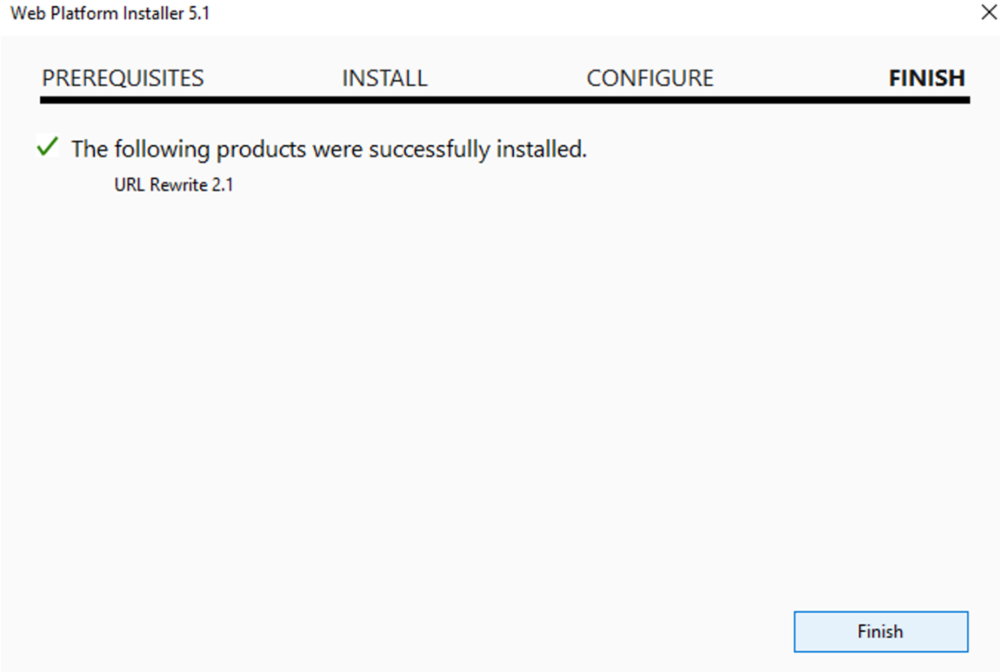
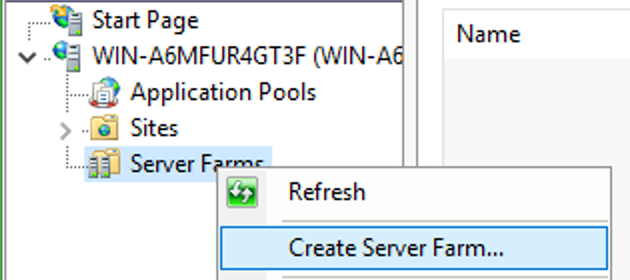
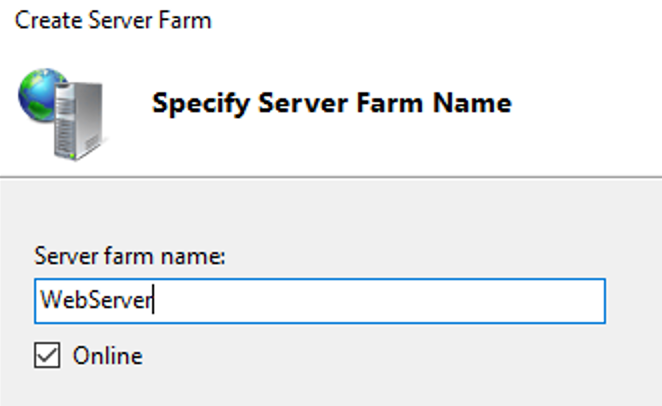
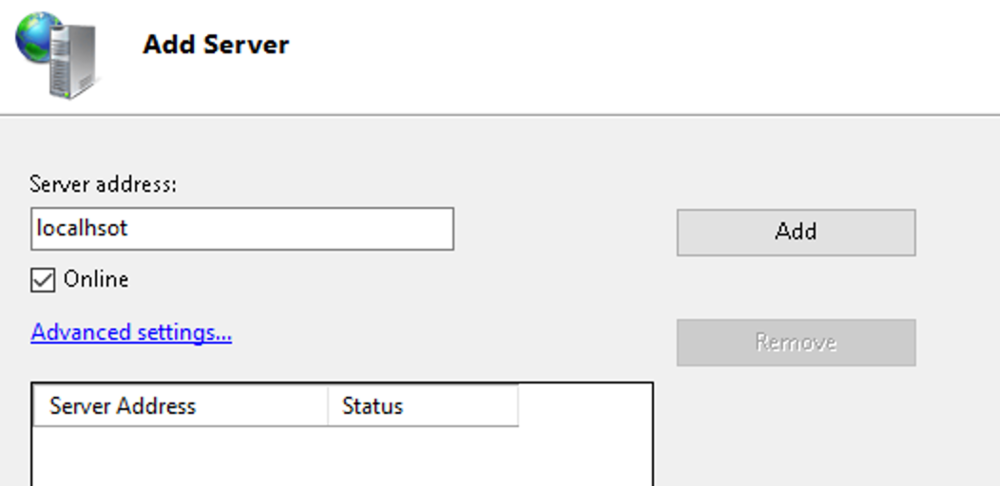
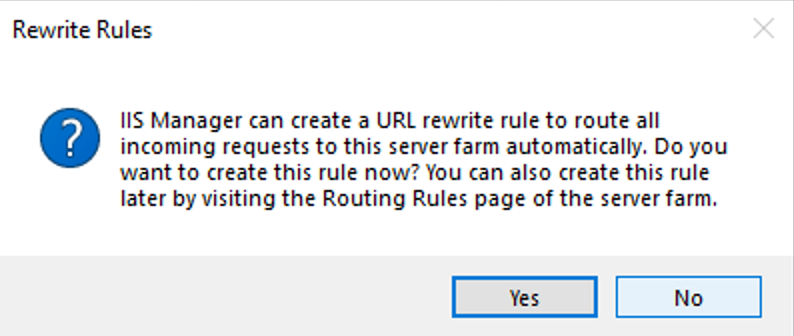
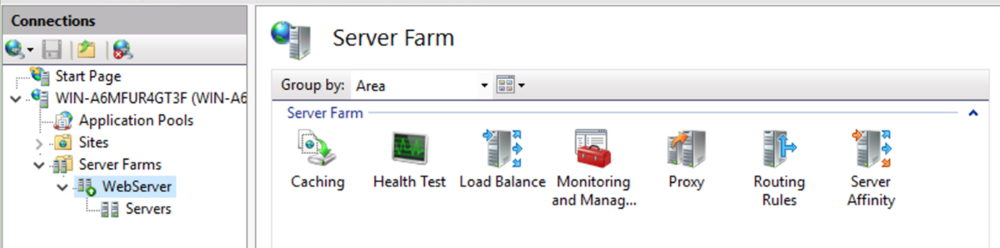
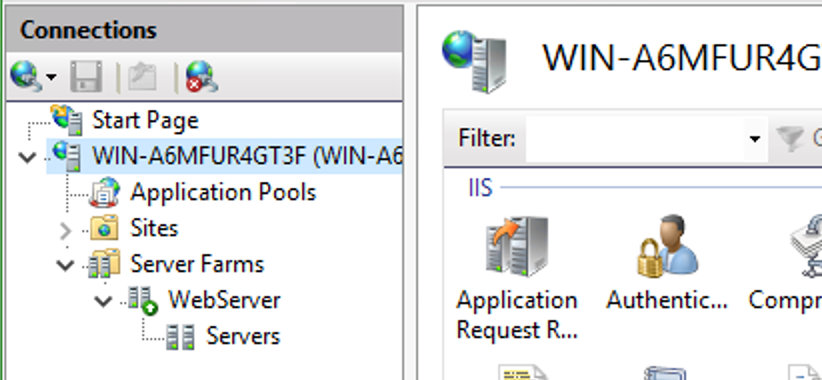
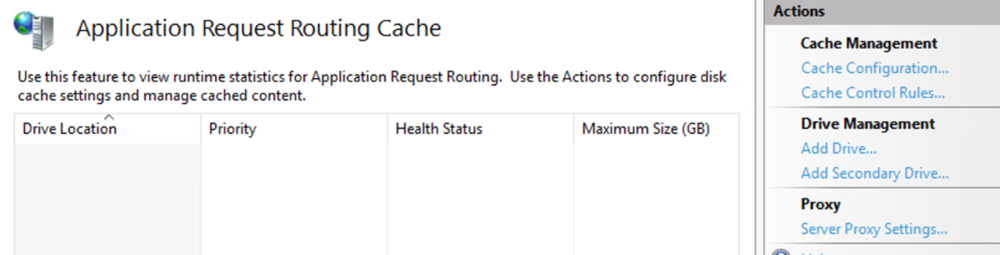
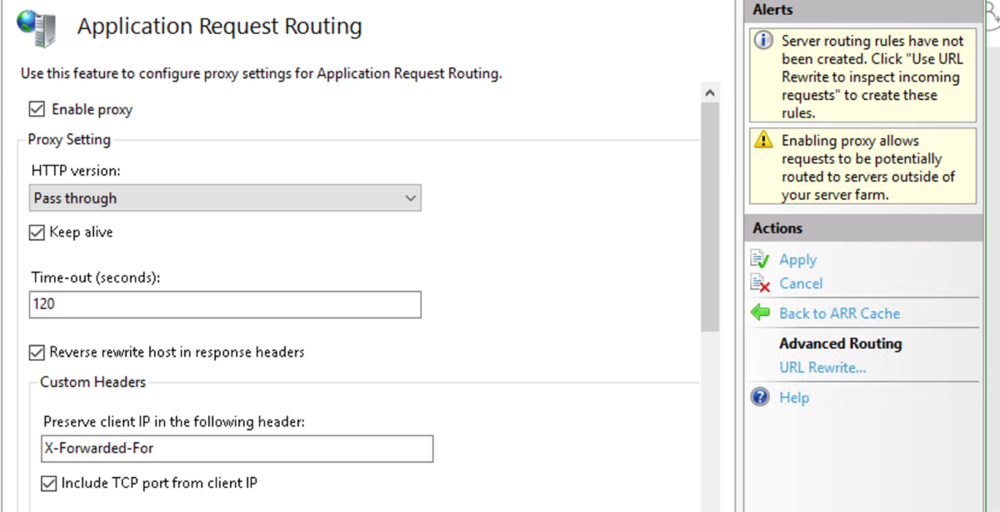
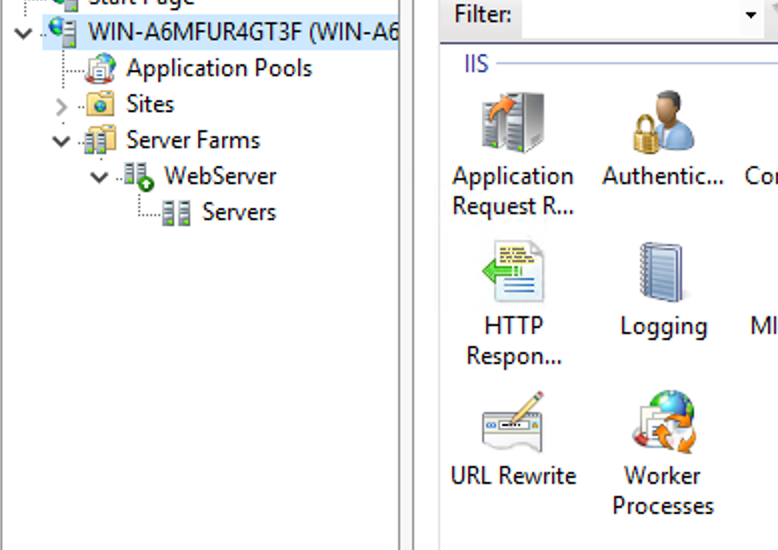
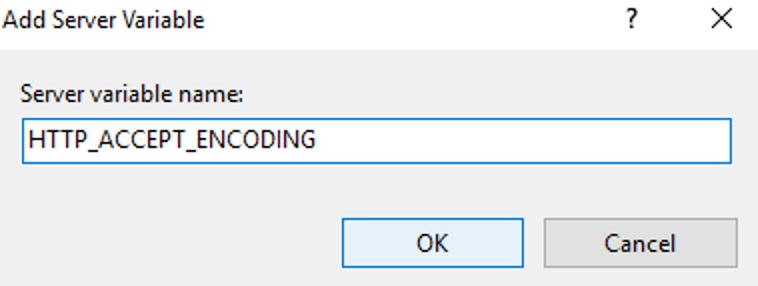
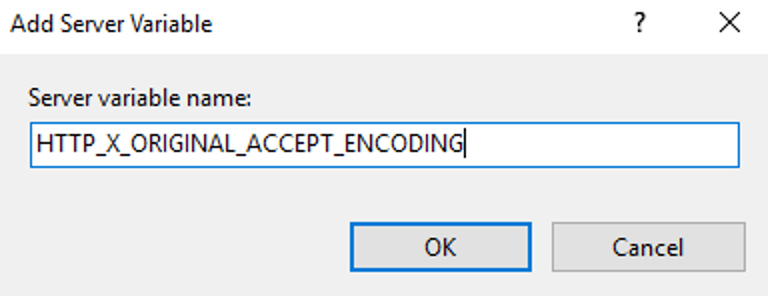
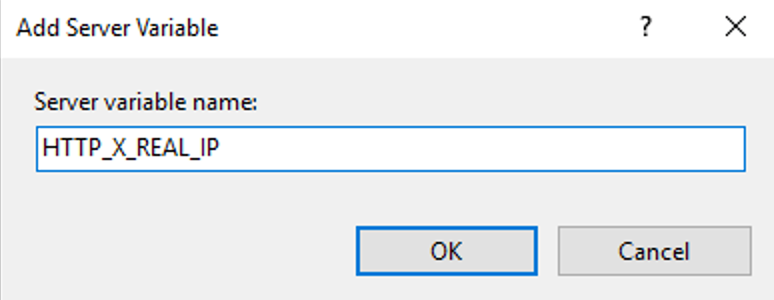
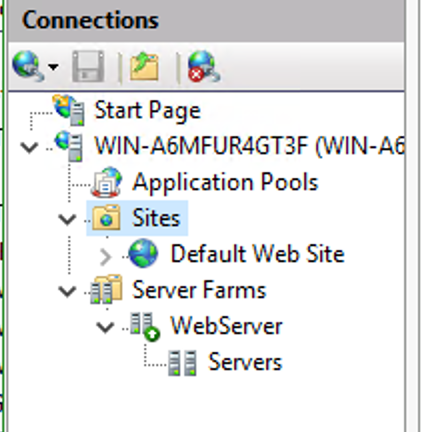
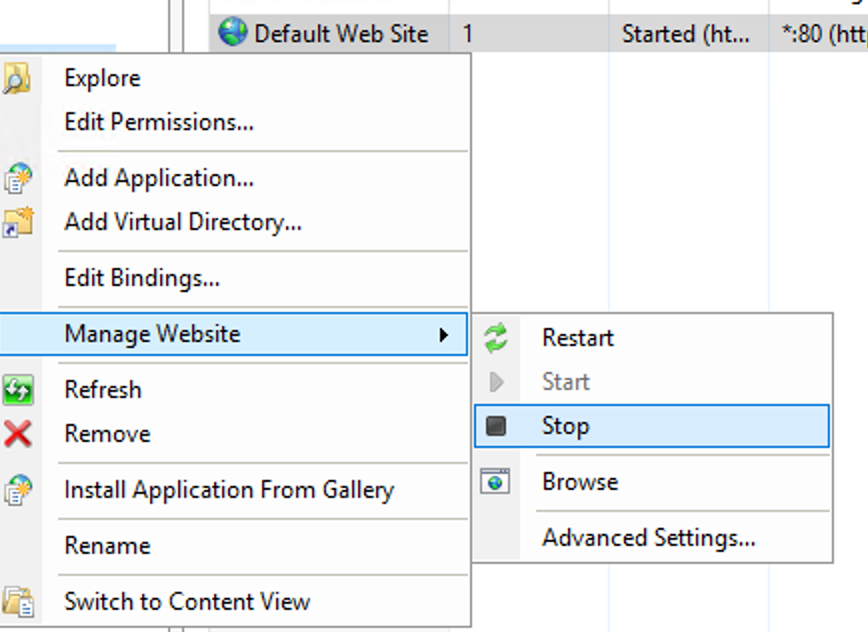
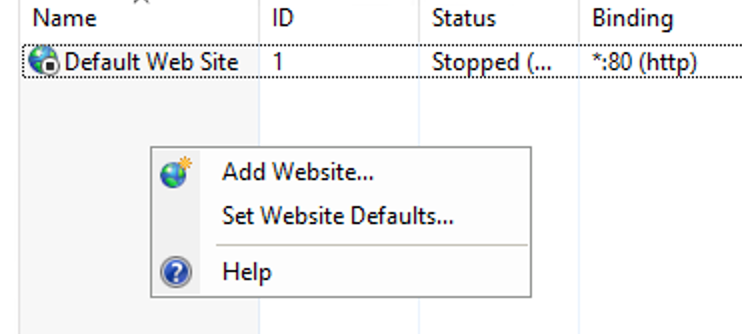
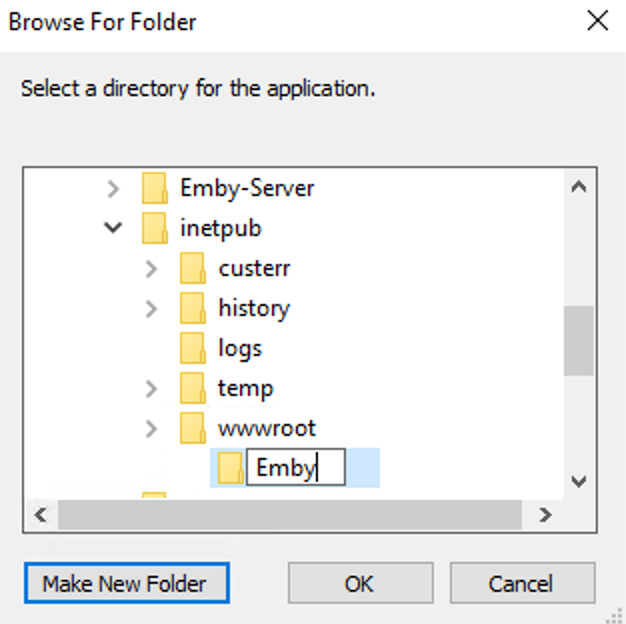
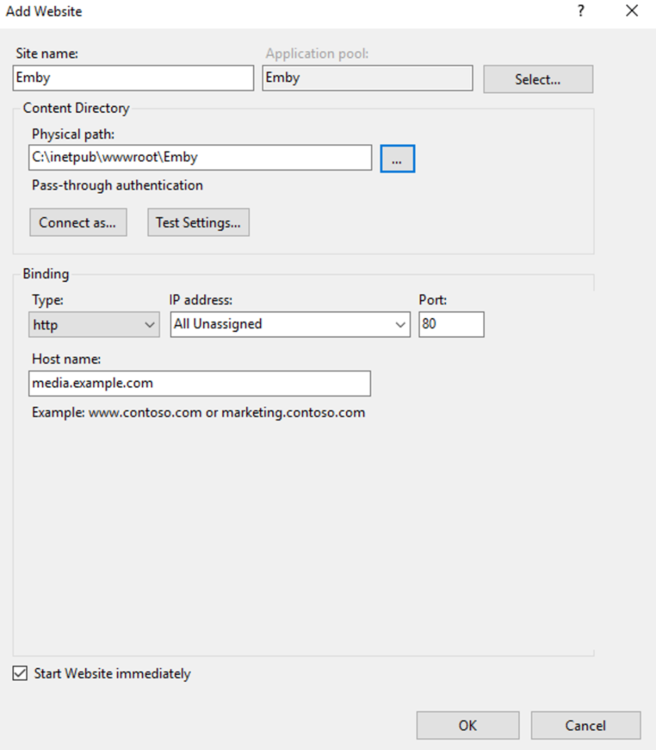
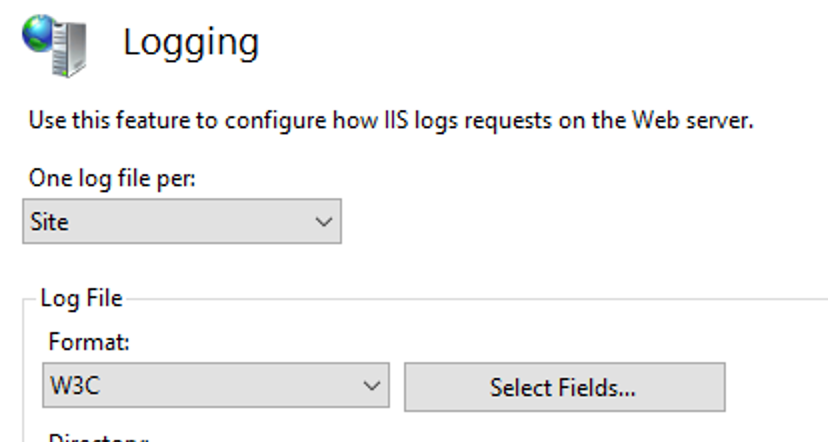
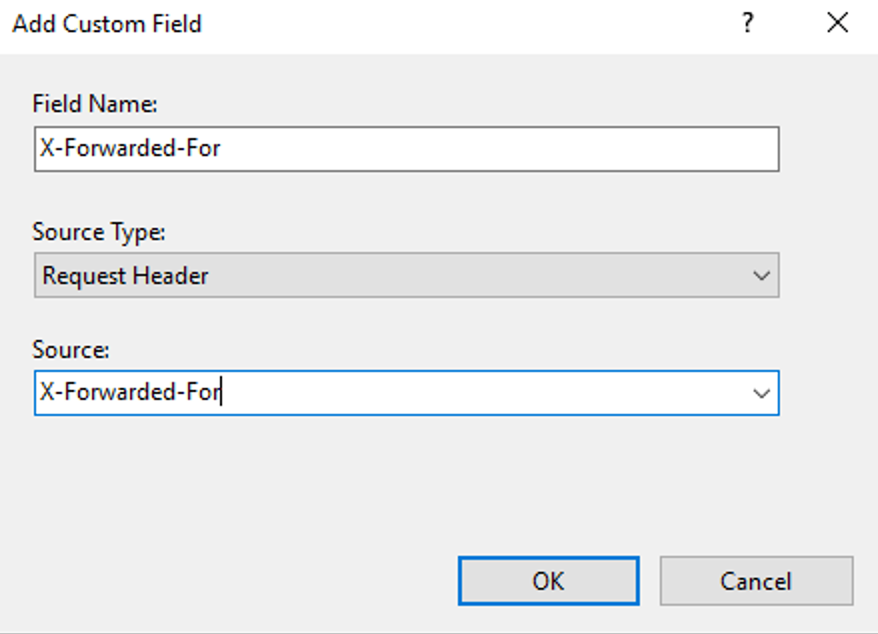
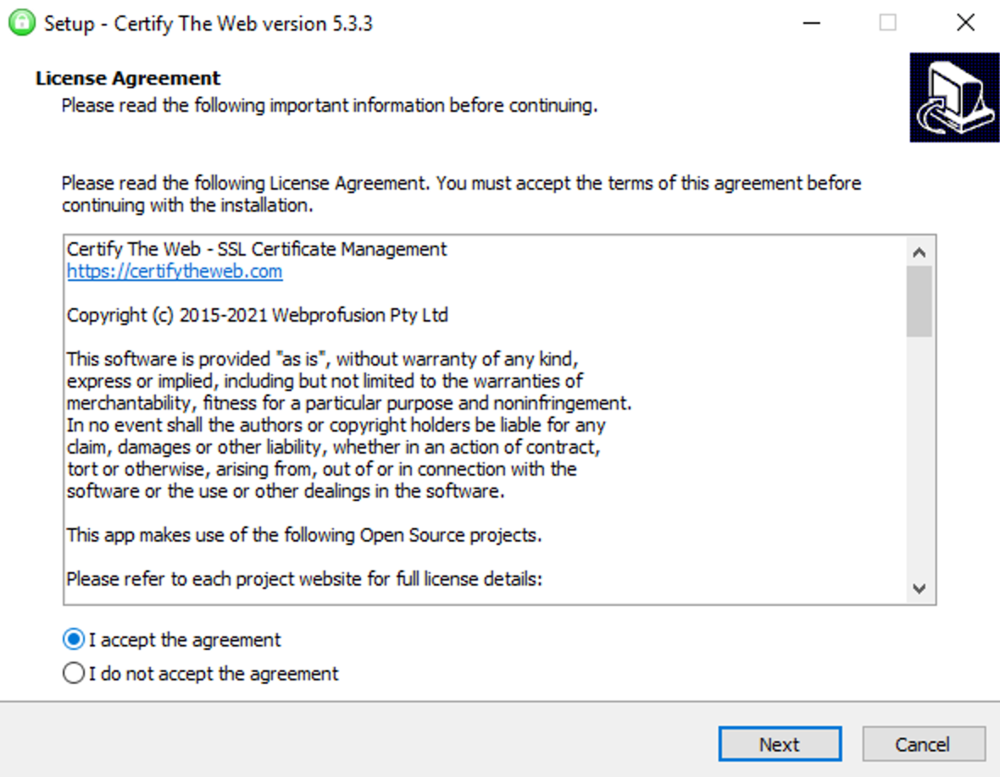
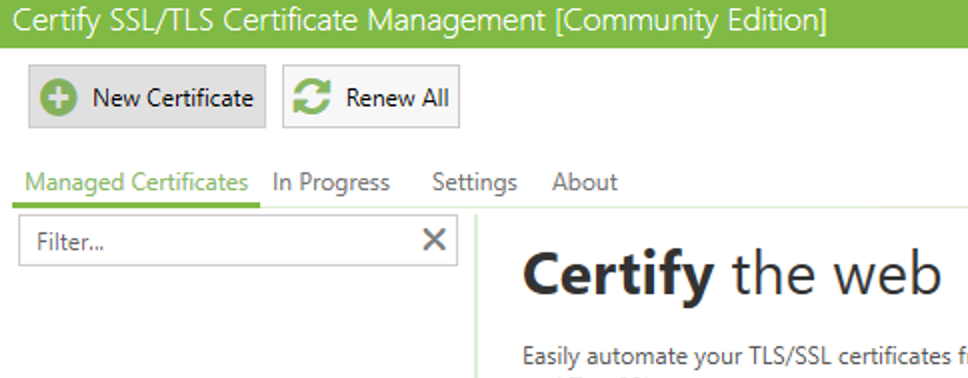
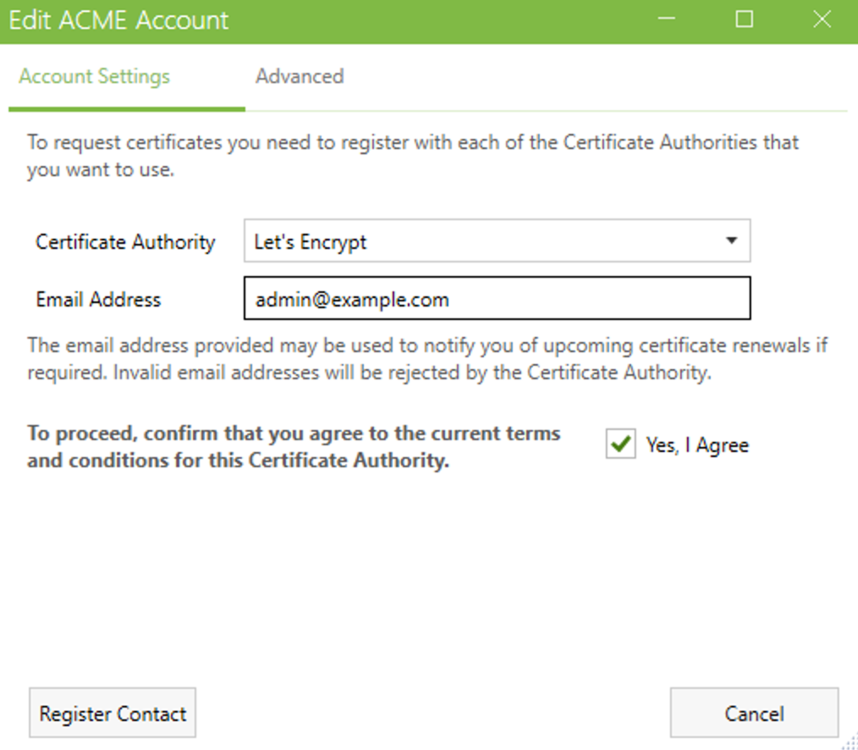
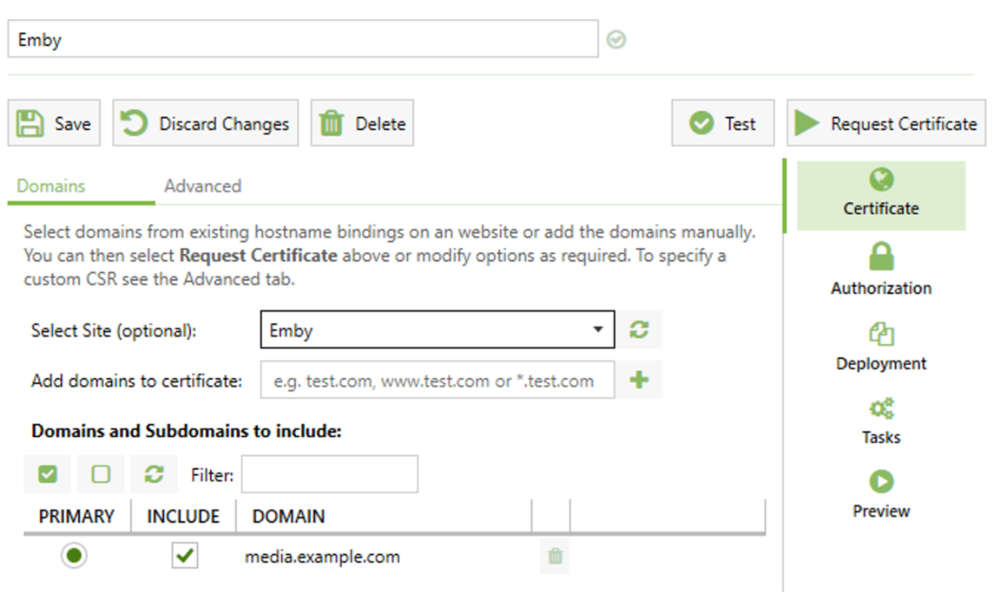
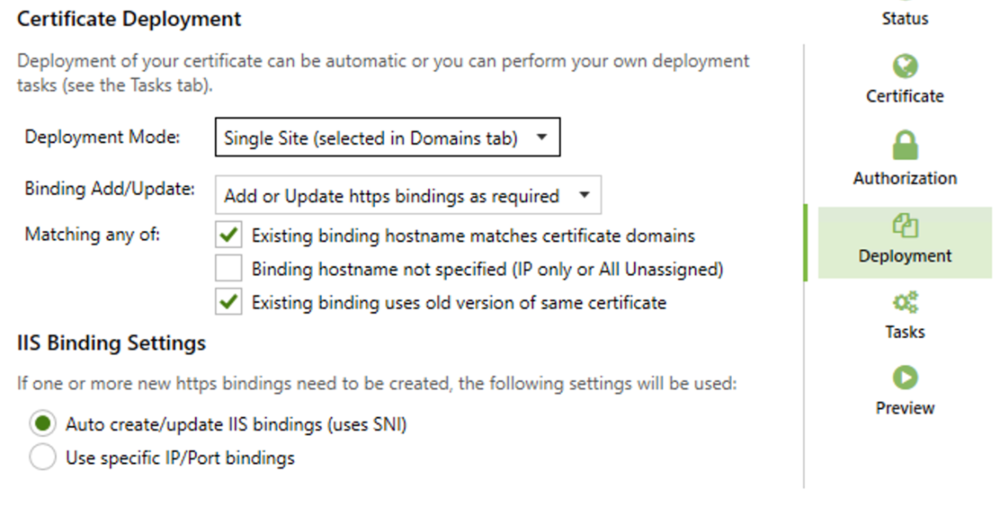
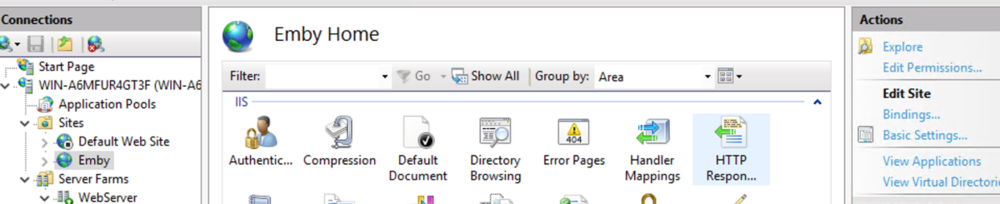
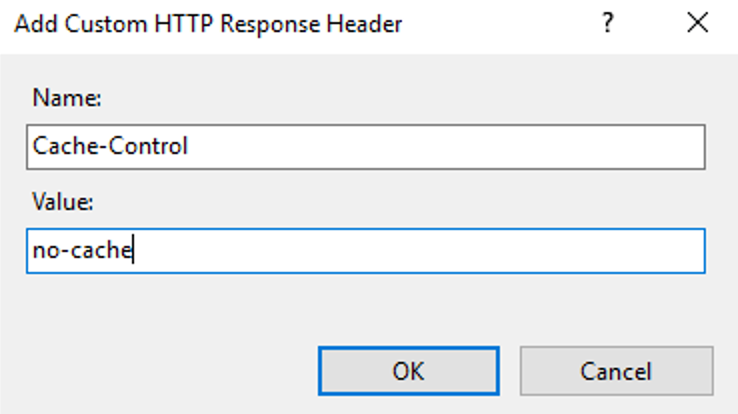
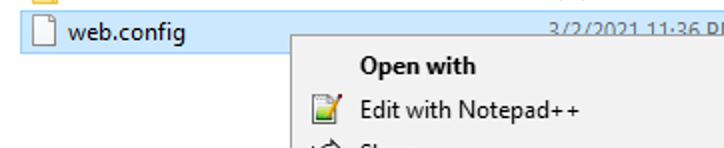
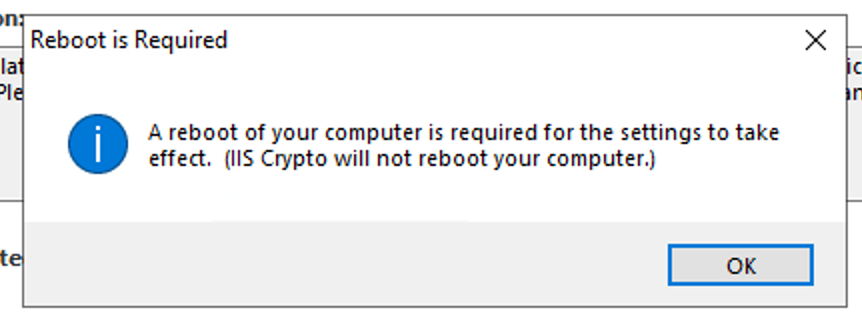
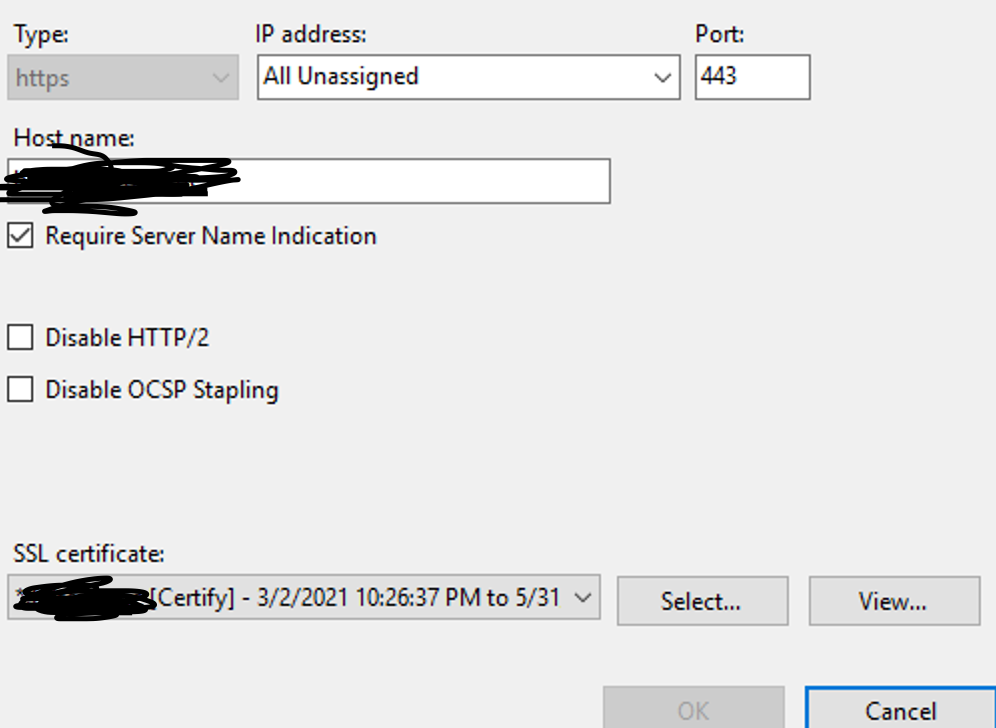
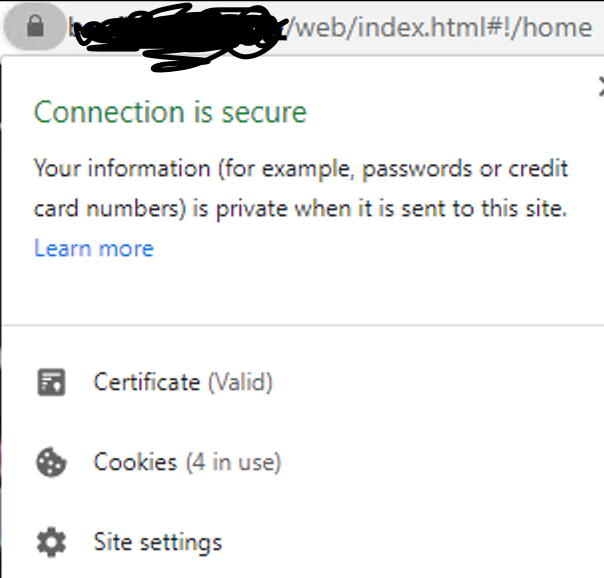
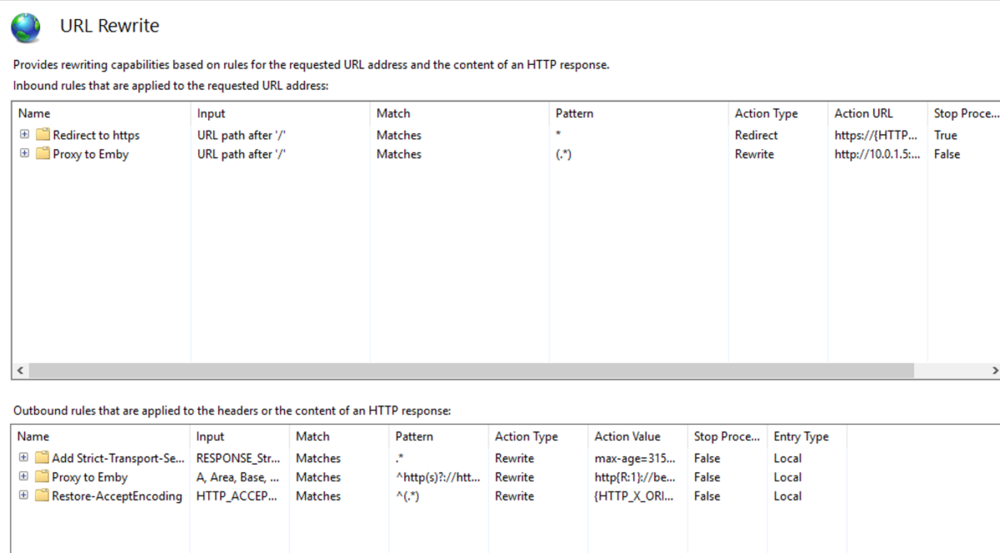
This guide will explain how to setup a Windows Server instance of Emby server with IIS as full transparent reverse proxy with SSL offload and auto-renewing certificates via Lets Encrypt. First, What is IIS? IIS or Internet Information Services is the web server service provided with Windows and Windows server installations. It is industry standard technology and is widely supported and regularly maintained by Microsoft. Second, What is a reverse proxy? A reverse proxy will take requests coming into your server (in this case HTTPS on port 443) and route them to a backend application (in this case Emby Server on port 8096 on the same box or another). Reverse proxies are very useful if you only have 1 public IP and multiple services you would like to run on a single port (443, for example is standard secure web traffic) or multiple servers that need to appear as one. Third, Why do I want a certificate for my site from Lets Encrypt? Well, most sites now days are secure (read they encrypt your traffic to prevent people from seeing your data), browsers these days flag sites that are not using properly signed certificate chains or run on insecure ports. If you use a self signed certificate in Emby, you may have difficulty getting things like the iOS app or Roku app to work properly outside your home. (Not sure about the rest of you, but Emby on the kid’s iPad is a life saver for long car rides). Let’s Encrypt provides free SSL certificates that are signed by certificate authorities that will be recognized on all devices and platforms. I will be using Windows Server 2019 with IIS 10 and AAR 3. All of this should work with Windows Server 2012R2 and Windows Server 2016 as well as Windows 10, however there may be some differences. You can use either stable or beta version of Emby Server, however in this guide we will use the stable version. At the time of writing, this guide will get you a full A+ rating from SSLlabs.com security test. (For comparison purposes, Facebook’s rating is a B.) In this guide we will: Install Emby Server Move Emby Server Installation to a non-user-locked location Setup a service user to run Emby Server as Configure Emby Server to run as a service Configure Windows Firewall Install IIS Install AAR Install IIS Rewrite module Configure AAR Configure IIS as a reverse proxy for Emby Configure SSL cypher suites for the server Install the Certify the Web client. Configure Certify the Web for auto-renewing SSL certificate for your domain Note: To be externally accessible, you will need to configure your route/modem to port forward 80 and 443 to your server. Pre-reqs/Assumptions: A physical server or VM running Windows Server An Internet Connection A DynDNS/No-IP URL (or similar routable dns name pointed at your router’s public IP) You have port forwarded ports 80 and 443 through your router to the machine you will use as a reverse proxy (in this guide we will use the same box for the reverse proxy and Emby server, but these can be run on different hosts). You have installed Notepad++ on the machine you will be setting up. Install Emby Server Download Emby Server Run the Installer Click Run when prompted If prompted by smart screen, click run anyway If prompted to install Visual C++ runtime, click install It will install to default location of %APPDATA%\Emby-Server. Move Emby Server to Non-User Locked Location Ensure that Emby Server is not running (right click icon in system tray if present and click Exit) Navigate to default location of %APPDATA% (%userprofille%\appdata\roaming) Right click the folder and click "cut" Navigate to C:\ (or root of the drive you wish to have Emby run from) Right click in the whitespace and paste. (if prompted to provide administrator permission, approve) Create a Service Account to run Emby as Note: Instructions show how to do this using local users and computers, you can also do this with Active Directory Users and Computers if your server is running that role. Right click on the start button (Windows flag) on the left side of the task bar Click Computer Management Expand Local Users and Groups on the left side Click Users Right click the whitespace and click new user Complete the new user dialog as shown (make sure you save whatever password you use as you will need it later, ProTip: don't re-use passwords) Click create Click close Close the computer management window Setup NSSM NSSM (Non-Sucking Service Manager) is needed to run Emby Server as a service as Emby Server does not include the nessicary components to run as a Windows service by default. Download here: https://nssm.cc/download Double click downloaded zip to open it in windows explorer Navigate to /win64 folder inside zip Copy/extract 64 bit version of the file to C:\Emby-Server Setup Folder Permissions Navigate to C:\ Right click the Emby-Server folder Click Properties Click Security tab Click Advanced Click Disable Inheritance Click Convert to Explicit Select CREATOR OWNER Click Remove Select Users (special) Click Remove Click Add Enter SvcEmby in the dialog Click OK Click Full Control Click OK Click Change next to owner at the top of the box Type SvcEmby in the dialog Click OK Check the Replace owner check box Check the Replace permissions checkbox Verify the dialog window looks similar to this (computer name will be different) Click OK When prompted if you want to replace permissions click Yes Verify security tab looks like this Click OK Setup Emby as a Service using NSSM Right click the start button on the left side of the task bar Click Windows Powershell (Admin) Type: "cd C:\Emby-Server" and press enter Type ".\nssm.exe install Emby" and press enter The install service dialog will launch, fill out as follows: Application Tab Details Tab Logon Tab (note, if you are using active directory it should be: YOURDOMAIN\SvcEmby) Exit Actions Tab Click Install Service Click OK Config ure Windows Firewall Click Start Click Control Panel Click Windows Defender Firewall Click Advanced Settings on the left hand side Click Inbound Rules Click New Rule on the right hand side Click Port Click Next Type 80, 443 in the ports box Click Next Click Next Click Next Name it Web Server Ports Click Finish Install IIS (Internet Information Services) Click Start Click Server Manager Click Add Roles and Features Click next on the Before you Begin page Click Role Based install Click Next Verify you are installing on your local server Click Next Check the box for "Web Server (IIS)" When prompted to install management tools Click Add Features Click Next Under Features, click Next Click Next again to get to role services Check the boxes for all of the following role services Make sure you check the box for web sockets under Application Development, this is needed for various features of Emby to work right. Click Next Click Install Once installation completes, click close Install Web Platform Installer add-on Download from: https://www.microsoft.com/web/downloads/platform.aspx Run the Web Platform Installer add-on installer Click Install Click Finish Install AAR (Advanced Application Routing) Download from: https://www.microsoft.com/en-us/download/details.aspx?id=47333 Run the Request Router installer Click Install Install IIS Re-Write Module Click Start Click Administrative Tools Open Internet Information Services (IIS) Manager Click the name of your server on the left Double Click on the Web Platform Installer In the search box type "url rewrite" Click Add Click Install Click I Agree Click Finish Configure AAR Click Start Click Administrative Tools Open Internet Information Services (IIS) Manager Click the name of your server on the left Right Click Server Farms Click Create Server Farm Name your Server Farm Click Next Enter the IP address of the server or "localhost" Click Add Click Finish Click No in the dialog that pops up Expand your newly created Server Farm Click Proxy Configure settings as shown Click Apply Click your Server Click Application Request Routing Click Server Proxy Settings Configure settings as shown Click Apply Click Your Server Configure IIS Server Variables Click Url Re-Write Click View Server Variables Click Add Type "HTTP_ACCEPT_ENCODING" Click OK Click Add Type "HTTP_X_ORIGINAL_ACCEPT_ENCODING" Click OK Click Add Type "HTTP_X_FORWARDED_FOR" Click OK Click Add Type "HTTP_X_REAL_IP" Click OK Click Your Server Create Emby Site Expand Sites on the left hand side Right Click "Default Web Site" Highlight "Manage Website" Click Stop Right Click the white space in the Sites list Click Add Website Click the "..." button to the right of Physical Path Browse to C:\inetpub\wwwroot Click it Click Make New Folder Call it Emby Click OK Under Binding Fill in with your public host name (see dynamic dns mentioned in pre-reqs) Click OK Configure Logging Click your server Click Logging Click Select Fields Click Add Field Configure as shown Click OK Click OK Click Apply Install and Configure Certify The Web client Download From: https://certifytheweb.com Run the Certify the Web installer Click Next Click Next Click Next Click Install Click Finish Click New Certificate Click on on Contact Prompt Fill in your contact email Click Register Contact Click New Certificate again Select Emby from the sites list Name and domain will populate automatically. Click Deployment Configure as shown Complete certificate verification process Click your site in IIS manager Click Bindings Verify there is an HTTPS binding and that it looks similar to this (with your domain information) Edit Web.Config for Emby Site Click HTTP Response Headers Click Add Configure as show (we are just creating a header to get the web.config to exist, we will paste in a premed one below, so these values dont really matter) Click OK Open an Explorer window and Browse to C:\inetpub\wwwroot\Emby Right click web.config and Edit with Notepad++ Replace existing content with web.config below <?xml version="1.0" encoding="UTF-8"?> <configuration> <system.webServer> <rewrite> <rules> <clear></clear> <rule name="Redirect to https" enabled="true" patternSyntax="Wildcard" stopProcessing="true"> <match url="*" negate="false" /> <conditions logicalGrouping="MatchAny"> <add input="{HTTPS}" pattern="off" /> </conditions> <action type="Redirect" url="https://{HTTP_HOST}{REQUEST_URI}" redirectType="Found" /> </rule> <rule name="Proxy to Emby" stopProcessing="false"> <match url="(.*)" /> <serverVariables> <set name="HTTP_X_ORIGINAL_ACCEPT_ENCODING" value="{HTTP_ACCEPT_ENCODING}" /> <set name="HTTP_ACCEPT_ENCODING" value="" /> <set name="HTTP_X_REAL_IP" value="{REMOTE_ADDR}" /> </serverVariables> <action type="Rewrite" url="http://localhost:8096/{R:1}" logRewrittenUrl="true" /> <conditions> <add input="/{R:1}" pattern=".well-known" negate="true" /> </conditions> </rule> </rules> <outboundRules> <rule name="Add Strict-Transport-Security when HTTPS" enabled="true"> <match serverVariable="RESPONSE_Strict_Transport_Security" pattern=".*" /> <conditions> <add input="{HTTPS}" pattern="on" /> </conditions> <action type="Rewrite" value="max-age=31536000; includeSubDomains; preload" /> </rule> <rule name="Proxy to Emby" preCondition="ResponseIsHtml1" enabled="true"> <match filterByTags="A, Area, Base, Form, Frame, Head, IFrame, Img, Input, Link, Script" pattern="^http(s)?://http://localhost:8096/(.*)" /> <action type="Rewrite" value="http{R:1}://media.example.com/{R:2}" /> </rule> <rule name="Restore-AcceptEncoding" preCondition="NeedsRestoringAcceptEncoding"> <match serverVariable="HTTP_ACCEPT_ENCODING" pattern="^(.*)" /> <action type="Rewrite" value="{HTTP_X_ORIGINAL_ACCEPT_ENCODING}" /> </rule> <preConditions> <preCondition name="ResponseIsHtml1"> <add input="{RESPONSE_CONTENT_TYPE}" pattern="^text/(.+)" /> </preCondition> <preCondition name="NeedsRestoringAcceptEncoding"> <add input="{HTTP_X_ORIGINAL_ACCEPT_ENCODING}" pattern=".+" /> </preCondition> </preConditions> </outboundRules> </rewrite> <caching enabled="false" enableKernelCache="false" /> <httpProtocol> <customHeaders> <add name="X-Frame-Options" value="SAMEORIGIN" /> <add name="X-Xss-Protection" value="1; mode=block" /> <add name="X-Content-Type-Options" value="nosniff" /> <add name="Referrer-Policy" value="same-origin" /> <add name="Feature-Policy" value="sync-xhr 'self'" /> <add name="Cache-Control" value="no-cache" /> </customHeaders> </httpProtocol> </system.webServer> </configuration> Save changes (if prompted to restart Notepad++ in admin mode allow it and then try saving again) IIS will now be properly configured as a reverse proxy for Emby. Under IIS Manager > Rewrite you should now see the following rules: Configure Server Cyphers Download here: https://www.nartac.com/Products/IISCrypto/Download (GUI version) Run the IISCrypto too Click Templates In the template drop down box, select PCI 3.2 This will disable IIS from being able to serve via SSL 2.0, 3.0; TLS 1.0 and TLS 1.1. This will leave just the industry standard TLS 1.2. Click Apply Click OK. Reboot your server. Emby Internal Settings Navigate to your server via the localhost:8096 address Click the gear in the top right corner Click Network from the list of tabs on the right Configure as shown (use your hostname in the external domain box) Conclusion Upon rebooting your computer will start IIS services and Emby server as a service. Traffic coming in on port 80 (if someone just types your url without HTTPS in their browser's address bar) will be automatically redirected to port 443 and the HTTPS:// version of your host name. Your certificate will auto-renew every so often and re-bind to the site in IIS without any interaction on your part. This allows for a server that you can for the most part setup, and forget about and just manage your Emby installation via its web ui. There are a lot of ways to set up Emby server depending on your environment and other factors. For my environment this made the most sense and since large portions of this took quite a bit of digging and research to get working just right, I figured Id make someone else's life a little easier if they were trying to do something similar. These instructions can be adapted for Windows Server 2012 R2, Windows Server 2016, Windows 8 and Windows 10. In the end browsing to your domain should look like this in the browser Additional Information for Updating When Updating your Emby installation. Simply stop the service for Emby, install like you normally would, then just cut the system folder inside the %appdata%\emby-server folder and paste it into the C:\Emby-Server folder. When prompted replace all files, then start the service again once the copy completes. Additional Information about Connecting with Emby Apps When connecting to your Emby installation remotely with Emby apps remember to prefix your domain name with https:// and use 443 for the port number. <Edit> Additional Information about changing Emby Server Title: For those users who wish to change their page title in browser (as discussed here), here is additional Web.Config information that will let you do just that! Using IIS Re-Write rules to change the page title means, you don't have to edit files to reset it every time you upgrade your Emby Server! Add these 3 rules at the bottom of the rules list, replace whole <preConditions> block too.: NOTE: Make sure you replace ALL 4 instances of NAME_OF_YOUR_SERVER with what you want your server to display in the tab bar. <rule name="RewriteTitle" preCondition="ResponseIsHtml1" enabled="true"> <match filterByTags="None" pattern="<title>(.*)</title>" /> <action type="Rewrite" value="<title>NAME_OF_YOUR_SERVER</title>" /> </rule> <rule name="RewriteAppHeaderJs" preCondition="ResponseIsJS" enabled="true"> <match filterByTags="None" pattern="document.title="Emby"" /> <action type="Rewrite" value="document.title="NAME_OF_YOUR_SERVER"" /> </rule> <rule name="RewriteAppHeaderJs2" preCondition="ResponseIsJS" enabled="true"> <match filterByTags="None" pattern="title.Name||"Emby":"Emby"" /> <action type="Rewrite" value="title.Name||"NAME_OF_YOUR_SERVER":"NAME_OF_YOUR_SERVER"" /> </rule> <preConditions> <preCondition name="ResponseIsHtml1"> <add input="{RESPONSE_CONTENT_TYPE}" pattern="^text/(.+)" /> </preCondition> <preCondition name="ResponseIsJS"> <add input="{RESPONSE_CONTENT_TYPE}" pattern="application/javascript|text/javascript" /> </preCondition> <preCondition name="NeedsRestoringAcceptEncoding"> <add input="{HTTP_X_ORIGINAL_ACCEPT_ENCODING}" pattern=".+" /> </preCondition> </preConditions> </Edit>


 4 points
 -
Add alpha picker to the "add to collection screen. The title pretty much says what I would like. It is slow to move through the collections to find the one to add to without it.3 points
-
That's something that previously worked but a change cause this to not work if the media isn't direct played. Luke has commented this will be fixed in an upcoming release.2 points
-
You've grown up with watching live tv but on television only runs garbage? You have a big library but don't know what to watch next? Then this for you: "VirtualTV" - my new live tv plugin that allows you to create custom channels based on conditions of your Emby library content. What's missing: Maybe codec conditions Known problems: Needs Emby Premier to work (Playback) Emby's live tv and playback api is very limited, so i've had to make some detours to get things working. The plugin has two general playback modes: "continous" and "playlist" playback. With "continous" mode you can also choose between "live", which bahaves like real live tv or "archive", which plays the videos from the start. In "Continuous" mode multiple videos are queued and concatenated to one big file with the help of ffmpeg. To make this happen every video in the queue has to have some common features (video and audio codec). That's why it often happens that the video also has to be transcoded by ffmpeg. For transcoding the plugin relies on Emby's internal transcoding engine. If there's a problem, not uncommon with hardware acceleration enabled, the plugin also has a problem. Nothing i can do about it. The availability of subtitle tracks is mostly dependant of the Emby user playback settings. In continous playback mode only one (the default) subtitle track can be used and this one has to be burnded into the video (transcoding takes place). In "Playlist" playback mode the videos are pushed as a playlist to the Emby clients. It's like you would play your videos directly from your libraries. This way you get all the features you are used to. Audio and subtitle selection, pause, skipping around and similar things. "Native" playback method was created by the Emby Devs. Similar to Playlist playback it will play the real library videos, but with the big difference that playback is purely initiated by the client app, without any remote command execution. This is why it also works for Roku devices on a WAN network. And although the real videos are played, the whole thing is treated like live TV. This means that channel zapping is possible and no dialogs for playing the next episode are displayed. Unfortunately, the new playback method does not yet support all features. As the name "Archive" suggests, it will currently always start all videos from the beginning. In addition, only very few Emby apps automatically advance to the next video. If you want it to be improved even further, each of you should raise your voice in this thread. To get things started install the plugin via Emby's plugin catalog and restart Emby. Setup your channels with a name and number and choose your playback mode. In the channel conditions you'll have to select an Emby account. This account is used to get library access, respect parental rating, reading watched states and selecting the stream language. At least one textual input field of the conditions has to be filled to get some program data. Fields with an asterisk are either evaluated with an "AND" or "OR" condition among each other. Finally, if you've chosen "Continous Playback" for one of you channels, take a look at the transcoding settings. Save your channel line up and manually trigger a "Guide Refresh". Now have fun! Version History: After a plugin update, always clear your browser cache. If your settings still don't load in the config screen, you have to move the "VirtualTV.xml" out of ...\plugins\configurations and restart Emby. Start from scratch. 2.0.0.0 Unlimited number of channels; New playback method "Native (Archive)"; New security concept for the Export API 2.0.2.0 Performance improvements to Guide Refresh; Preview for Add/Edit Channels; Option to disable Program indicators 2.0.3.0 Fixed missing Playlist sort order for some Content Types; Added support for Seasons with Content Source Collections 2.1.0.0 Selectively enable channels for specific users; Create copies of existing channels; Ordered unwatched episode playback 2.1.5.0 Added option to (auto)enable channels on a specific date range; Bug fixing1 point
-
Hi, There are a lot of filters available and we can do every possible filtering combinations today with that. Still one missing, the possibility to filter by country. Today there are a lot of local productions and it will be fun to filter for instance all movies coming from China, Russia or France! Think would be great!1 point
-
I mentioned it in another thread, but thought I'd put it here since this looks like a new section--just for posterity. Would like to have a bulk meta data editor function. For example, if I have 750 videos whose producing studio is the same, I want to select those videos and apply the name of the studio to those videos. Similarly, if there is a custom tag I want to apply to a subset of those movies, I want to be able to select them in bulk and apply the tag to those videos (instead of selecting them one by one).1 point
-
So I am reevaluating EMBY again for my needs and something that I just noticed is lacking support for ignore file with patterns. With a rather large anime library, some of the older best encodes for certain sources make use segment linking, so when I would usually split the OP/ED into an extra folder, in the cases of files using segments, I must keep them all together. This causes emby to display them under the season. Can we please get support for ignoring filenames using patterns (either via a file or field within the library section. See Plex's for an example: https://support.plex.tv/articles/201381883-special-keyword-file-folder-exclusion/ This is one of the few things holding me back from migrating to emby full time. The above is a good example, but I also use it heavily in my photos library as-well.1 point
-
I have a fairly large movie collection (5k+) starting with films from the 1920's and in the absence of "smart" playlists how about a filter by decade option? Filtering by year works, but if I want to watch something from say the 1950's I have to start navigating from the 1930's and work my up to the 1950's which is quite a few number of pages. Another option might be to have Years running vertically much like the alphabet when viewing by title.1 point
-
I'm new to Emby, from Plex. In the middle of my trial, using a fire stick. So far I'm a fan and plan to upgrade my account. On the server, files within collections scroll vertical on the fire they scroll horizontal. For smaller collections that's fine. I have a [comic book movie] collection that has 100+ files in it, scrolling right to left is a bit much. Any chance scroll can be vertical once there's a certain number of files within the collection? Also, release year shows on the server within a collection, but doesn't show on the fire app. I'm able to turn year on and off in the movie media folder, but not in the collections. In the movie media folder a decade filter would be pretty valuable. I saw a request for it already, never hurts to ask again . Lastly, it would be nice to view movies and collections in the movie media folder when sorted by title. Right now now it looks like it's an or option.1 point
-
Did a remote with CrossCech and got him squared away. Nice to meet another NFL lover who collects football games!1 point
-
Thanks again for looking into your configuration. I am embarrassed, but also relieved, to admit the issue was with the version of the plugin I selected. I had been trying to utilize the plugin version for Emby 4.6, but EmbyServer is running Emby 4.5. As soon as I tried it with the version for Emby 4.5, it immediately showed up. I feel like an idiot, but I will leave this here in case any other idiots try the same thing!1 point
-
@brentcoleman the permissions for the plugin in the directory I mentioned is like so: rw-rw-rw most of the other plugins in the directory look like rw-r--r-- so you can probably just have it like that. chmod 644 VirtualTV.dll The user and group are `daemon` so you likely need to do chown daemon:daemon VirtualTV.dll while inside the plugin directory. This is how I have it and the plugin works for me so I'm guessing you'll likely need to do the same.1 point
-
Also, I get these a lot:1 point
-
No problem, when I get some time I can fish out how I have those permissions and ownership set in that directory, it's sounding like it's likely the issue for what you're encountering.1 point
-
Hi there, yes we are planning on adding these guide features in upcoming updates. thanks for the feedback.1 point
-
Hi, no that's not possible, but it's something we'd like to support in the future.1 point
-
I'm using unraid as well - I don't know how you have your set up going but I just put the dll in the appropriate plugin directory of the appdata directory that my docker instance is set up to use and restarted the instance. No going into the container image and putzing around with that, you shouldn't be touching that with krusader or whatever you're using, unless you have things set up in a weird way...1 point
-
Hi, yes it's a good idea. Thanks.1 point
-
That did the trick. Thank you!1 point
-
To display the chapters, first you need a client which shows chapter points I know the AndroidTV client does, but I'm not sure what other clients do.. ?1 point
-
ok my solution for audiobooks in emby work very well... i use m4b files...and i think the track position feature works good... i need a sleep timer this could be nice1 point
-
three months ago, time to bump @ebr @corey maybe you're able to tell us something to hope?1 point
-
The folder.xml file is really of no importance it is only good for giving you a description for the very top folder. Emby ignores all the rest of the tags. Your screen shots do not look at all familiar from EMC they look like from the web app. When I start EMC as you can see from my first screen shot the EHS starts and the Maelstrom theme displays it that way. That is what you should get first the home screen working in EMC. Then when you click on the movie library my video wall opens up and I use for that the Ascendancy theme and its poster format. This theme when you click on the folder image will display what is in the description tag of the movie.xml file. To get mine the way it is I did a few things. First I realized that the content type = movies did not work for me, so I switched ALL my content type = movies to content type = mixed. Try by creating a small library with a few movies with subfolders in it and select as type = mixed. Next I changed my meta data gathering because it gives me more control and at time I am able to trick the Emby software. I used XML as primary meta data collection by using Media Master Center and installed the XML plug in. So Emby will now read all the XML files in the folders 1st and import the meta data. I have manual control. You should be able to check in the Meta Data Manager the appearance of your meta data if it doesn't look right there then it will not look correct in EMC. From the screen shots you can see that the Titanic collection is a Folder View with subfolders. This you need to get correct first. Just your question how to get the video wall 2D and the text on the left side tells me you don't have either the Throgsoft themes correctly installed or you are missing some settings that need to be changed. Get the EHS to work in EMC and the video wall for the movies. Your difficulties may be because of the content type not being mixed and in meta data manager not having sorted by folders.

 1 point
 -
Known issue as only one item nfo is updated via the UI (several topics). So you have to split apart and tag each item then regroup them or manually update each version nfo. But to the first question there is no option to all specific tagged items for a library and everything else. For your scenario I guess you would add a Shared folder to said Movie library and only give access to that folder along with all other libraries. So a little bit of work moving items in and out of the shared folder.1 point
-
ombi is really no strain on the api's, the clients use the api's way harder than anything we've came up with.. API's are good, ensures supportability because if you manage to mess it up via the API its a bug.. also consider api performance scales horizontally too, so more instances behind a load balancer will handle more api hits. Emby's API's and plugin interface are largely adequate and well documented, I've been able to work around any limitations just fine, it might be a little more work but its not been a major road block on anything I wanted to do.. not like this db backend that makes it nearly impossible to scale any way but up has been. Having my emby in k8s gives me visibility into all the performance metrics one needs, and nothing on the api front or database io seem to be the least bit heavy or likely to be performance binding, outside tossing it on a solid state drive for the low latency (the throughput is never going to get used) theres not a lot to be gained here. You will be saturating GigE interfaces long before you find the limits of the db and web traffic any modern COTS server w/SSD is capable of. Compared to the other media solutions I've used Emby's doing a rather good job on keeping that dataset sane.. after coming over from another solution 4 or so years ago I found the storage allocation I made specifically for my media servers metadata and databases was grossly oversized w/emby.. I came to emby ready for 200GB of metadata and databases and only ended up needing like ~40GB when all was said and done. TBH I cant see how they can squeak anything else outta that and is a strong indication that database performance was something they baked right into the current designs. I was designing a system last night as a thought experiment and found nothing else in current Emby setup that would be an issue with a parallel setup using existing FOSS tooling, all the configuration options needed are already exposed.. would need to turn off many of the automated tasks like library scans so you dont end up with all nodes scanning library in unison, but that can be replaced with a simple script to perform same actions via API that would only trigger it on a single instance.. it supports being behind a proxy and terminating SSL externally, yet dont really need load balancers as simpler segregation may be desirable, like one handling remote users likely to transcode, and local users direct streaming everything can run on another and not be impacted by the compute heavy users.. Transcoding files could be cached on a shared filesystem so if a node goes away another can take over seamlessly, I can already restart containers quick enough it has no impact on clients proving the clients can seamlessly handle getting kicked off an overloaded node within reason and is not hard to accomplish thanks to client caches. TV Recording can be offloaded to external plugins like TVHeadend.. Webhook extensions can be developed to handle alot of automation and coordination.. like overloaded nodes having a path to inform the load balancer its had enough, allowing a mishmash of nodes w/varying capacity thats not a pain to distribute work effectively. It has no problems working off a read only media collection so no collisions about people changing the media out from other users.. Basically all file inputs (scraping/downloading/etc) into Emby have long been fully automated and are ready to run as pods in the same namespace. all of the foundations for emby clusters are already in place, just that darn sqlite database in my way.1 point
-
Are you sure you can remote access the installation on the seedbox ie emby ports? So ExternalAddress:8096 or 8920. Resetting/deleting Connect accounts will not accomplish anything. Have you followed the Connectivity KB? Emby Connectivity : Emby1 point
-
It's updating correctly now. I accidentally, in all my chaos last night checked the create preview and I'm using .strm files. shhh, don't tell anyone I did that. I don't want to get kicked for a noob move.1 point
-
We'll take a look at it. Thanks.1 point
-
Thanks, I'll review it asap. @all Currently I'm very busy. Mostly I can only work on weekends at the moment, so answers could take a while.1 point
-
The first one that comes back in the search results from the provider.1 point
-
Hi, yes we'll be looking into supporting OS 5 for this device. Thanks.1 point
-
Thanks for the suggestion! I've added it to our internal tracking system for a future release.1 point
-
Don't know if it will help, try unticking "Allow remote control of other users" in your User profile settings. Edit: Found it:1 point
-
Hi, we will be looking at improving this in future updates to clean up older segments in the event of low disk space. Thanks for the feedback.1 point
-
We got things working pretty quickly but I wasn't in any hurry as I was just watching some NFL playoff games to get me in the mood for the Super Bowl tomorrow (go Brady) and eating dinner and it was a pleasure chatting with you so... LOL, didn't even realize it was an hour. Funny how times flies when you're doing something you enjoy! We try and go "above and beyond" whenever possible and I didn't mind at all the side questions and solutions we did. Now tell your friends how great Emby is. LOL Let us know if you have any additional questions or issues. Enjoy, Carlo1 point
-
The app should be able to detect or know if a device supports h.265 and simply request that if it's configured. You need h.265 hardware on both ends, but many people have this now or are not too far away from it considering that the last 3 generations of quicksync do it and as many nvidia generations as well. I would very very very much prefer h.265 streaming to my clients because many are not on my LAN. 1/2 the bitrate is really enticing.1 point
-
just a heads up, many of the budget "4k" streaming devices, such as Fire4k, new GoogleTV, etc are unable to decode H264 UHD 50/60fps streams.. the SoC's cap out at 30fps for AVC/H264, however they can all play 60fps on H265/HEVC just fine and dandy.. hit this issue with UHD Sports streams/recordings. ATSC3 with OTA 4K is rolling out, I'll be getting 4k broadcasts soon and the new ATSC3 HDHomeRun tuner is looking like its going to be an inevitable purchase in 2021.1 point
-
I know the module, used to use it myself now run a custom one, but I can probably help you set it up. The instructions they give are wrong first off so I'll write out how I got it to work. Yes I did try to explain all this to them but they pretty much dropped all support for this and it hasn't been updated since January 2019. Make a new server: Step 1 Make a NEW Emby admin account with emby connect. ( this will be the "BOT" account ) Step 2 Make a database user with the SAME username and password as your Emby BOT ( first mistake in instructions ) Step 3 Hostname = your emby server ie 24.65.43.222:8096 NO HTTP!! Step 4 IP Address actually is your Database I.P ( localhost ) this is where the instructions screw up again Step 5 Down at the bottom of the page select EMBY for module and put in your BOT username/Password Save and done: In product select the emby module and assign the server you just added. Any questions feel free to ask.1 point
-
Yeah this needs to be added. Seriously manually tagging individually 5000 files sucks1 point
-
It's modifying the nfo via <tag> </tag>, not embedded tags.1 point